How to Start an Online Business in Malaysia: The Complete Guide
Why Malaysia Is a Smart Base for an Online Business
If you are researching how to start an online business in Malaysia, you have chosen a strong starting position. The foundations here are solid. Malaysia has 1 of the highest internet usage rates in Southeast Asia, a strong digital payments network and a government that actively supports digital business ownership. So the Malaysia Digital Economy Body is a genuine resource worth knowing about.
Furthermore, Malaysia’s English-speaking people give local online business owners direct access to the US, UK, Australian and Canadian markets. These are the highest-spending digital audiences in the world. So the chance here is not limited to the local market. With the right online business model, your customers can be anywhere.
This article covers the online business models that work best for Malaysia-based business owners, what they pay in USD terms and the practical legal and tax steps. So by the end, you will have a specific path forward rather than a general sense of where to begin.
Malaysia’s e-commerce sector has grown greatly in recent years. So the network is there.
The consumer habits, the payment network, and the digital literacy needed to support a thriving online business ecosystem are all in place and growing. Furthermore, the Malaysian government’s Digital Economy Blueprint actively supports online business creation. So the policy setting is supportive.
Furthermore, Malaysia’s geographic position and its multilingual people give online business owners here a distinct advantage. It is a real advantage. So a Malaysia-based blogger, course creator or digital product seller can reach English-speaking, Malay-speaking and Mandarin-speaking audiences all at once. That kind of reach is a real advantage.
Why All Income Figures Are in USD
Most major affiliate programmes, ad networks and digital markets pay their creators in US dollars. So a Malaysia-based affiliate blogger earning commissions from a US platform receives those commissions in USD wherever they are based.
For that reason, all income figures in this article are in USD. So a Malaysia-based blogger earning $2,000 a month in affiliate commissions is earning around 9,300 Malaysian Ringgit at current exchange rates. Furthermore, that exchange rate can work in your favour when the Ringgit weakens against the dollar.
The 5 Best Online Business Models for Malaysia-Based Beginners
1. Affiliate Marketing Through a Blog
Affiliate marketing through a blog is 1 of the most popular and passive online business models for Malaysia-based beginners. The barrier to entry is low. So you create a website around a specific topic, write helpful articles and earn commissions when readers click your links and buy.
The income is passive once proven. So articles you write this month can earn commissions 5 years from now with no further input from you.
Furthermore, the cost to start is minimal. A domain and basic hosting costs around $50 to $100 a year. So you can begin with very little financial risk.
The niche you choose matters a great deal. So think carefully. This choice matters.
So pick a topic at the overlap of something you know well and something with real commercial appeal. That is your sweet spot. Find it.
Personal finance, technology, travel and health are all strong niches for Malaysia-based bloggers targeting English-speaking audiences. Furthermore, Malaysia-specific content within those niches often faces far lower rivalry than general English content.
So a blog about Malaysian travel spots or personal finance for SE Asian readers can outrank bigger sites because the keyword rivalry is much lower and the audience focus is much higher.
According to Authority Hacker, the average affiliate marketer earns around $8,038 a month. However, that covers skilled marketers at all levels. So a Malaysia-based beginner should expect modest early income that builds steadily over 12 to 24 months. That is normal.
Digital products are 1 of the most passive income models for Malaysia-based beginners. So you create the product once and sell it repeatedly. So there is no inventory, no shipping and no ongoing production work. The income continues whether you are working or not.
The most open digital products for beginners include e-books, templates, spreadsheets, Canva graphics, online courses and printable planners. So a Malaysia-based financial expert might sell a budgeting spreadsheet. A trained teacher might sell lesson plan templates.
A designer might sell a Canva social media template pack. The expertise you already have is the raw material.
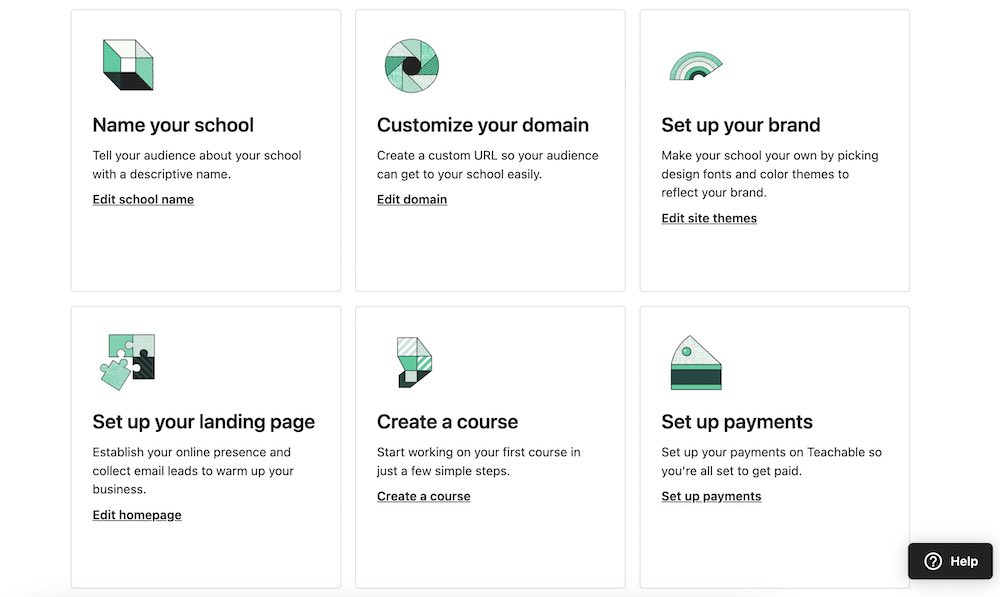
Platforms like Gumroad, Teachable and Etsy are all open to sellers based in Malaysia and accept payments from buyers worldwide. So you are not limited to Malaysian customers. Furthermore, income from digital product sales is taxable in Malaysia and must be declared to the Inland Revenue Board.
Income from digital products varies quite widely. A well-placed Gumroad product in a focused niche can earn $200 to $2,000 a month.
A full online course from a proven creator can earn $1,000 to $10,000 a month. Furthermore, building a catalogue of 10 to 15 related products means income compounds as buyers purchase many items.
3. Freelance Services
Freelancing is the fastest path to online income for Malaysia-based beginners who need money to arrive quickly. So you offer a skill, find clients and start earning within days. There is no long build-up period.
The most in-demand freelance skills for Malaysia-based online workers include content writing, graphic design, web development, video editing and social media oversight. So if you have any of these skills from your current job or your studies, you already have a sellable service.
Platforms like Upwork and Fiverr are fully open to freelancers based in Malaysia and give you access to a global client base right away. So you are not dependent on local Malaysian clients alone. Your market is global. Furthermore, many Malaysia-based freelancers find their first clients through LinkedIn or former colleagues rather than through freelance platforms.
According to Upwork, freelancers on proven platforms earn anywhere from $15 to $150 an hour, depending on their skill area. So even at entry level, part-time freelancing can earn a meaningful income whilst you build a more scalable income stream in the background.
The smart strategy is to freelance for income now, whilst building a blog or a digital product catalogue in the background. So you use freelance earnings to cover your costs whilst building something that earns money without your direct effort.
4. Online Courses and Coaching
If you have genuine expertise in any area, turning that knowledge into an online course is a high-margin business model for Malaysia-based experts. So you record the course once and sell it to as many students as want it. No ongoing production work is needed.
Platforms like Teachable and Kajabi are open to course creators based in Malaysia and handle payments in many currencies. So your students can be anywhere in the world. Furthermore, Malaysian expert credentials in accounting, finance, learning and healthcare often carry real weight with global audiences.
According to Teachable, successful course creators earn between $1,000 and $10,000 a month. However, that range covers a wide spectrum of creators. So a Malaysia-based beginner launching their first course should expect modest early sales that grow as their reviews and name build.
Coaching sits naturally alongside online courses as a natural extra income stream. So you offer 1-to-1 coaching sessions for students who want personal support beyond the course. Coaching rates of $100 to $300 an hour are common for subject areas with strong market demand.
5. E-Commerce and Print on Demand
E-commerce is a strong fit for Malaysia-based business owners who enjoy product thinking and want to sell physical or digital goods. However, standard e-commerce with stock can be complex. Print on demand is a much more beginner-friendly version. So it is worth thinking about first.
So with print on demand, you upload designs to a platform like Printful or Printify. When a customer orders, the platform prints and ships the product. So you never handle fulfilment. So there is no inventory and no upfront cost.
Income from print-on-demand builds through volume and size. So patience is key. So a Malaysia-based creator with 50 to 100 well-designed products can earn $500 to $3,000 a month from a proven shop. Furthermore, Shopee and Lazada are both strong local e-commerce platforms for Malaysia-based sellers who want to reach the domestic market.
Most Malaysia-based online business beginners operate as sole proprietors. This is the simplest and most practical legal structure for a small online business. So you can sign up as a sole proprietor with the Companies Commission of Malaysia, known as SSM, for a small annual fee. The process is done online.
Furthermore, if your online business grows and earns real income, you may want to register a private limited company, known as Sdn Bhd, which offers limited liability protection. So it is worth getting advice from a Malaysian accountant once your income reaches a meaningful level.
Income Tax in Malaysia
Malaysia has a progressive income tax system for residents. So all online business income must be declared. So all income from online business work, including affiliate commissions, digital product sales and freelance services, is taxable and must be declared to the Inland Revenue Board of Malaysia, known as LHDN.
The tax-free threshold in Malaysia is currently income below RM5,000 after deductions. So, a very small early income may fall below it. However, as your online business grows, keeping accurate records of all income and expenses becomes important.
Furthermore, Malaysia does not currently have a general goods and services tax on digital services sold locally to Malaysian customers, though this area continues to evolve. So it is worth staying updated on any changes to the digital services tax rules as you grow. Tax rules change.
Practical Record-Keeping
Set up a simple system from the start. It saves you a lot of stress later.
So use a free spreadsheet to record every dollar you earn and every valid business expense. Furthermore, set aside a portion of your online income in a separate account to cover your tax bill. So getting into this habit early avoids a stressful tax surprise.
The Practical Starting Plan
Week 1: Choose Your Model and Niche
Do not spend more than 1 week choosing your business model and niche. Be decisive. So think about 3 things: what you know well, what interests you, and what has real commercial value. The overlap between all 3 is your sweet spot.
Furthermore, consider whether you want to target Malaysian audiences or global English-speaking audiences.
Each comes with different rivalry levels. So a blog about Malaysian personal finance serves a specific, lower-rivalry audience.
A blog about general personal finance serves a global audience but competes with far larger, more proven sites. Both approaches work.
Week 2: Set Up Your Platform
Whatever model you chose, get your technical setup done in week 2. Speed matters here.
So register your domain name if you are starting a blog today. Open your Gumroad or Etsy shop if you are selling digital products. Set up your YouTube channel if that is your chosen path.
Furthermore, set up an email marketing system from the very beginning. This is very important. Do not skip it.
Systeme.io offers a free plan that covers email marketing, landing pages and digital product delivery in 1 place. So you can build an email list from your very first piece of content with no separate fees.
Write your first blog post, create your first product, record your first video or pitch your first freelance client this week. So do not wait until everything feels perfect. Just publish something.
Furthermore, the beginner who publishes 50 imperfect blog posts over 12 months will outperform the 1 who spends 12 months polishing 5 posts that never get published. So consistency beats perfection in the early stages. Publish something this week. Improve from there.
Week 4 Onwards: Build Steadily
From week 4 onwards, your goal is consistency. That is the most important principle. So aim for 1 new blog post, 1 new product or 1 new video per week.
Furthermore, keep a simple spreadsheet to track what you publish and what follows. So after 3 months, you will have real data on what is working.
Common Mistakes Malaysia-Based Beginners Make
Spending Before Earning
The most common financial mistake is spending heavily on tools and subscriptions before earning any income. So many beginners spend $200 a month on software before they have earned a single dollar.
Start lean. Keep costs at zero for as long as possible. So use free tools wherever possible in your first 3 months.
WordPress is free to use. Canva has a strong free plan.
Systeme.io has a free plan. Gumroad charges no monthly fee. Furthermore, most major affiliate programmes are free to join. So there is very little reason to spend much before your model is proven.
Trying to Reach Everyone
The most common strategic mistake is trying to appeal to too broad an audience. It produces nothing strong. So a blog that covers personal finance, cooking, travel and technology will struggle to rank in Google because it lacks topical depth.
Pick 1 specific niche and build authority within it. Be the go-to resource for that topic. So a blog that covers Malaysian personal finance in depth will rank faster than a general lifestyle blog. Furthermore, owning a clear niche makes it easier to attract the right affiliate partnerships as your audience grows.
Ignoring the Email List
Your email list is the 1 asset that no algorithm change or platform update can take from you. That is why it matters.
So many online business owners spend years building traffic without collecting a single email address. Then an algorithm update arrives, and their traffic drops. It happens often.
Start collecting email addresses from day 1. It is one of the most important decisions you can make.
So offer a free lead magnet, such as a useful checklist or a short e-book, in exchange for a subscriber’s email address. Furthermore, even a list of 200 engaged subscribers is a meaningful asset that drives income from every future product launch.
Quitting During the Slow Phase
Most content-based online business models do not produce real income in their first 6 months. So the slow phase falls between months 1 and 6. This is when most people quit.
However, this is also the phase that splits people who build real online businesses from those who give up. So the edge in online business is not talent or skill. It is staying power.
It is the willingness to stay steady through the period when results are not yet visible. That is the edge. Furthermore, the people earning $3,000 to $10,000 a month from blogs and digital products today are almost all people who started 2 to 4 years ago and kept going.
Income during this phase is almost certainly zero. So expect no money in the early months.
This is the normal background of building any online business from scratch. It is not a sign that you are failing. Furthermore, every piece of content you create during this phase is a long-term asset that compounds over time.
The key goal during months 1 to 6 is not income. It is improving your craft and building your foundation.
So focus on writing better, creating more useful products and learning the basics of SEO. Do that first, above all else. The income follows the quality. It always does.
Months 6 to 12
This is where the first real signs of traction appear. So things start to feel better. So blog posts begin ranking in Google, Gumroad listings start appearing in search results, and YouTube channels start gaining regular subscribers.
Income during this phase might range from $50 to $500 a month, depending on your niche. Furthermore, this is when the compound effect of your early work becomes visible for the first time.
So the articles you wrote in month 2 are now earning real traffic. That is the compound effect. Products you listed in month 1 are getting regular views and sales.
Months 12 to 24
This is where things start to feel real. Income becomes steadier. So income in this phase for steady bloggers and digital product sellers typically ranges from $500 to $3,000 a month. Furthermore, this is the right time to add a second income stream.
So if you started with a blog, month 12 might be the right moment to create your first digital product. If you started with freelancing, this might be the right moment to start building a passive income asset. Furthermore, your growing audience makes each new addition easier to earn from than the one before.
Beyond Month 24
Malaysia-based online business owners who have been operating reliably for 2 years are in a different financial position than when they started. So the online businesses earning $3,000 to $10,000 a month today are almost all run by people who started 2 to 4 years ago and kept going.
Furthermore, starting an online business in Malaysia gives you access to a truly global audience. So income is not capped by the local market.
The compound effect works the same whether you are based in Kuala Lumpur, Penang or Johor Bahru. Where you are does not matter. What you build does.
The Tools That Help Beginners Build Faster
For Email and Digital Products
Systeme.io covers email, sales funnels and digital product delivery in 1 free plan. So it is the most practical all-in-1 tool for Malaysia-based beginners who want to build an email list and sell products without paying for many tools.
For Writing and Content Creation
Rytris a low-cost AI writing tool that helps bloggers produce more content without losing their voice. So on days when the blank page is an obstacle, Rytr creates article outlines and section drafts that you refine and make your own. Furthermore, it is useful when you are trying to maintain a steady posting schedule alongside a full-time job.
For Keyword Research
Knowing what people are searching for before you write or create greatly increases the chance your content is found. So tools like Jaaxy show you monthly search volumes and rivalry levels for any topic. Furthermore, a 30-minute keyword research session before you write can greatly increase the return on every hour invested.
Getting Started: Your Next Step
If you have been thinking about how to start an online business in Malaysia for a while but have not yet taken your first step, choose your model and take 1 action today.
So register your domain, open your Gumroad shop or pitch your first freelance client. Begin something today. Furthermore, register your business with SSM and set up a simple income tracking system so that your business is on the right legal footing from the start.
Knowing how to start an online business in Malaysia is the easier half of the challenge. Staying steady through the slow early months when income has not yet arrived is the harder part.
The models in this article work. The legal framework is simple. Furthermore, the tools are low-cost and open.
So a steady Malaysia-based blogger can earn $2,000 to $10,000 a month from affiliate income and digital products. The potential is real. A skilled Malaysia-based freelancer can earn $3,000 to $8,000 a month from client services while building a passive income stream.
Furthermore, the compound effect rewards patience in a way that a salary never can. That is a powerful fact. So the time you invest this month is still paying you 5 years from now.
Pick your model, register your business, publish your first asset and build reliably from day 1. If you are serious about how to start an online business in Malaysia, you already have everything you need to begin.
How to Start an Online Business in the UK: The Honest Guide
Why This Guide Is Different
Most articles on how to start an online business in the UK are written for a very general audience. So they skip the UK-specific details around self-employment, HMRC and tax that every UK beginner needs to know before they earn their first pound.
This guide covers all of it. So it covers the online business models that genuinely work, what they pay in USD terms and the legal steps every UK entrepreneur must take. By the end, you will have a specific path rather than a vague sense of enthusiasm with no direction.
The UK Online Business Landscape Right Now
Why the UK Is an Excellent Base
The UK is 1 of the best places in the world to start an online business. The conditions are very favourable.
So it has a strong broadband network, a well-developed payments system, high consumer trust in online shopping and a healthy freelance culture. Furthermore, the English language gives UK-based online businesses direct access to the US, Canadian and Australian markets. These are the biggest-spending digital markets in the world.
Furthermore, the UK legal framework for starting a small online business is simple. So you can sign up as self-employed with HMRC in around 15 minutes online. The barrier to starting is genuinely low.
Most affiliate programmes, ad networks and digital platforms pay in US dollars. So a UK blogger writing in English for a primarily American or global audience will earn in USD wherever they are based.
For that reason, all income figures in this article are in USD. So a UK affiliate blogger earning $2,000 a month is earning around £1,600 at current exchange rates. Furthermore, that gap can work in your favour when the pound weakens against the dollar.
The 5 Online Business Models That Work Best for UK Beginners
1. Affiliate Marketing Through a Blog
Affiliate marketing through a blog is 1 of the most popular and genuinely passive online business models for UK beginners. The barrier to entry is low. So you create a website around a specific topic, write helpful articles and earn commissions when readers click your links and buy.
The income is largely passive once established. So articles you write today can earn commissions 5 years from now with no further input from you.
Furthermore, the cost to start is minimal. A domain and basic hosting costs around $50 to $100 a year. So you can begin with very little financial risk.
According to Authority Hacker, the average affiliate marketer earns around $8,038 a month. However, that covers experienced marketers at all levels. So a UK beginner should expect modest early income that builds steadily over 12 to 24 months.
The niche you choose matters a great deal. So pick a topic at the intersection of something you know well and something with real commercial interest. That is your sweet spot.
Personal finance, health, technology and home improvement are all strong niches for UK-based affiliate bloggers. Furthermore, UK-specific content within those niches often faces lower competition than general English-language content.
So a blog about UK personal finance or British home improvement can outrank bigger sites because the audience is more specific and keyword competition is lower.
2. Freelance Services
Freelancing is the fastest path to online income for UK beginners who need money to arrive quickly. So you offer a skill, find clients and start earning within days. There is no long build-up period.
The most in-demand freelance skills for UK-based online workers include copywriting, graphic design, web development, social media management and bookkeeping. So if you have any of these skills from your current job or previous work, you already have a marketable service.
Platforms like Upwork and Fiverr are open to UK-based freelancers and give you access to a global client base right away. So you are not dependent on UK clients alone. Furthermore, many UK freelancers find their first clients through LinkedIn or former employers rather than through freelance platforms.
The smart strategy is to freelance for income now, whilst building a passive income stream in the background. So you use freelance earnings to cover your bills whilst building a blog or a digital product catalogue that earns money without your direct involvement.
3. Selling Digital Products
Digital products are 1 of the most genuinely passive income models for UK beginners. So you create the product once and sell it repeatedly. So there is no inventory, no shipping and no ongoing production work.
The most accessible digital products for UK beginners include e-books, templates, spreadsheets, printable planners and short online courses. So a former HR manager might sell a CV guide. A trained accountant might sell a small business budget spreadsheet.
A graphic designer might sell Canva templates. The expertise you already have is the raw material.
Platforms like Etsy, Gumroad and Teachable are all open to UK sellers and accept payments from buyers worldwide. So you are not limited to UK customers. Furthermore, income from digital product sales counts as self-employment earnings in the UK and must be declared to HMRC. So register early rather than waiting.
Income from digital products varies quite widely. A well-placed Etsy listing in a focused niche can earn $200 to $2,000 a month.
A comprehensive online course can earn $1,000 to $10,000 a month for established creators. Furthermore, building a catalogue of 10 to 15 related products means income compounds as buyers purchase multiple items.
4. Online Courses and Coaching
If you have real expertise in any area, turning that knowledge into an online course is a high-margin business model for UK professionals. So you record the course once and sell it to as many students as want it.
Platforms like Teachable and Kajabi are available to UK course creators and handle payments in multiple currencies. So your students can be anywhere in the world. Furthermore, UK professional credentials often carry extra weight with international audiences who associate British qualifications with quality.
According to Teachable, successful course creators earn between $1,000 and $10,000 a month. However, that range covers a wide spectrum of creators. So a UK beginner launching their first course should expect modest early sales that grow as their reviews and reputation build.
Coaching sits alongside courses as a natural extra income stream. So you offer 1-to-1 coaching sessions for clients who want personal support beyond the course. Coaching rates of $100 to $300 an hour are common for subject areas with strong demand.
5. Content Creation on YouTube or Social Media
YouTube, TikTok and Instagram are long-term platforms for UK beginners who are comfortable on camera or in short-form content. So you build an audience around a specific topic and earn through ad revenue, affiliate links, digital products and sponsorships.
The income from content creation takes longer to arrive than from blogging. However, the upside is real and significant. So established channels in strong niches earn $10,000 to $50,000 a month through a mix of income streams once their audience scales.
Furthermore, the UK YouTube audience is 1 of the most commercially valuable in the world. So a UK-based YouTube channel about personal finance or technology earns strong ad rates because the audience is exactly what advertisers want to reach.
This is the most important practical step for anyone starting an online business in the UK. Do not skip it. So if you earn money from self-employment, including freelancing, affiliate commissions or digital product sales, you must sign up with HMRC as self-employed.
You must sign up with HMRC by 5 October in the second year of trading. So if you start earning in April 2025, you must be signed up by October 2026. However, signing up early is always better.
You can sign up online through the HMRC website in around 15 minutes. It is quick and free.
The annual self-assessment tax return covers your income and expenses. So you file it once a year. You report your earnings and deduct valid business expenses such as software and equipment.
Furthermore, you only pay income tax on your profits, not on your total revenue. That is a key point. So if you earn $5,000 in a year but have $1,500 of valid business expenses, you pay tax on the $3,500 difference.
The Trading Allowance
The UK has a useful tax relief called the trading allowance. It helps beginners. So the first £1,000 of self-employment income each tax year is tax-free.
Furthermore, you do not need to declare it to HMRC if your total self-employment income for the year is below that threshold. So it is a real safety net for beginners earning very small amounts in their first months.
Sole Trader vs Limited Company
For most UK online business beginners, operating as a sole trader is the simplest and most practical legal structure. It is easy to set up. So you do not need to incorporate a company, file company accounts or deal with the extra admin that comes with limited company status.
However, once your online business generates consistent income above the higher-rate tax threshold of around £50,270, incorporating as a limited company can become more tax-efficient. Furthermore, limited company status provides liability protection as your business grows. So it is worth getting advice from a UK accountant once your income reaches a meaningful level. A good accountant will pay for themselves.
National Insurance
As a self-employed person in the UK, you pay Class 2 and Class 4 National Insurance on your profits above certain thresholds. So this is an extra cost to factor into your income planning. Furthermore, paying National Insurance protects your right to certain state benefits, including the state pension. So it is worth paying rather than trying to avoid.
The Practical Starting Plan
Week 1: Choose Your Model and Niche
Do not spend more than 1 week choosing your business model and niche. Be decisive. So think about 3 things: what you know, what interests you and what has real commercial value.
The overlap between all 3 is your starting point. That is your niche.
Furthermore, consider whether you want to target UK audiences or global English-speaking audiences. Both approaches work. So a blog about UK side hustles serves a specific audience and faces lower keyword competition.
A blog about general side hustles serves a global audience but competes with far larger sites. Both approaches work. Choose based on where you think you can win.
Week 2: Set Up Your Platform and Register with HMRC
Whatever model you choose, get your technical set-up done in week 2. Speed matters here.
So register your domain name if you are starting a blog today. Open your Etsy shop if you are selling digital products. Set up your YouTube channel if that is your chosen path.
Furthermore, set up an email marketing system from the very start. This is non-negotiable. Systeme.io offers a free plan that covers email marketing, landing pages and digital product delivery in 1 place. So you can build an email list from your very first piece of content with no separate fees.
Also, sign up with HMRC as self-employed this week. The process takes around 15 minutes, and you will receive your Unique Taxpayer Reference number within a few weeks.
Write your first blog post, create your first product, record your first video or pitch your first freelance client this week. So do not wait until everything feels perfect.
Publish something this week. The first version of anything will not be your best. That is normal and expected.
Furthermore, the beginner who publishes 50 imperfect blog posts over 12 months will outperform the 1 who spends 12 months polishing 5 posts that never get published. So consistency beats perfection in the early stages.
Week 4 Onwards: Build and Track
From week 4 onwards, your job is to build consistently and track your progress. That is all.
So aim for 1 new blog post, 1 new product or 1 new video per week. Furthermore, keep a simple spreadsheet to record what you publish and what follows. So after 3 months, you will have real data on what is working.
The most common financial mistake is spending heavily on tools and subscriptions before generating any income. So many beginners spend $200 a month on software before they have earned a single dollar.
Start lean. So use free tools wherever possible in your first 3 months of building. WordPress is free to use. Canva has a strong free plan.
Systeme.io has a free plan. Etsy charges no monthly fee. Furthermore, most affiliate programmes are free to join.
There are no upfront costs. So there is very little reason to spend much before your model is proven.
Ignoring the Tax Admin
Starting an online business in the UK comes with real admin duties that most beginners underestimate. These are genuinely important. So failing to sign up with HMRC, failing to keep records and failing to file your self-assessment on time can all result in fines.
Set up a simple system from the start. It saves you a lot of stress later. So use a free spreadsheet to record every pound you earn and every valid business expense. Furthermore, set aside 20% to 30% of your online income in a separate account to cover your tax bill in January.
Targeting Everyone
The most common strategic mistake in UK online businesses is trying to appeal to a very broad audience. It produces nothing strong. So a blog that covers personal finance, cooking, travel and fitness will struggle to rank in Google because it lacks topical focus.
Pick 1 specific niche and own it. Be the go-to resource for that topic. So a blog that covers UK side hustles in depth will rank faster than a general lifestyle blog that touches on side hustles occasionally. Furthermore, owning a clear niche makes it much easier to attract the right affiliate partners as your audience grows.
Not Building an Email List
Your email list is the 1 asset that no algorithm change or platform update can take from you. That is why it matters so much.
So many UK online business owners spend years building traffic without collecting a single email address. Then an algorithm update arrives and their traffic drops. It happens regularly.
Start collecting email addresses from day 1. It is one of the best decisions you can make.
So offer a free lead magnet, such as a useful checklist or a short e-book, in exchange for a subscriber’s email address. Furthermore, even a list of 200 engaged subscribers is a meaningful business asset that drives income from every future product launch.
Realistic Income Expectations for UK Online Businesses
Months 1 to 6
Income during this phase is almost certainly zero. So expect no money, slow growth and moments of self-doubt. That is completely normal.
Furthermore, it is the phase where most UK beginners give up. So staying consistent through this period puts you ahead of the majority. Every piece of content you create and every product you list during months 1 to 6 is a long-term asset.
Months 6 to 12
This is where the first real signs of traction appear. So blog posts begin ranking in Google, Etsy listings start appearing in search, and YouTube channels start gaining subscribers.
Income during this phase might range from $50 to $500 a month, depending on your niche. Furthermore, this is when the compound effect of early work becomes visible for the first time.
So the articles you wrote in month 2 are now generating real traffic. That is the compound effect in action. Products you listed in month 1 are getting regular views and sales.
Months 12 to 24
This is where UK online businesses start to feel genuinely real. Income becomes consistent. So income in this phase for consistent bloggers and digital product sellers typically ranges from $500 to $3,000 a month. Furthermore, this is the right time to add a second income stream.
So if you started with a blog, month 12 might be the right moment to create your first digital product. The audience is there. If you started with freelancing, this might be the right moment to start building a passive income asset.
Beyond Month 24
UK online business owners who have built consistently for 2 years are in a very different financial position. So the online businesses earning $3,000 to $10,000 a month today are almost all run by people who started 2 to 4 years ago and kept going.
Furthermore, starting an online business in the UK gives you access to a truly global audience. That is a significant advantage. So your income is not capped by the size of the UK market alone. The compound effect of building an online business works the same whether you are based in London or Los Angeles.
Systeme.io covers email marketing, sales funnels and digital product delivery all in 1 free plan. So it is the most practical all-in-one starting tool for UK beginners who want to build an email list and sell digital products without paying for multiple separate subscriptions.
For Content and Writing
Rytr is an affordable AI writing tool that helps bloggers produce more content without losing their own voice. So on days when the blank page is an obstacle, Rytr generates article outlines and section drafts that you refine and personalise. Furthermore, it is useful when you are trying to maintain a consistent publishing schedule alongside a full-time job.
For Keyword Research
Knowing what people are searching for before you write a post or create a product dramatically increases the chance of being found. So tools like Jaaxy show you monthly search volumes and competition levels for any topic or keyword. Furthermore, a 30-minute keyword research session before you write can dramatically increase the return on the hours you invest.
Getting Started: Your Next Step
If you have been thinking about how to start an online business in the UK for a while but have not yet taken your first step, choose your model and act today.
So register your domain, open your Etsy shop or pitch your first freelance client. Begin something today. Furthermore, sign up with HMRC as self-employed so that your business is on the right legal footing.
Knowing how to start an online business in the UK is the easier half of the challenge. Staying consistent through the slow early months is the harder half.
The models in this article work. The legal framework is simple and well-established. Furthermore, the tools are affordable.
So a consistent UK blogger can earn $2,000 to $10,000 a month from affiliate income and digital products alone. A skilled UK freelancer can earn $3,000 to $8,000 a month from client services whilst building a passive income stream.
Furthermore, the compound effect of building an online business rewards patience in a way that a salary never can. So the time you invest this month is still paying you 5 years from now.
Pick your model, sign up with HMRC, publish your first asset and build consistently. If you are asking how to start an online business in the UK, the answer is clear. You already have what you need to begin.
How to Start an Online Business in Your 20s- What Actually Works
The Advantage You Do Not Realise You Have
Knowing how to start an online business in your 20s is not just useful. It is arguably the best financial decision you can make in your entire decade. The reason is simple.
Time is the most powerful variable in the compound effect equation. So every year you spend building in your 20s is a year of compounding that late starters never recover.
Furthermore, your 20s come with structural advantages that older entrepreneurs often lack. That matters. You have fewer financial obligations. Furthermore, you have more tolerance for uncertainty.
Furthermore, if you make a mistake and lose 6 months of effort, you still have decades ahead of you. So the risk of starting in your 20s is genuinely lower than at any other career stage.
This article covers how to actually start an online business in your 20s. Not a list of 40 vague ideas but a practical framework for choosing your model, setting realistic expectations and taking the first steps this week.
The fear of failure is the most common reason people in their 20s delay starting. So they spend years planning, researching and waiting for the right time. However, the risk of failing in your 20s is much lower than at any other career stage.
So if you spend 6 months building a blog that does not take off, you have lost 6 months and a few hundred dollars. You still have a job, no dependents and no mortgage tied to your success. Furthermore, the skills you build during that failed attempt are never wasted. So the second attempt is always faster and more targeted than the first.
The Compound Effect Works in Your Favour
An online business started at 23 does not just earn income at 23. It earns at 30 and 40 too. So a blog that takes 18 months to reach $2,000 a month can earn $200,000 or more in cumulative income by age 40.
Furthermore, online assets compound in a way that employment income never does. So an article you write at 23 can earn affiliate commissions for 15 years after publication. A digital product you create at 25 can sell for many years. That compounding is the real wealth-building mechanism that your generation has access to in a way that no previous generation has.
You Grew Up Knowing How the Internet Works
People in their 20s today have spent more time on the internet than any previous working generation. That is a real business advantage. So you already understand how platforms work, what makes content engaging and how people discover products and services online.
Furthermore, that knowledge is enormously valuable when building an online business from scratch. So a 24-year-old who has spent 10 years on social media often understands online audiences better than many marketing executives. That understanding translates directly into better content and faster growth.
Choosing the Right Online Business Model in Your 20s
The 4 Models Worth Considering
There are hundreds of online business models, but most 20-somethings should focus on 4 core options. Each one suits a different starting position and skill set. Furthermore, most successful online business owners eventually combine 2 or 3 of these models.
Affiliate Marketing and Blogging
Affiliate marketing through a blog is 1 of the most accessible online business models for people in their 20s. So you create a website, write helpful content in a specific niche and earn commissions when readers click your links and buy.
The income is genuinely passive once established. So articles you write at 23 can earn money at 33 without any further work from you.
Furthermore, the startup cost is low. A domain and basic hosting costs around $50 to $100 a year. So you can begin without significant financial risk.
According to Authority Hacker, the average affiliate marketer earns around $8,038 a month. That covers experienced marketers at all levels. So a 22-year-old beginner should expect modest early income that grows over the next 12 to 24 months.
The most important niche decision in affiliate blogging is picking something at the intersection of your knowledge and commercial interest. So personal finance, technology and career development are all strong niches for people in their 20s. Furthermore, your authentic experience gives your content credibility that older writers often lack.
Selling Digital Products
Selling digital products suits people in their 20s who have a specific skill they can package into a downloadable product. So a graphic designer might sell Canva templates. A finance graduate might sell a budgeting spreadsheet.
A fitness enthusiast might sell a 12-week home workout plan. These are all strong starting points.
The appeal of digital products is that you create them once and sell them many times over. So there is no inventory, no shipping and no limit on how many times a product sells. Furthermore, platforms like Etsy, Gumroad and Teachable make it possible to start selling within days without needing your own website.
Income from digital products varies widely depending on your niche, your product quality and how well you market your listings. So the range is genuinely wide. A well-positioned Etsy digital product can earn $200 to $2,000 a month. A comprehensive online course can earn much more for established creators.
Freelancing First, Passive Income Second
Freelancing is the fastest path to online income for people in their 20s who need money now. So you offer a service, find clients and start earning within days.
However, the smart freelancing strategy for your 20s is to use freelance income to fund a longer-term passive income build. So you freelance to pay your bills whilst building a blog or a digital product catalogue. Furthermore, the skills you develop through freelancing are the same skills that accelerate your passive income build.
According to Upwork, freelancers on established platforms earn from $15 to $150 an hour. So even at entry level, part-time freelancing can cover your living costs while you build something more scalable in the background.
Building a Content Brand on YouTube or Social Media
Content creation on YouTube, TikTok or Instagram suits people in their 20s who are comfortable on camera or in short-form content. So you build an audience around a specific topic and then monetise through ads, affiliate links, digital products and sponsorships.
The income from content creation takes longer to arrive than from blogging. However, the upside is real and significant. So established creators in commercially valuable niches earn $10,000 to $100,000 a month once their audience grows.
Furthermore, building a content brand in your 20s gives you time to grow through the awkward early stages. So a 22-year-old who starts a YouTube channel today has 3 to 5 years to build it properly.
The Mindset That Determines Whether You Actually Build Something
Stop Researching, Start Building
The single most destructive habit among 20-somethings who want to start an online business is endless preparation. They research without ever acting. So they read 50 articles about the best business model, watch 30 YouTube videos and buy courses about affiliate marketing. Then they repeat the same research cycle 6 months later.
Research has sharply diminishing returns. So after 2 to 3 hours of research on any specific model, you know enough to start. Everything else will come from doing it. Furthermore, the specific problems you encounter when you actually build something are more instructive than anything you can read in advance.
So the rule is this. Give yourself 1 week to choose your model. Then act. That first piece of content or product listing is worth more than any further research session.
Think in Years, Not Months
The single biggest threat to 20-somethings building an online business is an unrealistic timeline. So address it early. So they started a blog in January, expecting $1,000 a month by April. When April arrives with $12, they quit.
Most content-based online businesses do not produce meaningful income in their first 6 months. So the right mental model is to commit to 18 to 24 months of consistent effort before drawing any conclusions. Furthermore, that timeline feels long when you start, but very short when you look back.
Treat It Like a Business from Day 1
The difference between 20-somethings who build profitable online businesses and those who quit is often simply attitude. So the people who succeed treat their online business like a real business from week 1.
That means setting specific weekly publishing goals and hitting them consistently. It means tracking your results.
Furthermore, it means separating your identity from your results. A slow month should not break your consistency.
The Practical First Steps
Step 1: Choose Your Model and Niche This Week
Do not spend more than 1 week choosing your model and niche. So think about 3 things: what you know, what you enjoy and what has genuine commercial value.
Furthermore, the overlap between all 3 is your starting point.
If you know about personal finance, a blog with affiliate links to budgeting tools and investment platforms is a natural starting point. If you are a skilled designer, selling Canva templates on Etsy while building a design YouTube channel is a strong combination.
Step 2: Set Up Your Platform in Week 2
Whatever model you chose, get your technical setup done in week 2. So register your domain and install WordPress if you are blogging. Open your Etsy shop or set up a Gumroad account if you are selling digital products. Set up your YouTube channel and plan your first 5 videos if that is your chosen model.
Furthermore, set up an email marketing system from day 1. Systeme.io offers a free plan that covers email marketing, landing pages and digital product delivery in 1 place. So you can build an email list from your very first piece of content with no separate tool fees.
In week 3, write your first blog post, create your first product, record your first video or pitch your first freelance client. So do not wait until everything is perfect.
Furthermore, it does not need to be. It just needs to exist.
The beginner who publishes 50 imperfect blog posts will outperform the perfectionist who rewrites 5 posts that never get published. So consistency beats perfection in the early stages of building any online business.
Step 4: Build Consistently for 6 Months Before Evaluating
Commit to publishing consistently for 6 months before you evaluate your model. So, for a blog, aim for 2 posts a week. If you start a YouTube channel, aim for 1 video a week. For digital products, aim to add 2 new listings each month.
Furthermore, track your metrics weekly. So after 6 months, you will have real data on what is working and what to focus on next. That data tells you where to focus next.
What to Expect at Each Stage
Months 1 to 6: The Foundation Phase
Income during this phase is almost certainly zero. So expect no money, slow growth and moments of self-doubt. This is the normal experience of building any online business. Furthermore, every piece of content you create during this phase is a long-term asset that compounds later.
The goal during months 1 to 6 is not income. It is improving your craft and your output.
So focus on writing better, creating more useful products and learning SEO basics. The income follows quality. It almost never leads it.
Months 6 to 12: The Traction Phase
This is where the first real signs of momentum appear. So your blog posts begin ranking in Google, your Etsy listings start appearing in search, and your YouTube channel starts attracting subscribers. Income during this phase might range from $50 to $500 a month, depending on your niche.
Furthermore, this is when the compound effect of your early work becomes visible for the first time. So the articles you wrote in month 2 are now generating real traffic. Products you listed in month 1 are getting regular views and sales. The work is starting to accumulate in a way that produces returns beyond the effort you invested.
Months 12 to 24: The Growth Phase
The growth phase is where your online business starts to feel genuinely real. This is where things get exciting. So income in this window for consistent bloggers and digital product sellers typically sits between $500 and $3,000 a month. Furthermore, this is the right time to introduce a second income stream alongside your primary one.
So if you started with a blog, month 12 might be the right moment to create your first digital product. If you started with freelancing, this might be the right moment to launch a course. Furthermore, your growing audience makes each new addition easier to monetise than the last.
Beyond Month 24
People in their 20s who have built consistently for 2 years are in a genuinely different financial position from their peers. So the online businesses earning $3,000 to $10,000 a month today were almost all started 2 to 4 years ago.
Furthermore, the advantage of having started in your 20s becomes most visible here. So your 24-year-old self, who started a blog, is now a 26-year-old with an asset producing a monthly income. That asset compounds for the rest of your working life.
WordPress remains the best platform for serious bloggers. So pair it with Systeme.io for email marketing and digital product delivery. Systeme.io’s free plan covers everything a beginner needs to build an email list, create landing pages and sell digital products with no monthly fees before you earn anything.
Rytr is an affordable AI writing tool that helps younger bloggers produce content more quickly without sacrificing their voice. So on low-motivation days, Rytr generates article outlines and section drafts that you refine and personalise. Furthermore, it is useful when you are trying to maintain a consistent publishing schedule alongside a full-time job.
For Keyword Research
Before you write a blog post or list a product, knowing what people are searching for is essential. So tools like Jaaxy show you monthly search volumes and competition levels for any topic you want to cover. Furthermore, a 20-minute keyword research session before you write can dramatically increase the chance that people actually find what you have produced.
For Digital Products
Canva is the go-to design tool for 20-somethings creating digital products without a design background. So it lets you produce e-books, templates and planners that look professional without needing Photoshop. Furthermore, both Etsy and Gumroad charge no monthly fees on their basic plans. So you can start selling without paying anything until your first sale arrives.
Common Mistakes 20-Somethings Make When Starting Online Businesses
Choosing the Flashiest Model Rather Than the Right One
The most common mistake is choosing a model based on the most impressive income screenshot they have seen. They chase excitement rather than what suits their skills. So they start a dropshipping store because someone posted $50,000 a month on TikTok rather than starting a blog in a niche they actually know.
The boring choice is usually the right choice. That is a pattern you will notice. So the model that plays to your existing knowledge and fits your budget will outperform the one that sounds exciting but requires skills you lack.
Quitting During the Slow Phase
The slow phase of building an online business falls between months 3 and 9. So you have invested real time, you are producing content regularly, but the results are not yet visible. This is when most 20-somethings give up. That is the brutal truth.
Furthermore, this is the phase that separates people who build real businesses from those who do not. So the edge in online business is not talent or technical skill. It is patience and consistency applied through the period when results are not visible.
Trying to Do Everything at Once
Social media on 5 platforms, a blog, a YouTube channel, a podcast and an Etsy shop all started in the same month. So no single 1 of them gets enough attention to build meaningful momentum. 6 months of scattered effort produce nothing.
Pick 1 model. That is the key instruction. Build it to the point of producing real income.
Then add a second income stream. Furthermore, most online business owners earning serious money built 1 thing well before they built a second.
Why Starting in Your 20s Changes Everything
The Income Multiplier Effect
Starting an online business at 22 and earning $2,000 a month by 25 does not just mean $2,000 a month. It means $2,000 a month and growing year on year. So by 30, that same business might be earning $6,000 to $10,000 a month. By 35, potentially much more.
Furthermore, the digital assets you build in your 20s outlast any employment contract. So a blog you build at 23 can earn passive income into your 50s. That security does not come from a salary.
The Skills Compound Too
Every online business you build teaches you skills that transfer to the next one. So the 22-year-old who spends 2 years on a blog learns SEO, content marketing and affiliate strategy. Those skills make the next business faster and more profitable.
Furthermore, they matter in the traditional job market too. So your online business experience makes you a stronger candidate for marketing roles than peers who spent those years doing nothing similar.
Getting Started: Your Next Step
If you have been thinking about how to start an online business in your 20s but have not yet taken your first step, choose your model and act today.
So register a domain, open an Etsy shop or send your first freelance pitch. Furthermore, the first action is the most important. The rest follows once you break the inertia of not starting.
Knowing how to start an online business in your 20s is one of the most valuable things you can invest your energy in. The case for starting now is genuinely overwhelming.
You have time to fail and recover quickly. You have decades for your assets to compound. That is an enormous advantage. Use it.
Furthermore, every year you delay is a year of compounding you lose.
So pick your model this week. Begin today. Publish your first asset in week 3. Build from there.
The people who figure out how to start an online business in their 20s and follow through build assets that earn income whether they are working or not.
The Best Passive Income Ideas for Beginners That Actually Pay
The Promise vs the Reality
The best passive income ideas for beginners are buried beneath a mountain of bad advice online. So before we get into what actually works, it is worth being clear about what passive income really means. It is not income you earn without doing anything. It is income that continues to arrive after the initial work is done.
So a blog post you write this weekend can earn affiliate commissions for years. A digital product you build over 4 evenings can sell hundreds of times with no further effort.
A dividend stock you buy today can pay quarterly income indefinitely. That is what real passive income looks like.
The work is front-loaded. The income follows later. That is the deal.
This article covers 10 passive income ideas that beginners can realistically start, what each one honestly pays and how long it typically takes to see results. Furthermore, it includes the first practical steps, so you finish reading with a plan rather than just a list.
What Every Beginner Should Know Before Starting
Passive Income Takes Active Work to Build
The biggest misconception beginners carry into passive income is that it arrives quickly and easily. So let us address that directly. Most passive income streams take 6 to 18 months to produce meaningful returns from a standing start.
That is not a reason to avoid them. It is a reason to start now rather than later.
Furthermore, the income that builds after that early phase tends to be durable and genuinely scalable. So the slow start is not a bug in the system. It is the price of entry for something that eventually works without you.
Capital vs Time
Passive income ideas for beginners generally fall into 2 categories. The first group requires capital to start, such as dividend investing or high-yield savings. The second group requires time and effort rather than money, such as blogging, digital products and affiliate marketing.
So if you have $10,000 or more to invest, the capital-based options provide the fastest path to income. If you are starting with little or no money, the content and digital business models are the right starting point. Furthermore, neither path is better than the other. They simply suit different starting positions.
The most common mistake beginners make is trying to build 3 or 4 passive income streams at the same time. So they start a blog, open an Etsy shop, buy dividend stocks and launch a YouTube channel in the same month.
Pick 1 model and commit to it for at least 6 months before adding anything else. One thing done well beats many things done badly. That is the rule. So choose your entry point based on your existing skills, your available time and your starting capital.
The 10 Best Passive Income Ideas for Beginners
1. Affiliate Marketing Through a Blog
Affiliate marketing through a blog is consistently 1 of the best passive income ideas for beginners. The barrier to entry is low, and the income is genuinely passive once established. So you write helpful content around a specific niche, include affiliate links and earn a commission when readers click through and buy.
The most important thing to understand about blog-based affiliate income is that content compounds over time. So an article you write in month 2 might not rank in Google until month 8. However, once it ranks, it can earn income every month for years.
Furthermore, each new article adds to the total without replacing the old ones. So your earning potential grows with every post you publish.
Income varies widely by niche. Personal finance, software, health and home improvement affiliate programmes all carry higher commission rates than general retail.
So a beginner blogger targeting a commercially strong niche can realistically earn $500 to $2,000 a month by year 2 with consistent publishing. According to Authority Hacker, the average affiliate marketer earns around $8,038 a month. However, that figure covers experienced marketers. So a beginner should expect a much slower start.
Starting steps: Choose a niche that combines something you know well with commercial interest. Register a domain, install WordPress and write your first 10 articles around specific keywords before worrying about anything else.
2. Selling Digital Products
Digital products are 1 of the most genuinely passive income options on this list. So you create the product once and sell it repeatedly with no inventory, no shipping and no ongoing production costs.
The most accessible digital products for beginners include e-books, templates, spreadsheet tools, printable planners and mini-courses. So a personal finance e-book, a social media content calendar, or a meal planning printable can all generate ongoing sales once listed and optimised on the right platform.
Etsy is the most beginner-friendly selling platform because it has built-in search traffic from buyers looking for downloadable products. So you do not need a following or an email list before your first sale on Etsy. Furthermore, Gumroad and Payhip are good alternatives for selling directly with no platform fees.
Income from digital products ranges from $50 to $500 a month for a single well-placed listing. Beginners who build a catalogue of 10 to 15 related products can earn $1,000 to $5,000 a month once established. So the compound effect of building a product library is one of the most powerful forces in this model.
Starting steps: Identify a specific problem you have expertise in. Create 1 product using Canva or Google Sheets. List it on Etsy this week and use keyword research to write your title and description.
Dividend investing is the most genuinely passive option on this list for beginners who have capital to start. So you invest in stocks or funds that pay regular dividends and receive income quarterly or monthly without any active work.
The S&P 500 currently yields around 1.3% to 1.5% on average. However, targeting dividend-focused exchange-traded funds can produce yields of 3% to 6%. So a beginner who invests $10,000 at a 4% yield earns $400 a year. At $50,000 invested, that becomes $2,000 a year.
Furthermore, dividend income grows over time as quality companies increase their payouts. So the $400 a year you earn in year 1 becomes $500 or $600 in year 3 without you adding any more capital. According to Vanguard, dividend reinvestment over 40 years has historically produced much higher returns than growth-only portfolios. So the compound effect of dividends is a genuinely powerful long-term wealth-building mechanism.
The most accessible starting point for beginners is a dividend-focused exchange-traded fund. So you get broad diversification in 1 purchase. Vanguard’s High Dividend Yield ETF and the Schwab US Dividend Equity ETF are both popular starting points.
Starting steps: Open a brokerage account with a low-cost provider like Fidelity or Schwab. Start with a single dividend-focused ETF. Set up automatic reinvestment of dividends to compound your returns from the beginning.
4. High-Yield Savings Accounts and Certificates of Deposit
For beginners who want the most risk-free passive income possible, high-yield savings accounts and fixed-term deposits are the simplest starting point. So there is no market risk, no content creation and no ongoing effort.
High-yield savings accounts in the US have offered rates of 4% to 5% in recent years. So that is far higher than the 0.1% offered by traditional bank savings accounts. So $20,000 in a high-yield account at 4.5% generates $900 a year with zero risk to your principal.
Fixed-term savings accounts lock your money in for a set period at a guaranteed rate. So a 12-month fixed account at 5% on $30,000 generates $1,500 in guaranteed income. Furthermore, laddering multiple fixed accounts with different maturity dates gives you regular access to your capital at the higher rates.
This suits beginners who have savings but are not ready to take on investment risk. Furthermore, it provides a safe base whilst you learn about other passive income models over time.
Starting steps: Search for the current best rates on a comparison site. Open a high-yield savings account online. Consider moving a portion of savings into a 12-month CD for a guaranteed rate.
5. Creating an Online Course
Online courses sit between digital products and coaching in terms of effort and income potential. So they reward expertise well. So you record the course once and sell it to unlimited students with no ongoing active work.
Platforms like Teachable, Udemy and Kajabi handle the technical parts. So you focus on creating the content. The platform manages student access, payments and delivery.
Furthermore, Udemy is the most beginner-friendly because it has built-in search traffic. So you can earn from your first day of listing with no existing audience.
According to Teachable, successful course creators earn between $1,000 and $10,000 a month. However, that range covers a wide spectrum. So a beginner’s first course might earn $100 to $500 a month, which grows as their reviews build over time.
The strongest course topics for beginners are tied to professional skills or expertise they already hold. So, a former nurse creating a course on caregiver support or a graphic designer creating a Canva course both benefit from genuine credibility that improves conversion rates.
Starting steps: Identify your area of expertise. Outline a course of 8 to 12 short modules. Record simple videos using Loom or a basic screen recorder. List your first course on Udemy this month.
Print on demand is a beginner-friendly e-commerce model. So you upload designs to a platform and a third party prints and ships the product each time someone orders. So there is no inventory, no upfront cost and no shipping.
Platforms like Printful, Printify and Redbubble connect to Etsy or your own store. So you upload a design once, and it can sell indefinitely. Income builds through volume and catalogue size. So a beginner with 30 to 50 well-designed products in a focused niche can earn $300 to $1,500 a month once established.
The most successful print-on-demand shops focus on a specific niche rather than designing for everyone. So teacher gift products, nurse humour designs and hobby-specific items all tend to outperform generic designs. Furthermore, the niche you know best is always the right place to start.
Starting steps: Create 5 to 10 designs using Canva. Open an Etsy shop. Connect a print-on-demand supplier like Printify. List your first products this week.
7. Renting Out Property or Space
If you own property, a spare room or an underused space, renting it out is 1 of the most direct passive income options for beginners. So platforms like Airbnb, SpotHero and Neighbor.com make it possible to monetise almost any type of space.
Average Airbnb host earnings in the US sit at around $13,800 a year. However, the figure varies widely by location. Furthermore, a spare parking space in a city can earn $100 to $400 a month through platforms like SpotHero. Garage or basement storage space can earn $50 to $200 a month through Neighbor.com too.
Long-term property rental produces more stable income than short-term letting does. However, short-term platforms like Airbnb typically produce higher income per night of rental. So beginners should consider the effort they want to invest when choosing between the 2 approaches.
Starting steps: Check what similar listings earn in your area on Airbnb or SpotHero. Create a listing on 1 platform. Take quality photos and write a clear description. Respond quickly to your first enquiries.
8. Selling Stock Photography or Video
If you have a camera or a modern smartphone, stock photography is a passive income option that rewards quality and consistency. So you upload photos or clips to platforms like Shutterstock, Adobe Stock or Getty Images. Each time someone licenses your content, you earn a small royalty.
Individual royalties are modest. So a single image might earn $0.25 to $2 per download. However, a large library generates real income. Furthermore, the income from a well-built stock library grows as your portfolio expands and as search traffic discovers your work.
The most commercially valuable stock subjects for beginners include lifestyle imagery, business scenarios and seasonal content. So the everyday moments that surround you at home and at work are all potential stock income assets with the right framing.
Starting steps: Choose 1 stock platform to start with. Research what types of images sell well in your area of interest. Upload 50 well-tagged images this month. Add new content regularly to build your library.
Self-publishing through Amazon Kindle Direct Publishing is a long-term passive income model that rewards beginners with expertise or creative ability. So you write a book once and earn royalties on every copy sold, often for years after publication.
Amazon KDP pays royalties of 35% to 70% on e-book sales. So an e-book priced at $9.99 that sells 40 copies a month generates $140 to $280 a month in royalties. Furthermore, authors who publish multiple books in a series see their income multiply as readers discover the whole collection.
The most successful beginner e-books focus on very specific practical problems rather than broad topics. So “A Beginner’s Guide to Sourdough Bread” sells better than “A Guide to Baking”. Specificity works every time.
Starting steps: Choose a specific topic you know well. Outline your book in 8 to 12 chapters. Write 500 words a day for 60 days. Publish on KDP and use relevant keywords in your title and description.
10. Building a YouTube Channel
YouTube is a long-term passive income model for beginners who are comfortable on camera or who create valuable content consistently. So you build an audience around a specific topic, qualify for the YouTube Partner Programme and earn from ad revenue, affiliate links and brand deals.
YouTube pays between $1 and $10 per 1,000 views, depending on the niche. So ad income takes time to become meaningful on its own. However, established channels in commercially valuable niches also earn through affiliate links and sponsorships that can far exceed ad income.
To qualify for the YouTube Partner Programme, you need 1,000 subscribers and either 4,000 watch hours in the past 12 months or 10 million Shorts views in the past 90 days. So that is the first goal.
Furthermore, YouTube is 1 of the few passive income models where older content can go viral and accelerate your growth. So a video you made in month 3 might be discovered and generate 100,000 views overnight. That kind of compounding makes YouTube a uniquely powerful long-term asset despite the slow start.
Starting steps: Choose a niche with strong search intent on YouTube. Study the top 10 channels in your niche. Create your first 5 videos focusing on quality thumbnails and clear titles. Upload consistently for 6 months before judging your progress.
How to Choose the Right Model for You
Match Your Starting Resources
The right passive income model for a beginner depends on what you are starting with. So consider these 3 questions before you decide.
First, how much starting capital do you have? If you have $5,000 or more, dividend investing and high-yield savings give you immediate returns. If you are starting with little or no money, blogging, digital products, and print-on-demand are better fits.
Second, what skills and knowledge do you already have? If you have professional expertise in any field, a course or an e-book is the fastest path to credible content. If you are a creative, print-on-demand or stock photography rewards your abilities.
Third, how many hours per week can you realistically invest? If you have fewer than 5 hours a week, pick a single focused model rather than attempting multiple streams. So 5 focused hours on 1 model will always outperform 5 hours split across 3 different projects.
The truth about the best passive income ideas for beginners is that none of them produces real income immediately. So here is a realistic picture of what to expect.
Months 1 to 3 are almost always a zero or near-zero income period for content or digital business models. Financial models like high-yield savings and dividend investing produce income from day 1, but at modest levels.
Months 4 to 9 are where the first signs of traction typically appear for content-based models. So blog posts begin ranking, Etsy listings start appearing in search, and YouTube channels start gaining subscribers.
By months 12 to 18, consistent beginners typically see their first real passive income from digital business models. So $200 to $1,000 a month is a realistic range for someone who has published consistently and targeted keywords well.
Beyond month 18, the compound effect becomes clearly visible for the first time. So the work you did in month 1 is still earning in month 18. The work you do in month 18 adds to an already growing base. Furthermore, this is the point at which passive income starts to feel genuinely real rather than theoretical.
The Tools That Help Beginners Build Faster
For Blogging and Affiliate Marketing
Starting a blog requires a domain, hosting and a way to manage your email list. So WordPress for your site and Systeme.io for email marketing cover both needs. Systeme.io’s free plan includes email marketing, landing pages and digital product delivery in 1 place. So beginners can build an email list from day 1 without paying for separate tools.
Rytr is an affordable AI writing tool that helps bloggers produce more content without sacrificing their own voice. So on days when the blank page is an obstacle, Rytr helps generate outlines and section drafts that you refine and personalise. Furthermore, it is useful across all content-based passive income models, from blog posts to e-book outlines.
For Keyword Research
Knowing what people are searching for before you create content dramatically improves your chances of being found. So tools like Jaaxy show you monthly search volumes and competition levels for any topic you target. Furthermore, a 30-minute keyword research session before you write is 1 of the best time investments you can make.
For Digital Products and E-Commerce
Canva is the go-to tool for creating digital products and templates without design skills. So beginners can produce professional-looking products without hiring anyone. Furthermore, both Gumroad and Etsy charge no monthly fees on their basic plans. So you can start selling without paying anything upfront.
Common Beginner Mistakes That Delay Passive Income
Choosing the Flashiest Model Rather than the Right One
The most common mistake beginners make is choosing a passive income model based on the largest income screenshot they have seen. So they chase excitement rather than what suits their skills. So they start a dropshipping store because someone posted $50,000 a month on Instagram rather than starting a blog in a niche they actually know something about.
The boring choice is usually the right choice. So the model that plays to your existing knowledge and fits your budget is always better than the exciting model that sounds amazing but does not fit your life.
Quitting Before the Compound Effect Kicks In
The second biggest mistake is quitting at month 4 because income has not appeared yet. Most content-based passive income models do not produce real returns until month 12 or later. Furthermore, the people earning $3,000 to $10,000 a month from their blogs today are almost entirely people who kept going through the first year of near-zero income.
So the edge in passive income is not talent, budget or technical skill. It is patience. Furthermore, the flat part is where most people give up. Staying in it puts you ahead of the majority.
Trying to Monetise Too Early
Many beginners spend so much energy thinking about monetisation in their first weeks that they neglect the foundation. So they set up multiple affiliate programmes before they had 5 articles published. They try to run ads before they have an audience.
The foundation of every passive income model is creating real value. So your first job in any model is to produce something truly useful to a specific audience.
Do that first. The money follows the value. It never leads it.
Getting Started: Your Next Step
The best passive income ideas for beginners are not secret. They are available to anyone willing to pick 1 model, start today and stay consistent through the slow early months.
So if you have been thinking about starting but have not yet taken your first step, pick the model from this list that best matches your situation. Then take 1 concrete action this week.
The best passive income ideas for beginners share 3 things in common. They require real upfront effort or capital. They produce income that continues after that initial investment is made. Furthermore, they compound over time rather than staying flat.
So the right model for you is the 1 you can start this week and stay consistent with for 12 months. Furthermore, beginners who succeed in building passive income are rarely the most talented. They are simply the most consistent.
Pick your model today. That is step 1. The best passive income ideas for beginners all work for the same reason. The people who build them refuse to stop before the compound effect kicks in.
I Want to Start an Online Business in My Spare Time- Here Is Where to Begin
The Thought That Keeps Coming Back
If you have ever said to yourself, “I want to start an online business in my spare time”, you are not alone. That thought crosses the minds of millions of Americans every year. Some follow through. Most do not.
The gap between those 2 groups has very little to do with talent, money or technical skill. It has almost everything to do with having a clear starting point and a realistic plan.
So this article is the starting point. It is not a list of 50 vague ideas or a motivational poster dressed up as a guide. It is an honest look at what actually works when you have a few spare hours a week and limited starting capital.
Why Spare Time Is Enough to Start
The most common reason people delay starting an online business is the belief that they need more time than they have. So they wait for a quiet season at work, for the kids to be older or for a period of life that never quite arrives.
However, the reality of most successful online businesses is that they were built in spare hours. Many of the bloggers and affiliate marketers earning $2,000 to $10,000 a month today started with 5 to 10 hours a week.
Furthermore, online businesses suit irregular hours. The content you create continues to work after the session ends. So a blog post written on a Sunday evening earns income on a Wednesday afternoon with no further input.
This article covers the most practical online business models for people building in their spare time. Furthermore, it covers how to choose between them, what a realistic income looks like at different stages, and the first practical steps to take this week. By the end, you will have a clear and specific starting plan rather than a general direction.
The Right Mindset Before You Choose a Business Model
Think in Assets, Not Hours
The single most important shift to make before you start is how you think about the time you invest. So when you work a job, your income stops the moment you stop working. Every hour produces one payment and nothing more.
An online business works differently. Every piece of content you publish, every product you create and every system you build is an asset.
So a blog post you write in 3 hours this weekend can earn income for 5 years. A digital product you build over 4 evenings can sell hundreds of times without further work. That is the real appeal of building an online business in your spare time. The hours you invest compound rather than expire.
Expect a Slow Start
The truth is that the first 3 to 6 months of building an online business in your spare time rarely produce meaningful income. So if you start this week and expect to earn $1,000 a month by month 3, you are almost certainly going to be disappointed.
However, most people who build a reliable online income from the side start earning $500 to $2,000 a month in 12 to 18. Furthermore, many earn $3,000 to $10,000 a month by year 2. So the curve is slow at the start and then becomes steep. Staying consistent through the flat part is how you benefit.
You Do Not Need to Be an Expert
One of the most paralysing myths about starting an online business is that you need to be an expert before you begin. So aspiring bloggers spend months reading about SEO before publishing a post. Aspiring course creators spend months planning a curriculum before recording a single video.
In practice, most online business owners started as enthusiastic beginners in their niche. Furthermore, being 1 step ahead of your audience is often more valuable than being a fully qualified expert. So people who are learning something want to hear from someone who recently learned it. They do not want to hear from someone so deep in the subject that they have forgotten what confusion feels like.
Affiliate marketing combined with a blog is 1 of the most popular online business models for people building in their spare time. So you create a website, write helpful content around a specific topic, include affiliate links and earn a commission when readers purchase.
The income potential is real but takes time to build. Beginner bloggers typically earn very little in their first year. However, established bloggers in commercially attractive niches can earn $2,000 to $20,000 a month or more.
Furthermore, the income is largely passive once the content is indexed and ranking in Google. So articles you write this year can earn income for years without further work.
The most important decision in blogging is your niche selection. So choose a topic that sits at the intersection of something you know well and something with enough commercial interest to attract affiliate income. Personal finance, health, home improvement and technology are all strong niches. Furthermore, within each broad category, a specific focus beats a general approach.
According to Authority Hacker, the average affiliate marketer earns around $8,038 a month. However, that figure covers experienced marketers at all levels. So a beginner should expect modest early income that grows as traffic compounds over 12 to 24 months.
Selling Digital Products
Selling digital products is 1 of the most genuinely spare-time-friendly online business models. So you create a product once and sell it repeatedly with no ongoing production work. There is no inventory, no shipping and no limit on how many times a product can sell.
The most accessible digital products for beginners include e-books, templates, spreadsheets, printable planners and online mini-courses. Furthermore, you do not need complex software or a large budget to create them.
Tools like Canva handle design. Gumroad and Etsy handle the selling. Systeme.io handles the email marketing and delivery.
Income from digital products varies widely. A well-positioned Etsy listing can earn $200 to $2,000 a month. A short e-book on Amazon Kindle can earn $100 to $500 a month in royalties once it finds its audience.
Furthermore, creators who build a catalogue of 5 to 10 related products see income multiply. So the compound effect of building a product library is real and powerful.
Freelancing is the fastest way to generate online income from scratch. So if you have skills in writing, design, bookkeeping, video editing or any other service area, you can find clients and earn within days.
The challenge with freelancing is that it scales directly with your hours. So it does not produce passive income in the same way as blogging or digital products do. However, it is a smart starting strategy because it produces immediate income that you can reinvest into a more passive income model.
According to Upwork, freelancers on established platforms earn anywhere from $15 to $150 an hour, depending on their skill area. So a part-time freelancer working 10 hours a week at $30 an hour earns around $1,200 a month. Furthermore, that income can fund the tools and learning that accelerate the passive side of your business.
Online Courses and Coaching
If you have deep knowledge in any area, turning it into an online course is a high-margin way to build a spare-time income stream. So you record the course once and sell it to as many students as want it.
No ongoing production is required. Platforms like Teachable, Kajabi and Thinkific handle the technical parts. So you focus on teaching. The platform handles everything else.
According to Teachable, successful course creators earn between $1,000 and $10,000 a month. However, that range covers a wide spectrum of creators. So a beginner should expect modest early sales that grow as their audience expands.
Furthermore, coaching sits alongside courses as a natural extra income stream. So you offer 1-to-1 coaching sessions for clients who want personalised guidance beyond the course. Coaching rates vary, but $100 to $300 an hour is common for subject areas with real market demand.
YouTube and Content Creation
YouTube is a long-term strategy that suits people who enjoy being on camera and are willing to invest a year or more before seeing real income. However, it also offers multiple income streams once a channel is proven. So you earn from display ads, sponsorships, affiliate links and digital product sales all at once.
YouTube pays between $1 and $10 per 1,000 views, depending on the niche. So it takes real view volume before ad income alone is meaningful. However, channels that serve a commercially valuable audience can earn $10,000 to $50,000 a month through a mix of income streams.
Building a YouTube channel in your spare time needs consistent uploading. So most spare-time creators aim for 1 video per week as a minimum. Furthermore, the early videos in any channel are rarely the best. So the real work in year 1 is learning and improving rather than expecting big returns.
E-Commerce and Print on Demand
E-commerce suits people who enjoy product thinking and creative marketing. So you create an online store, source products and sell them to buyers. Print-on-demand is a particularly accessible option because you upload designs, and a third party prints and ships the product. So there is no inventory and no stock cost.
Platforms like Printful, Printify and Redbubble connect to Etsy or your own site. So you upload a design once, and it sells indefinitely. Income from print-on-demand builds through volume and catalogue size. So a creator with 50 to 100 well-designed products can earn $500 to $3,000 a month.
Choosing the right online business model for your spare time comes down to 3 questions. The first is what you enjoy. So if you hate writing, starting a blog is a recipe for quitting. If you love video, a YouTube channel may suit you better.
The second is what skills you already have. So a designer has a head start with digital products and print-on-demand.
A teacher has a natural head start with courses. A writer has a clear head start with blogging. Furthermore, building on existing skills means you produce better early work.
The third is how much time you realistically have per week. So if you have 5 hours a week, choose 1 model and focus on it entirely. If you have 10 to 15 hours a week, you might combine 2 complementary models. So freelancing can produce immediate income, whilst a blog builds long-term passive income.
Avoid the Shiny Object Trap
The single biggest threat to building an online business in your spare time is switching models every few weeks. So you start a blog, get distracted by a YouTube video about dropshipping, then pivot to print on demand.
6 months later, you have half-built 4 businesses and earned from none of them. Furthermore, none of them has had time to compound.
The compound effect requires consistency over time. So pick 1 model and give it 6 to 12 months. Resist every new idea until that first model is producing real income.
A Realistic Week-by-Week Starting Plan
Week 1: Decide and Research
Pick your business model this week. So read this article, consider your skills and interests and pick the model that fits. Then spend the rest of the week on your niche research.
Look at what is already working in your chosen area. So if you are starting a blog, search Google for your target topics and study the top-ranking posts. If you are creating digital products, search Etsy for your intended product type and study the best-selling listings. Furthermore, note the gaps you could fill.
Week 2: Set Up Your Platform
Whatever model you choose, get the technical setup done early. So register your domain if you are starting a blog today. Create your Etsy shop if you plan to sell digital products this week. Set up your YouTube channel if that is your path.
Furthermore, set up an email marketing system from the start. Systeme.io offers a free plan that covers email marketing, landing pages and digital product delivery in 1 place. So you can build an email list from your very first piece of content with no separate tool costs.
Write your first blog post, design your first product or record your first video. So create something this week.
Furthermore, do not wait until it is perfect. The first version of anything will almost certainly not be your best work.
So publish it anyway and improve your next effort. The biggest mistake most aspiring online business owners make is spending months polishing 1 piece of content that no one sees yet. So build a body of work rather than 1 perfect piece.
Week 4 and Beyond: Build Consistently
From week 4 onwards, your goal is consistency. So aim for 1 new blog post, 1 new product or 1 new video per week. Furthermore, track what you are doing and what results follow. So after 3 months, you will have real data on what is working.
Consistency over perfection separates online business owners who succeed from those who do not. So a simple, published piece beats a perfect piece that never gets finished.
Common Mistakes That Derail Spare-Time Businesses
Spending Before You Earn
The most common financial mistake is spending heavily on tools and software before generating any income. So many beginners spend $200 a month on subscriptions before earning a single dollar.
Start lean. So use free tools wherever possible in your first 3 months of building.
WordPress is free to start. Google Analytics is free to use. Systeme.io has a very useful free plan.
Canva has a solid free plan. Etsy charges a small listing fee per product rather than a monthly subscription.
So there is little reason to spend significant money before proving your model works.
Trying to Build Everything at Once
Building a blog, a social media presence, a YouTube channel, and a product suite simultaneously in one’s spare time is not possible. So focus on 1 primary asset in your first 6 months.
Furthermore, the overlap between platforms comes naturally as you grow. So once your blog is established, repurposing your best posts into YouTube videos makes sense. However, trying to build all of those things from day 1 is a reliable way to burn out and quit.
Most spare-time business owners have no idea whether their time investment produces any return. So they feel busy without knowing if they are actually making progress. Keep a simple log of what you work on each session.
Furthermore, tracking creates accountability. So if you review 3 months of data and find you spent 40 hours on posts that drove zero traffic, you can redirect that time.
The Tools That Make Spare-Time Business Building More Manageable
An All-in-One Platform
Managing email lists, product delivery, and landing pages across separate tools adds cost and complexity. So an all-in-one platform removes that problem.
Systeme.io offers a useful free plan that covers email marketing, sales funnels and digital product delivery in 1 place. So you can build an email list, deliver digital products and create landing pages without multiple separate subscriptions.
AI Writing Tools
Writing consistently is one of the biggest challenges for spare-time builders. So on low-energy days, starting a new piece of content from scratch can feel overwhelming.
Rytr is an affordable AI writing tool that helps bloggers produce more content without losing their own voice. So it generates article outlines and section drafts that you refine and personalise. Furthermore, it is useful on difficult days when the blank page is the biggest obstacle.
Before you write a post or create a product, knowing what people are searching for is essential. So a strong keyword research tool saves you from creating content that nobody finds.
Tools like Jaaxy show you monthly search volumes and competition levels for any topic. So you can find the low-competition keywords that give a new site or product the best chance of being found. Furthermore, a 30-minute keyword research session before you write can dramatically increase your return on the hours invested.
What to Expect Month by Month
Months 1 to 3
Income is almost certainly zero. However, this is not a sign that anything is wrong. It is the normal foundation phase. So every piece of content you publish and every product you create builds an asset base that compounds later.
Focus during this phase on learning rather than obsessively monitoring analytics. So your job in months 1 to 3 is to show up consistently and improve.
Months 4 to 9
This is where the first real signs of traction appear. So your blog posts begin ranking in Google search. Your Etsy listings start to appear in search results. Your affiliate links begin generating small commissions.
Income in this phase varies. So expect anywhere from $0 to $500 a month, depending on your niche and content targeting. Furthermore, this is when the compound effect of early work becomes visible for the first time. So articles you wrote in month 2 may start driving real traffic by month 7.
Months 9 to 18
This is where the investment of the early months starts to pay off. So consistent bloggers often see their income jump meaningfully in this window. Digital product sellers with a catalogue of listings start to see regular daily sales.
Furthermore, this is a good time to add a second income stream alongside your primary one. So if you started with a blog, month 9 might be the right moment to add a digital product. If you started with freelancing, it might be the right moment to start building a blog.
Beyond month 18, the compound effect becomes clearly visible. So the work you did in month 1 is still paying you. The work you do in month 18 adds to an already-growing base. Furthermore, this is the point at which spare-time business owners begin to see income that could replace a portion of their salary.
Getting Started: Your Next Step
If you have been saying “I want to start an online business in my spare time” for longer than you would like to admit, pick 1 model and take 1 action today.
So register your domain, open your Etsy shop or send your first freelance pitch. Furthermore, the first action is the most important. The rest follows once you break the inertia of not having started.
The Real Answer to “I Want to Start an Online Business in My Spare Time”
So if you are thinking “I want to start an online business in my spare time”, spare time is genuinely enough to start. You do not need to quit your job. A large budget is not required either. You do not need to be an expert before you begin.
What you need is a clear model, a realistic timeline and the discipline to show up consistently when results are not visible yet. Furthermore, the compound effect of online business income rewards patience like almost no other income model.
The Gap Is Just a Decision
The only gap between where you are now and a working online business is a decision followed by action. So choose your model and begin. Publish your first asset this week.
Furthermore, the online business owners earning $3,000 to $10,000 a month today were once in your position. They decided to start and kept going. So the best time to make that decision is now.
Passive Income Ideas for Retirees: 10 Smart Options That Pay
The Right Question to Ask in Retirement
Passive income ideas for retirees deserve a more honest treatment than most articles give them. So this is not a list of vague suggestions dressed up with stock photo thumbnails. It is a practical breakdown of 10 income models that suit retired people specifically, with real income figures, honest timeframes and the key gaps between each option.
Retirement looks different for different people. What suits 1 person may not suit another.
So there is no single right answer here. Some retired people have substantial savings. Others are working with more modest nest eggs.
Some have 10 to 20 years of active retirement ahead. Others are looking for low-effort income that works around limited energy or health constraints. So the goal of this article is to match the right option to the right situation.
Why Passive Income Matters in Retirement
The maths of retirement pay is simple but unhappy. Social Security covers about $1,907 per month for retirees in 2026. So for most American retirees, that single source covers basic expenses but leaves little room for travel or surprise bills.
Also, inflation continues to erode the purchasing power of fixed pension income. So building even $500 to $2,000 a month in passive income on top of existing retirement pay changes what retirement in fact feels like.
What This Article Covers
This article covers 10 passive income ideas for retirees with specific income figures, an honest breakdown of the effort required and the starting steps for each.
The standard passive income advice targets younger people who are time-poor but energy-rich. Retired people often have the opposite situation. So the best passive income ideas for retirees tend to focus on low physical effort, freedom and a slow start.
Also, retirees usually have strong points that younger people lack. They have decades of career knowledge, settled trust, a network of former colleagues and clients and in many cases some capital to invest. So the right passive income model builds on those assets rather than requiring you to start from zero.
Risk and Stability
Risk tolerance is a personal factor in retirement pay planning. However, most retired people prefer income models that protect capital and produce steady returns rather than those with high risk.
So the options in this article range from very low-risk savings models to higher-effort digital income streams.
Some need capital. Others need time. Pick the one that fits your situation right now. Also, mixing 2 to 3 income streams across different risk levels is the strongest approach for most retirees.
10 Passive Income Ideas for Retirees
1. Dividend Investing
Dividend investing is 1 of the most passive income ideas for retirees who have capital to invest. So you invest in stocks or funds that pay regular dividends and receive income every quarter or monthly without needing to sell any assets.
The S&P 500 right now yields around 1.3% to 1.5% on average. However, targeting dividend-focused stocks or funds can produce yields of 3% to 6% or higher. So a portfolio of $300,000 invested in dividend-paying assets at a 4% yield earns $12,000 a year. That is $1,000 a month in passive income.
Also, dividend income tends to grow over time because quality dividend companies usually increase their payouts. So a retired couple who invested $500,000 in a spread dividend portfolio could reasonably expect $20,000 to $30,000 a year in income. Also, that income compounds and grows without requiring active oversight.
The most open entry point for beginners is a dividend-focused exchange-traded fund. So you get instant diversification without needing to research single companies.
Vanguard’s High Dividend Yield ETF and the Schwab US Dividend Equity ETF are both popular starting points. Both are widely used. Both are low-cost. So they are worth looking at first.
2. High-Yield Savings and CDs
High-yield savings accounts and deposit savings bonds are the lowest-risk options for retirees. So there is no market exposure, no active oversight and no complexity.
High-yield savings accounts in the US have offered rates of 4% to 5% in recent years. So that is much higher than the 0.1% offered by many standard bank accounts. So $50,000 in a high-yield savings account at 4.5% earns $2,250 a year in interest income with zero risk.
Deposit savings bonds lock your money in for a fixed term at a guaranteed interest rate. So a 12-month CD at 5% on $100,000 earns $5,000 in guaranteed interest. Also, laddering multiple CDs with different maturity dates gives you regular access to your capital whilst keeping the higher rates.
This option is the best first step for retired people who are cautious about market risk. So, even setting aside a portion of savings into a high-yield account earns more income than a standard savings account.
3. Renting Property or Space
Property rental is a well-settled income stream for retired people who own real estate beyond their primary home. So a spare bedroom, a granny flat or a second property can produce regular rental income.
Average Airbnb host earnings in the US sit at around $13,800 a year. However, that figure varies widely. Also, for retired people who prefer a hands-off approach, long-term rental to reliable tenants produces steadier income.
Beyond property, platforms like SpotHero let you rent out a spare parking space for $100 to $400 a month. Also, Neighbor.com lets you rent out a garage or basement storage. So even retirees without a second property can often find something to monetise at home.
The income from rental property is real, but the effort involved varies. Long-term rental with a property oversight company can be nearly fully passive for 8% to 12%. So, for retired people who want income without effort, paid oversight is worth paying for.
Retired people often have decades of career knowledge or knowledge in a specific field. So writing a book or an e-book turns that knowledge into a passive income asset that earns royalties for many years.
Amazon Kindle Direct Publishing pays royalties of 35% to 70% on e-book sales. So the return per sale is solid. So an e-book priced at $9.99 that sells 50 copies a month earns $170 to $350 a month in royalties. Also, a paperback self-published through Amazon’s print-on-demand service earns royalties with no inventory costs.
The most commercially successful retirement-focused e-books tend to address very specific knowledge. So, a retired doctor writing about managing a common health condition is a practical example. Also, a former financial planner writing about late-career investment plans or a retired teacher writing about homeschooling methods are equally strong examples.
Also, once a book is published, it can earn income for years. So the upfront effort of writing produces a return that compounds. That makes it 1 of the most long-term passive income ideas for retirees.
5. Creating and Selling Digital Products
Digital products are created once and sold repeatedly with no inventory and no ongoing costs.
So a retired accountant might create a tax planning spreadsheet. A retired designer might create a home staging guide.
A retired chef might create a recipe e-book. The list goes on. Think about what you know that others do not.
Platforms like Etsy, Gumroad and Teachable make it simple to list and sell digital products without technical knowledge. So the barrier is low for retired people who have the knowledge but not the technical background.
Income from digital products varies quite widely. A well-placed Etsy listing can earn $200 to $2,000 a month.
Also, retired people who build a small catalogue of related products see their income multiply. So, a retired teacher who creates 10 teaching printable packs earns from all 10 at the same time.
Also, digital products suit retirees well because you set the pace. So you can create 1 product this month and another next month. There is no deadline, no boss and no pressure to scale faster than your energy.
6. Affiliate Marketing Through a Blog or Website
Affiliate marketing suits retired people who enjoy writing and have knowledge others want. So you write content about topics you know well, include affiliate links and earn commissions when readers buy.
There is no shop to manage. There is no stock to hold. Shipping is handled by someone else.
The appeal of affiliate marketing for retirees is that content continues to earn long after you write it. So an article about Medicare supplement plans or fishing gear for seniors can earn commissions for years from organic search traffic.
According to Authority Hacker, the average affiliate marketer earns around $8,038 a month. However, that covers skilled creators across all niches. So a retired beginner building a niche site should expect modest early income that builds over 12 to 24 months.
The most good niches for retired affiliate bloggers are tied to their career background. So a retired nurse might write about health products. A former estate agent might cover home upgrade tools.
Also, a retired travel career might review senior travel gear. That mix of genuine knowledge and trusted content produces affiliate income that is honest and good.
Peer-to-peer lending platforms connect investors with borrowers directly. So you lend money to people or small businesses and earn interest at rates usually higher than bank savings.
Platforms like Prosper and LendingClub have offered returns of 4% to 8% a year in the past years. So $25,000 invested across a range of loans could produce $1,000 to $2,000 a year in interest income.
However, peer-to-peer lending carries more risk than savings accounts or bonds. So borrowers can default, and some principal loss is possible.
Also, these platforms have changed their business models. So it is worth researching any specific platform carefully before investing. Read the terms. Check the current offer.
So peer-to-peer lending suits retired people who are happy with moderate financial risk and want higher returns than bank savings. Also, it avoids the volatility of the stock market.
8. Licensing Expertise or Creating an Online Course
Retired experts have something most online course creators lack. They have genuine, decades-deep know-how in a real field. So packaging that know-how into an online course is a natural passive income model for retirees.
Platforms like Teachable, Udemy and Kajabi handle the technical parts. So you focus on creating the course content.
The platform manages everything else. No tech skills are required. Also, a course created once can sell for many years to new students.
According to Teachable, successful course creators earn between $1,000 and $10,000 a month. So the range is wide. However, even a modest course earning $300 to $500 a month provides real extra income.
Also, retired people who choose this path are often surprised by the demand for their know-how. So a 35-year career as a HR professional or a certified public accountant represents specialist knowledge that new entrants will pay to access.
9. Renting Out Belongings or Equipment
Many retirees own equipment or recreational gear that sits unused for most of the year. So platforms like Fat Llama and PeerRenters let you rent out items from cameras and power tools to kayaks and golf clubs.
Income from equipment rental varies quite a bit. So a high-quality camera kit that rents for $75 a day, used 8 times a month, earns $600 a month. A boat rented through Boatsetter can produce $500 to $2,000 a month, depending on location.
Also, this is 1 of the most practical options on this list because it requires no new skills and no investment. So you list what you already own and earn from assets that would otherwise sit idle. It is one of the simplest ideas on this list.
The most in-demand rental items tend to be expensive, durable and needed only from time to time. So photography equipment, outdoor gear, musical instruments and specialist tools are all strong rental candidates.
10. Creating YouTube Content or a Podcast
Creating content around a specific topic is a long-term strategy for retired people who enjoy sharing knowledge. So a retired doctor might start a YouTube channel about managing chronic health conditions. A retired craftsperson might make videos about their craft. A former military officer might build a podcast around leadership.
YouTube pays between $1 and $10 per 1,000 views, depending on the niche. So it takes time to build any meaningful ad income. However, a well-settled channel also earns affiliate income and sponsorship revenue that can far exceed ad income.
Also, podcast ad rates run from $15 to $50 per 1,000 downloads, depending on your niche. So a modest podcast with 5,000 monthly downloads can earn $75 to $250 per episode from sponsorship.
According to Podbean, podcast creators can earn through ads, listener support and premium content. So income grows alongside audience size. So this suits retired people who enjoy creating content rather than those motivated mainly by income.
Choosing the Right Passive Income Strategy for Your Retirement
Match the Option to Your Energy
Not all passive income ideas for retirees need the same energy. So the most important question is not which option pays the most. It is the option you can honestly sustain given your health and energy.
The lowest-effort options are financial. So dividend investing, high-yield savings and CDs all qualify. These suit retired people who want an income with minimal effort.
Property rental is a moderate effort, especially with paid oversight. Digital products and affiliate marketing require more upfront time. However, they produce income that runs without your effort once settled.
The Role of Existing Capital
Your spare capital shapes which options are most practical. So retirees with $100,000 or more in spare savings have immediate access to dividend income. Those with less capital but more time are better suited to digital income models.
Also, the 2 approaches are not mutually exclusive. So a retiree might invest $50,000 in dividend stocks for steady quarterly income whilst also building a digital product.
Realistic Income Expectations
Setting realistic income expectations matters for a sustainable plan. Most passive income ideas for retirees produce little income in the first 3 to 6 months. However, the income that builds after that tends to be durable.
So here is an honest picture of what different starting points might produce after 12 months.
A retiree who invests $200,000 at an average yield of 4.5% earns around $9,000 a year. So that is $750 a month with zero ongoing work.
A retiree who writes 1 e-book and creates 5 digital products might earn $200 to $800 a month by the end of year 1. Also, that income compounds as they add more products in subsequent years.
A retiree who builds an affiliate blog might earn $50 to $300 a month in month 12. However, by month 24, that figure can reach $500 to $2,000 for those who publish reliably.
So the best approach for most retirees is to combine a financial passive income stream with 1 digital or content-based stream. Also, this mix provides both a stable income now and a growing income over time.
Tools That Make Passive Income Easier for Retirees
For Digital Products and Email Marketing
Systeme.io suits retired people who want to sell digital products or build a simple email list. So it offers a free plan that covers digital product delivery, email marketing and landing pages in 1 place.
Also, the interface works well for people who are not very technical. So, retired people can set up a product and an email list without any web development skills.
For Blog Content and Writing
Rytr is an affordable AI writing tool that helps retirees build a blog. So it removes the blank-page problem that slows many people down. So it earns article outlines and section drafts that you then refine with your own knowledge and voice.
Also, it is useful for retired experts with deep knowledge who find writing for an online audience different from their career writing. So it bridges the gap between knowing something deeply and sharing ideas it for a web reader.
For Keyword Research
Knowing what people search for before you write or create a product is key to building passive income that compounds. So tools like Jaaxy show you search volumes and competition levels. They also help you find the gaps your knowledge can fill.
A Simple Starting Plan for Retirement Passive Income
Week 1: Assess Your Starting Point
Take stock of what you have to work with. So note your spare capital, your areas of knowledge and any assets others might want to rent or buy.
Also, be honest about your energy and your openness to new things. So a retiree who dislikes technology will have a different starting plan from 1 who is happy with email and online shopping. Both are valid. Both can work.
Week 2: Choose Your First Income Stream
Pick 1 option and commit to it for the next 3 months. Focus on 1 stream. Add a second once the first is producing some income.
Also, choose based on fit rather than potential income. So the income stream that suits you is the one you will, in fact, follow through on. The highest-paying option you never finish earns you nothing.
Week 3 and Beyond: Build and Publish
Whatever income stream you choose, create your first asset. So open a high-yield savings account and transfer funds. List your first digital product on Etsy.
Write and publish your first blog post. Record your first YouTube video if that suits your chosen path.
Also, the first version of anything will rarely be your best. So publish it anyway.
Improve with each version. That is how good passive income assets are built. The retired people who build real passive income are those who start with something rather than waiting for the perfect plan.
Passive income ideas for retirees are not a fantasy. They are a practical response to a real gap between what retirement pay provides and what a happy retirement requires. So the options covered in this article range from the very simple to the more involved. All of them are achievable for American retirees willing to invest some time or capital.
The Time to Start Is Now
The compound effect of passive income is the most important factor here. So the income stream you start this month may feel slow for the first 6 to 12 months. However, by month 24 or 36, that stream could produce $500 to $2,000 a month with little active effort.
Pick One and Begin
The retired people who build real extra income choose 1 option, start it properly and stay steady through the slow early phase. So do not wait for the perfect moment to begin. Also, a retired person who starts today has a real advantage over 1 who spends another 6 months researching without acting.
Passive income ideas for retirees work best when matched to your skills, capital and energy. So start where you are and build at a pace that suits you.
Some weeks, that may be 1 hour. Other weeks it may be more. What matters is that you start.
Passive Income Ideas for Moms: 10 Real Options That Pay
The Real Question Behind This Search
Passive income ideas for moms come with a lot of noise attached. Pinterest boards full of “$5,000 a month from your kitchen table” claims sit right next to articles that list 47 ideas with zero detail on how they actually work. So this article takes a different approach.
It covers 10 genuine passive income models that suit motherhood. Furthermore, it covers what each option honestly pays, how long it takes to build and the first practical steps. By the end, you will have a clear picture of which options suit your time and your financial goals.
Why Passive Income Makes Particular Sense for Moms
The appeal of passive income for moms is not laziness. It is leverage. So if you invest time during nap times or school hours into something that continues to earn after that time is up, you are multiplying the return on every hour you work.
Furthermore, the online income landscape has expanded in the past 5 years. So the options available to a mum building a side income from home are much broader than they were a decade ago.
What This Article Covers
This article covers 10 passive income ideas for moms with honest income figures, timelines and a breakdown of what each involves. It also covers the tools that make each option more manageable for someone with limited time.
Before we get into the ideas, it is worth being clear about what passive income actually means in practice. Passive income is income that continues to arrive after the initial work is done. So a blog post you write today can earn affiliate commissions for years. A digital product you create once can sell repeatedly with no further input.
However, it is not income you generate with zero effort. Every passive income stream requires real upfront investment of time, skill or money. So the work is front-loaded rather than ongoing. Furthermore, most passive income streams require ongoing maintenance, even if that maintenance is light.
So the honest framing is this. Passive income is income that scales beyond your direct hours. So once it is built, you earn whether you are working or sleeping.
How to Choose the Right Option
The best passive income idea for any individual mum depends on 3 factors. The first is the time available. Some models need a significant upfront time investment before any income arrives.
The second is existing skills. Some models reward writing, design or teaching. The third is the starting budget. Most of the best options cost little or nothing.
So read through all 10 ideas and note which ones align with what you already have.
10 Passive Income Ideas for Moms
1. Blogging with Affiliate Marketing
Blogging combined with affiliate marketing is 1 of the most popular passive income ideas for moms. The reason is straightforward. You write content, publish it on a blog and earn commissions when readers click your links and buy. So once a post is published and ranking in Google, it can earn income every month with no further effort.
The income range for an established blog is wide. Beginner bloggers typically earn $0 to $500 a month in their first year. By year 2 or 3, bloggers with consistent output and good SEO can reach $2,000 to $10,000 a month or more. Furthermore, the income is largely passive once the content is established.
The key is choosing a niche that suits you and has enough commercial interest to attract affiliate programmes. Parenting, finance, cooking and home organisation are all strong niches for moms. Furthermore, they all have high-quality affiliate programmes with solid commission rates.
Selling digital products is 1 of the most genuinely passive income ideas for moms. So you create the product once and sell it repeatedly with no further input. So there is no inventory, no shipping and no limit to how many times a product can sell.
The most accessible digital products for moms include printable planners, budget spreadsheets, recipe e-books and kids’ activity sheets. So if you have experience in any area of family life, that knowledge can become a product.
Platforms like Etsy, Gumroad and Teachable make it simple to list and sell digital products with no technical expertise. Furthermore, Etsy in particular is a strong starting point because it has built-in traffic from buyers already searching for downloadable products. So you do not need a following or an email list to start making sales.
Income from digital products varies widely. A well-researched Etsy listing can earn $200 to $2,000 a month at the lower end. Moms who build digital product businesses around a specific niche can earn $5,000 to $20,000 a month at the established level.
3. Creating an Online Course
If you have skills in any area, from cooking to managing a household budget, an online course turns that expertise into a scalable income stream. So you record the course once and sell it to as many students as want it.
Platforms like Teachable, Kajabi and Thinkific handle the technical parts. So you focus on creating the content. The platform manages delivery, payment processing and student access. Furthermore, courses can be priced from $47 for short beginner ones to $500 or more for comprehensive programmes.
According to Teachable, successful course creators earn between $1,000 and $10,000 a month. However, that figure covers a broad range of creators. So a new course creator should expect modest initial sales that grow as their reputation expands.
The most effective approach is to create a course around something you know very well, starting with a small, focused audience. Selling to 10 people at $97 is far easier than trying to reach 1,000 people.
4. Print on Demand
Print on demand is a model where you create designs for products like t-shirts, mugs and phone cases. When a customer orders, a third party prints and ships the product. So you never handle inventory or packaging.
Platforms like Printful, Printify and Redbubble connect to Etsy or your own site. So you upload a design once, and it sells indefinitely. Furthermore, income is largely passive after the initial design and listing work.
Profit margins vary considerably. A t-shirt that sells for $25 might produce a profit of $5 to $8 after print costs. So income builds through volume rather than high-margin single sales. Moms who build print-on-demand businesses with strong designs can earn $500 to $3,000 a month with an established product catalogue.
The strongest print-on-demand niches for moms are family humour, teacher gifts, nurse designs and hobby-specific content. So, picking a niche you understand gives you a natural advantage in creating designs that resonate.
You do not need a blog to earn affiliate commissions. So moms who are more comfortable with social media can build affiliate income through Pinterest, Instagram, YouTube or TikTok.
Pinterest is a strong starting point for moms in particular. So you create pins that link directly to affiliate products or to your own content. Pins can drive traffic for months or years after they are posted.
Furthermore, Pinterest users tend to be buyers rather than browsers. So their purchase intent is higher than that of audiences on other social platforms.
According to Authority Hacker, the average affiliate marketer earns around $8,038 a month. However, that covers experienced marketers. However, that figure covers experienced marketers. So a beginner building through social media should expect a slower start with income building over 6 to 18 months.
The key to affiliate marketing without a blog is focus and consistency. So pick 1 platform, choose a specific niche and create content around it for at least 6 months before concluding.
6. Stock Photography and Video
If you have a decent camera or a modern smartphone, stock photography can generate passive income. So you upload photos or short clips to platforms like Shutterstock, Adobe Stock or Getty Images. Each time someone licenses your image, you earn a small royalty.
Individual royalties are small. So a single image might earn $0.25 to $2 per download. However, a library of 500 to 1,000 well-tagged images can generate $300 to $1,000 a month. Furthermore, a well-built stock library grows in value as your portfolio expands.
For moms, the most commercially valuable subjects include families, children at play, home cooking and seasonal activities. So the everyday moments of family life that you are already photographing can become a real income stream with the right tagging.
7. Licensing Music or Artwork
If you create music or art, licensing platforms let your work earn royalties each time it is used. So musicians can upload tracks to platforms like Musicbed. Artists can licence digital files through Creative Market or Etsy.
Income from licensing is small per individual use but scales with the size of your catalogue. So a library of 200 commercial-use music tracks can earn $500 to $3,000 a month from content creators and brands who need background music.
Furthermore, this suits moms who already create music or art as a hobby. So the income is a natural extension of work you may already be doing.
8. High-Yield Savings and Dividend Investing
Not every passive income idea requires creating content or products at all. So for moms with some savings to invest, high-yield savings accounts and dividend stocks can generate hands-off income.
High-yield savings accounts in the US have offered rates of 4% to 5% in recent years. So $10,000 in a high-yield account generates $400 to $500 a year in interest. Furthermore, dividend stocks can generate $3,000 to $7,000 a year from a portfolio of $50,000 to $100,000.
So this option needs capital rather than time. It suits moms who already have savings and want to put them to better use than a standard savings account. Furthermore, it is the most genuinely passive option on this list. Once the money is invested, no further effort is required.
9. Renting Out Space or Belongings
Renting is a simple and underrated passive income idea for moms with a spare room or a parking space that sits idle. So platforms like Airbnb and VRBO allow you to rent a spare room or a property to short-term guests.
Average Airbnb host income in the US sits at around $13,800 a year. So income varies widely based on your location, your pricing and your listing quality. Furthermore, a spare parking space in a city can earn $100 to $400 a month through platforms like SpotHero.
Beyond property, platforms like Neighbour let you rent out storage space in your garage or basement. So if you have unused space, there is almost certainly a platform that can monetise it for you.
10. Writing a Book or Creating a Pattern Collection
Writing a self-published book or building a pattern collection is a long-term strategy that compounds over time. So a knitting pattern published on Ravelry today can earn royalties for many years. A Kindle e-book on Amazon can generate monthly income from searches and recommendations indefinitely.
Amazon Kindle Direct Publishing pays royalties of 35% to 70%, depending on pricing and distribution settings. So an e-book priced at $9.99 that sells 50 copies a month generates $170 to $350 a month in royalties. Furthermore, authors with multiple titles see their income grow with each new publication.
For moms, the most successful e-books focus on very specific practical problems. So “Managing a Household Budget on $600 a Month” or “Toddler Activities for Rainy Days” are more likely to sell consistently than broad parenting advice. Specificity is the key to being found and converting browsers into buyers.
Choosing the Right Passive Income Idea for You
Match the Idea to Your Life
The single biggest mistake people make is choosing a passive income idea based on its income potential rather than its actual fit. So fit with your real life matters more at the start. So a mum of 3 young children with 5 hours a week needs a different starting point from a mum with a school-age child and a part-time job.
Digital products and affiliate marketing through Pinterest suit moms with very limited time. So the initial work can be done in short sessions. So a single Etsy listing or a batch of Pinterest pins can be created across several evenings without long uninterrupted work blocks.
Blogging and online courses require more sustained upfront effort from you. So they suit moms who can set aside a few consistent hours each week over 6 to 12 months. Furthermore, both options produce compounding income that rewards the patience required in the early stages.
Combine 2 Income Streams for Better Results
The most resilient set-ups for moms combine 2 complementary income streams. So a blog generates affiliate income whilst also promoting the creator’s own digital products. So a Pinterest account drives traffic to an Etsy shop. A YouTube channel builds an audience that buys a self-published book.
Furthermore, each stream reinforces the others. So your blog readers become your course students. Your Etsy buyers join your email list.
Your email list buys your new digital products. This interconnected approach produces income that is far more stable than any single stream in isolation.
How Long Before You See Real Income?
This is the question most articles avoid answering directly. So here is the honest version. Most passive income streams take 6 to 18 months to produce meaningful income from a standing start.
The first 3 months are almost always unpaid. The first commission, the first sale or the first royalty payment typically arrives between months 3 and 6.
Beyond month 12, income for those who have stayed consistent typically sits in the $500 to $2,000 a month range. Beyond month 24, that figure can be much higher for moms who have invested time and effort consistently.
Furthermore, the compound effect is the most important factor to understand. So the work you do in month 3 is still earning in month 18. The product you create in month 1 can be your top seller by month 12. That compounding is what makes the early slow phase worth pushing through.
The Tools That Make Passive Income More Manageable for Moms
An All-in-One Platform
Managing email lists, landing pages, and digital product delivery across separate tools adds friction and cost. So an all-in-one platform like Systeme.io removes that complexity very effectively. Systeme.io offers a free plan that includes email marketing, digital product delivery and sales funnel pages all in 1 place.
So for moms who want to start building an email list without paying for multiple tools before earning anything, it is 1 of the most practical starting points available.
AI Writing Tools
Producing consistent blog content around a family schedule is one of the biggest challenges for moms. So an affordable AI writing tool like Rytr helps you draft content faster without losing your own voice.
Rytr is useful for generating article outlines, product descriptions and social media captions. So you can produce more content in the limited time you have without the blank-page problem.
Keyword Research
Knowing what people are actually searching for before you create content is the difference between passive income that builds and content that goes unnoticed. Tools like Jaaxy make keyword research approachable for beginners by showing search volumes and competition levels.
So a 30-minute keyword research session before you create anything can dramatically increase the chance that people find and buy it.
Getting Started: A Simple First Week Plan
Day 1 to 2: Choose Your Starting Point
Read back through the 10 ideas and pick 1 that fits your time and skills. So do not try to start 3 things at once. That is the fastest path to starting nothing. Pick the 1 that feels most natural and most achievable in the next 30 days.
Furthermore, do a quick keyword or market research check first. So look on Etsy or Pinterest for your chosen niche to see what is already working and where the gaps are.
Day 3 to 4: Set Up Your Platform
Whatever income stream you choose, get the technical set-up done early. So register your domain if you are starting a blog. Create your Etsy shop if you are selling digital products.
Set up your Systeme.io account if you need email marketing. Do not let the technical setup slow down your content creation.
Furthermore, set up Google Search Console from the start so you can track what is working over time.
Day 5 to 7: Create and Publish Your First Asset
Write your first blog post, design your first product or film your first video. So publish something this week. Done is better than perfect. It needs to exist.
Furthermore, the first version of anything you create will almost certainly not be your best. So every subsequent post or product benefits from what you learned in creating the first 1. The fastest path to a good passive income asset is through making incremental improvements rather than one perfect attempt that never gets made.
The first 6 months are the foundation phase of your passive income build. Income is typically zero or close to zero. However, this is also the period where the most important foundational work happens. So every product you create and every post you publish in this phase is an asset that compounds over time.
Furthermore, use this phase to learn what your audience actually responds to. So look at your analytics and note which content drives the most engagement. That information is more valuable than any course or strategy guide.
Months 6 to 18
This is where the first real passive income for moms typically begins. So your blog posts start to rank in Google search. Your Etsy listings start to appear in search.
Your Pinterest pins start to drive steady traffic. Income in this phase ranges from $100 to $1,500 a month for moms who have published consistently.
Furthermore, this is when combining 2 income streams starts to make more sense. So once your primary stream is producing income, adding a complementary stream multiplies results without doubling your workload.
Beyond Month 18
According to Productive Blogging, bloggers who publish consistently for over 2 years see a dramatic income increase. So the passive income opportunity is real. However, it is also genuinely long-term.
The moms earning $5,000 to $20,000 a month did not get there quickly. They got there by staying consistent through the long, quiet phase when results were not visible. So the edge in passive income is not talent or budget. It is patience and consistency over time.
Conclusion
The Bottom Line on Passive Income for Moms
Passive income ideas for moms are not a shortcut. They are a long-term strategy for building income that scales beyond your working hours. So the appeal is genuine. However, so is the effort required.
The Opportunity Is Genuinely There
Digital products, affiliate marketing and blogging give moms more passive income options than any previous generation. Furthermore, the tools available are more affordable and accessible than ever.
Start with 1 Idea This Week
The moms who build real passive income choose 1 idea and start this week rather than spending months planning. So pick the option that suits your life right now. Build consistently from week 1.
Furthermore, the work you do this week is still paying you 2 years from now if you stay with it. So the best time to start is now.
If you are ready to take the first step, passive income ideas for moms are not just theoretical. They are building real income for thousands of women right now. The starting point is the same for every one of them.
Can You Earn Money Posting Videos on YouTube? The Truth Most People Skip
The Short Answer Is Yes. The Full Answer Is More Interesting.
Can you earn money posting videos on YouTube? Yes. So if you have ever wondered whether you can earn money by posting videos on YouTube channels, the way it actually works is quite different from what most people picture. They imagine posting a few videos and watching the money roll in. The reality involves a specific process, a required audience threshold and a much wider range of income streams than ad revenue alone.
So this article covers the whole picture. It explains how YouTube actually pays creators, what the real numbers look like across different niches and how long it typically takes to reach meaningful income. Furthermore, it covers every income stream beyond ads that the most successful YouTubers use to build genuinely sustainable revenue.
Who This Is Really For
This article is for people who are seriously thinking about starting a YouTube channel and want honest information before they commit their time. So it is not for people who want confirmation that YouTube is a guaranteed path to quick money. It is for people who want the actual data and a clear-eyed view of what the journey involves.
What You Will Find Here
You will find the mechanics of YouTube monetisation, the real income figures at different levels and the income streams that go beyond ad revenue. Furthermore, you will find a realistic timeline and the first practical steps to take if you decide this is the right path for you.
The first thing to understand is that YouTube does not pay you simply for posting videos. You need to qualify for the YouTube Partner Programme before any ad revenue comes your way. So the requirements are specific and worth knowing before you start.
To join the programme, you need 1,000 subscribers and either 4,000 watch hours of long-form content in the past 12 months or 10 million Shorts views in the past 90 days. Furthermore, you need a linked AdSense account, and your channel must comply with YouTube’s content policies. So the threshold is real but achievable for most creators who publish consistently.
Once accepted, YouTube splits ad revenue with you. The split is 55% to the creator and 45% to YouTube. So if advertisers spend $100 on ads shown on your videos, you receive $55 of that. This is important to understand before you try to estimate your potential earnings from any CPM or RPM figures you see online.
CPM vs RPM: The Numbers That Actually Matter
Most creators encounter 2 terms when researching YouTube income: CPM and RPM. CPM stands for cost per mille, which is the amount advertisers pay per 1,000 ad impressions. RPM stands for revenue per mille, which is what you actually earn per 1,000 views after YouTube takes its cut.
So if a video shows a CPM of $20, your RPM is not $20. After YouTube’s 45% share and after accounting for views that did not show any ads at all, your RPM might be closer to $4 to $8. Furthermore, not every view results in a monetised ad impression. Ad blockers, viewers who skip ads before 30 seconds and audiences in lower-paying regions all reduce your actual earnings.
According to Hootsuite, in 2026, YouTubers earn between $5 and $15 per 1,000 ad views on average. So a video with 10,000 total views might generate between $25 and $100 in ad income depending on your niche, audience location and engagement rate.
What Determines Your RPM
Several factors shape how much you earn per 1,000 views. Your niche is the most significant. Finance, investing and business content can command RPMs of $10 to $29 because advertisers in those industries pay a premium to reach potential customers. Entertainment and gaming content, whilst often generating higher view counts, typically earn $2 to $5 RPM.
Furthermore, your audience location matters enormously. Viewers in the US generate significantly more ad revenue than viewers in many other countries because US-based advertisers pay higher rates. So a channel with 100,000 monthly views from a US audience can out-earn a channel with 300,000 views from lower-paying regions.
Video length also affects income. Videos over 8 minutes can include multiple mid-roll ads, which increases total ad revenue per view. So a 12-minute finance video can earn considerably more than a 3-minute entertainment clip with the same view count.
The honest data on YouTuber income is not particularly glamorous. Only 9% of independent creators report earning over $100,000 a year. Furthermore, 71% earn less than $30,000 annually. So the gap between the top creators and the rest is very wide.
However, the key insight is not the average. It is the trajectory. Most creators who reach meaningful income built it over 2 to 4 years of consistent publishing. So the distribution looks skewed, not because YouTube is unfair, but because most people quit too early.
Earnings by View Count
The most practical way to understand YouTube income is to look at what specific view counts produce. Using the common RPM range of $3 to $5 per 1,000 views for a general channel, the numbers look like this.
At 10,000 monthly views, ad income is roughly $30 to $50 a month. So this is firmly in the hobby zone rather than an income stream. At 100,000 monthly views, ad income climbs to $300 to $500 a month.
That is meaningful for a side income but not a full-time wage. At 1 million monthly views, income reaches $3,000 to $5,000 a month from ads alone. Furthermore, at this level, most channels are earning additional income from sponsorships and affiliate deals.
So for a finance channel with RPMs around $10 to $15, those numbers look very different. 100,000 monthly views could produce $1,000 to $1,500 a month.
1 million monthly views could produce $10,000 to $15,000 from ads alone. So niche selection is not a minor detail. It is a major determinant of your income ceiling.
YouTube Shorts vs Long-Form
Shorts have become a major part of the YouTube ecosystem. However, they pay much less than long-form content on a per-view basis. The average payout for Shorts is between $30 and $200 per million views, compared to $1,000 to $20,000 per million views for long-form content, depending on the niche.
So Shorts are best used as a growth tool rather than a primary income source. They build subscribers faster and can drive viewers to longer videos. Furthermore, Shorts can trigger viral moments that accelerate channel growth. But relying on Shorts as your main content strategy will produce much lower income than long-form video at the same view count.
The Income Streams Beyond Ad Revenue
Why Ad Revenue Is Just the Starting Point
The most financially successful YouTubers do not rely on ad revenue as their primary income. So the smartest approach to building a YouTube-based business is to treat ad income as a foundation and build several additional streams on top of it.
Brand sponsorships, affiliate marketing, digital products and channel memberships are all income streams that can dwarf your AdSense earnings. Furthermore, many creators build these streams whilst they are still growing toward the monetisation threshold. So they start earning before they even qualify for the YouTube Partner Programme.
Brand Sponsorships
Brand sponsorships are typically the highest-value income stream for established YouTubers. A brand pays you to feature their product or service in a video. Rates vary based on your subscriber count, your engagement rate and your niche.
So a channel in the personal finance niche with 50,000 subscribers might charge $500 to $1,500 per sponsorship video. Furthermore, a channel with 500,000 subscribers in the same niche might charge $5,000 to $15,000 per deal.
So sponsorships become available long before channels reach viral scale. Many YouTubers with 10,000 to 30,000 subscribers land their first brand deals if their niche is commercially attractive and their engagement rate is high.
Affiliate Marketing
Affiliate marketing is 1 of the most accessible income streams for new creators. So you mention a product in your video, include a link in your description and earn a commission when viewers purchase. This income stream can start from your very first video with no minimum subscriber count.
The commission rates vary widely. Amazon Associates pays 1% to 10% on physical products. Software and digital tool affiliates often pay 20% to 50% recurring commissions. So a personal finance channel that recommends budgeting software or a financial course can earn considerably more per conversion than a channel recommending kitchen gadgets.
Furthermore, affiliate income from YouTube is not capped by your view count in the same way as ad income is. So a video with 5,000 views that drives 50 software sign-ups at $30 commission each generates $1,500 from that single video. That is more than most channels earn from 5,000 views in ad revenue alone.
Digital Products
Many YouTubers create and sell their own digital products. So a tutorial channel might sell a premium course. A personal finance channel might sell a budget spreadsheet. A fitness channel might sell a 12-week training plan.
Digital products carry very high margins because you create them once and sell them repeatedly. Furthermore, your YouTube channel is a free marketing platform for those products. So every video you publish is simultaneously content for your audience and a funnel for your product sales.
Channel Memberships and Fan Funding
YouTube’s built-in fan support tools include channel memberships, Super Chats during live streams and Super Thanks on regular videos. So viewers can pay directly to support creators they value. These features typically require a minimum of 500 subscribers to unlock.
Furthermore, platforms like Patreon give creators an additional way to build recurring monthly income from their most loyal viewers. So a channel with 20,000 subscribers and a strong community might earn $1,000 to $3,000 a month from memberships alone, regardless of ad revenue.
Why Niche Selection Is Your Most Important Decision
The niche you choose determines your RPM ceiling, your sponsorship rates and your affiliate commission potential. So choosing a commercially attractive niche is not about selling out. It is about building a business that can actually support you financially.
Finance and investing content commands the highest RPMs on the platform, often between $10 and $29 per 1,000 views. Business and entrepreneurship content typically earns $5 to $12 RPM. Tech and software reviews earn $8 to $15 RPM. Furthermore, health and fitness content with a strong product-based angle can earn $5 to $10 RPM.
Entertainment, comedy and lifestyle niches generally earn $2 to $5 RPM. So they are not bad choices if you love the content. However, they require significantly more views to produce the same income as a high-RPM niche. Furthermore, they are typically harder to monetise through sponsorships and affiliate deals.
Evergreen vs Trending Content
Evergreen content covers topics that remain relevant for years. “How to budget as a student” or “beginner’s guide to investing” will drive search traffic and ad revenue long after they are published. Trending content may spike quickly but fades equally fast.
So the most effective YouTube strategy for income building combines evergreen long-form content that brings consistent search traffic with occasional trending videos that expand your audience. Furthermore, evergreen content builds a passive asset. So a video you published 2 years ago can still earn income today with no additional effort.
How Long Does It Take to Start Earning?
The Honest Timeline
The path to meaningful YouTube income takes longer than most people expect. Most creators take between 6 and 18 months to qualify for the YouTube Partner Programme. So the first phase is building to 1,000 subscribers and 4,000 watch hours before any ad revenue is even possible.
The first phase of real income growth typically happens between months 12 and 24. Furthermore, full-time income, which most people define as replacing a salary, typically requires 2 to 4 years of consistent publishing for most creators who do not have a prior audience or a significant existing platform.
What Month-by-Month Progress Looks Like
In the first 3 months, focus entirely on learning the craft. Study thumbnails, titles and video structure. Publish consistently.
Do not obsess over your numbers. So the videos you publish in month 1 are rarely your best ones. They are your learning ones.
In months 3 to 9, growth typically becomes more visible. So your earlier videos start to accumulate search traffic. Your thumbnails improve.
Furthermore, you may land your first affiliate income from description links during this period, even before you reach Partner Programme eligibility.
In months 9 to 18, many creators who have published consistently reach the monetisation threshold. So ad revenue begins.
Furthermore, this is also when brands sometimes start reaching out for their first sponsorship conversations. The income is modest at this stage. However, it proves that the strategy is working.
Beyond month 18, the compound effect becomes clearly visible. Each video adds to a growing library of assets. Furthermore, older videos continue to generate traffic and income.
So the income graph typically looks flat for a long time and then begins to climb more steeply. Most people who quit do so in the flat phase, right before the curve begins.
Step 1: Choose Your Niche and Research It Thoroughly
Pick a niche that sits at the intersection of something you know well and something that has commercial value. So search YouTube for your intended topic. Look at what is already working. Identify the gaps in existing content that you could fill better.
Furthermore, use keyword research to find specific topics within your niche that people are actively searching for. A video that targets a specific search query will build traffic long after it is published. So treat each video as a searchable asset rather than a social media post.
Step 2: Set Up Your Channel Properly from Day One
Create your channel with a clear name and a well-defined focus. Set up your profile image, banner and channel description to communicate immediately who the channel is for. So a new viewer arriving on your channel page should understand within seconds whether your content is for them.
Furthermore, create a channel trailer video that explains what you cover and why someone should subscribe. This is the first video most new visitors see. So it is worth investing time in getting it right.
Step 3: Publish Consistently and Learn from Each Video
Consistency matters more than perfection. So 1 video per week for a year beats 10 videos in a burst followed by months of silence. Furthermore, each video you publish teaches you something about what your audience responds to. So study your YouTube Studio analytics after each video and look for patterns.
Watch time percentage is the most important metric to monitor. If viewers are leaving after the first 30 seconds, your opening is not engaging enough. If they are watching 80% of your video, you are doing something well. So use these signals to improve rather than simply counting views.
Step 4: Add Affiliate Links from Day One
You do not need to be in the YouTube Partner Programme to earn money from affiliate marketing. So add relevant affiliate links to your description from your very first video. For tool and software recommendations, always include your affiliate link. For every product you mention, check whether there is an affiliate programme available.
Furthermore, be transparent with your audience about affiliate links. State clearly in your videos that the description contains affiliate links. So honesty builds trust, and trust leads to higher click-through rates on your recommendations.
Step 5: Build an Email List Alongside Your Channel
Your YouTube channel can be taken away at any time by an algorithm change or a policy violation. So your email list is the 1 asset you own outright.
Build it from your very first video. Offer a lead magnet, such as a free guide, a checklist or a template. Mention it in every video.
Furthermore, your email list becomes a multiplier for every future video, product launch and sponsorship. So subscribers who also join your email list are your most valuable audience members because you can reach them directly without depending on the algorithm to show them your content.
What a Realistic Year 1 Looks Like
Months 1 to 3
Income is zero. You are learning and building. So this is the investment phase.
Every video you publish is a long-term asset that may not produce real returns for 6 to 12 months. Focus on improving your thumbnails, your on-camera presence and your research process.
Months 4 to 9
Small affiliate commissions may begin to appear. Your subscriber count is growing. Some videos are starting to rank in YouTube search.
So this is the phase where most beginners either push through or give up. Pushing through matters enormously here.
Furthermore, your earlier videos are beginning to compound. So views and watch time are climbing even when you have not published anything new that week. That is the beginning of the compound effect working in your favour.
Months 9 to 18
Many creators reach the Partner Programme threshold during this period. So ad revenue begins. Furthermore, your first sponsorship enquiries may arrive. Income in this phase ranges from a few hundred to a few thousand dollars a month, depending on your niche and publishing frequency.
The key insight is that the income you earn in month 15 is mostly built on the foundation you laid in months 1 to 6. So the early work is never wasted. It just takes time to express itself in the form of real income.
Getting Started: Your Next Step
If the YouTube income model appeals to you and you are ready to begin, the most important action is to start your first video rather than continuing to plan it. So choose your niche, set up your channel and publish something this week.
So can you earn money posting videos on YouTube? Yes. However, it requires a longer runway than most people expect, a smart niche selection and multiple income streams working together. Ad revenue alone is rarely enough to build a sustainable business. Furthermore, the creators who build real income treat YouTube as a platform for a broader content business rather than simply as an ad network.
The Income Is Proportional to the Effort
The data is clear. Only 9% of creators earn over $100,000 a year. However, that 9% did not arrive there through luck. They built consistently, studied their analytics, diversified their income and stayed the course through the flat part of the growth curve where most people leave.
Start Now
According to the YouTube Partner Programme overview, creators in eligible countries can join once they reach the required thresholds. So the system is accessible, and the starting point is the same for everyone.
The online income space rewards people who start early and stay consistent. So every month you wait is a month of compound growth you will not recover. Can you earn money posting videos on YouTube? Yes. The best time to find out for yourself is now.
Online Jobs for People with Social Anxiety: 10 Low-Stress Roles That Pay Well
You Are Not Alone in Feeling This Way
Online jobs for people with social anxiety are not a niche concept. Social anxiety disorder affects around 15 million US adults, making it the most common anxiety disorder in the country. Furthermore, the Anxiety and Depression Association of America reports that social anxiety typically begins around age 13. So millions of working-age adults are dealing with this condition every day, whilst also trying to build a career and pay the bills.
The standard workplace is a difficult setting for people with social anxiety. Open-plan offices, group meetings, impromptu conversations at the coffee machine and review sessions in front of colleagues are all challenging. So it is not weakness or avoidance to want a work setup that reduces that pressure. It is a practical response to a real situation.
Why Online Work Changes Things
Remote and online work removes the social triggers that make the office difficult for many people. You control when you respond to messages. Working in your own space at your own pace is fully possible.
Furthermore, async communication, which means writing instead of speaking in real time, is a genuine advantage. So people who think more clearly when they are not put on the spot benefit directly from that format.
So this article is not about hiding from the world. It is about finding a working model that plays to your strengths rather than forcing you to perform the way extroverts do.
What This Article Covers
This article covers 10 online roles that work well for people with social anxiety. Furthermore, it covers what each role realistically pays and the first steps to get started. By the end, you will have a clear and practical picture of which options suit your particular strengths.
A 2024 American Psychiatric Association poll found that 43% of US adults felt more anxious than the previous year. Furthermore, 58% of employees reported experiencing stress and anxiety at work in a separate study. So the workplace itself is a real anxiety trigger for a large portion of the workforce, not just people with diagnosed social anxiety.
Online work reduces several of the most common anxiety triggers at once. There is no commuting through crowded spaces. Furthermore, there is no open-plan office noise.
Furthermore, the nature of most online roles favours written communication, which gives you time to think before you respond. So the format itself is more comfortable for people who process information better outside of high-pressure social situations.
The Difference Between Avoidance and Strategy
It is worth saying clearly that choosing online work because it reduces your anxiety is a strategy, not avoidance. Avoidance means refusing to engage with what matters. Strategy means choosing the setting where you can do your best work.
Furthermore, many of the most effective people in business work remotely by design. So they do this not because they cannot handle an office, but because they produce better results away from one.
So building an online career is not a workaround or a compromise. For many people with social anxiety, it is simply the right choice.
The 10 Best Online Jobs for People with Social Anxiety
1. Freelance Writing
Freelance writing is 1 of the best online roles for people with social anxiety because the work is almost fully solitary. You research, you write, you submit. Most client communication happens over email. So you have complete control over when you respond and how much you say.
Entry-level freelance writers typically earn between $15 and $35 per article for short pieces on content platforms. Furthermore, as you build a niche and a portfolio, rates can reach $0.10 to $0.25 per word. So a 1,000-word article can earn $100 to $250. So the income trajectory is real if you specialise.
The practical starting point is to pick a topic you know well and write 3 sample articles. Publish them on a free platform like Medium. Then use those as your portfolio when you pitch clients or apply on platforms like Upwork.
2. Blogging and Affiliate Marketing
Blogging is 1 of the most anxiety-friendly income models. So you work fully at your own pace with no direct client pressure. You write posts, publish them and earn money through affiliate links, display ads or digital products. So there are no video calls, no open-plan office settings and no social situations to navigate.
The truth about blogging is that it takes time to build. Most bloggers earn little in their first 6 to 12 months. However, the income that builds after that is largely recurring. So a post you publish today can earn affiliate commissions for years without any further input.
Affiliate marketing is a natural partner for blogging. You recommend products and earn a commission when readers buy through your link. Furthermore, the niches that work best for social people with anxiety are often niche-specific topics they already know well, such as mental health, productivity, home working or introvert-friendly hobbies.
Proofreading is a role built for people who prefer accuracy over socialising. You read content produced by others and correct errors in spelling, grammar and punctuation. So it is quiet, focused work.
Entry-level proofreaders typically earn $15 to $25 an hour. Furthermore, as you specialise in legal or academic content, rates can reach $35 to $50 an hour. So the income ceiling is higher than most people expect for a beginner role.
The best starting point is a free or low-cost proofreading course. Then offer your services on Upwork or Fiverr, or reach out directly to publishers and marketing agencies who need editing support.
4. Data Entry and Virtual Administration
Data entry is 1 of the most direct entry points into online work. The role involves moving information from 1 source to another accurately and reliably. So it requires focus and precision rather than social confidence or phone calls.
Average yearly earnings for data entry roles in the US sit at around $38,867 a year. However, the real appeal for people with social anxiety is not the pay. It is the text-based, async nature of the work. So you complete tasks on your own schedule and communicate with employers over email rather than in real time.
Virtual administration is a step up from basic data entry. So it might include managing calendars, responding to emails, organising files and researching information for clients. According to ZipRecruiter, virtual assistants earn an average of around $60,000 a year at the experienced level in the US. So it is a role with genuine income potential once you build your skills.
5. Graphic Design
Graphic design is a strong fit for people with social anxiety who have a creative eye. The work is largely independent. You receive a brief, produce the design and submit it for feedback via email. So the day-to-day reality of freelance design involves very little of the kind of in-person social pressure that makes office life difficult.
Beginner graphic designers on platforms like Fiverr and Upwork typically charge $15 to $40 an hour. Furthermore, designers who build a strong portfolio in a specific niche can charge $50 to $100 an hour. So logo design, social media graphics and book covers are all strong areas to specialise in. So specialism pays considerably more than generalism.
Furthermore, tools like Canva let beginners produce polished-looking work without an expensive software subscription. So the barrier to entry is lower than it used to be.
6. Web Development and Coding
Web development is 1 of the highest-earning online roles available to people with no standard office background. Furthermore, it is a field where your portfolio matters far more than your ability to perform in social situations. So introverts and people with social anxiety regularly build strong careers in this space.
Entry-level junior web developers in the US earn a median of around $50,000 a year. Furthermore, experienced full-stack developers can earn $90,000 to $130,000 or more from home.
You do not need a computer science degree to start coding. Free courses on platforms like freeCodeCamp teach coding from scratch. Furthermore, most employers focus on what you can build rather than where you studied.
7. Transcription
Transcription involves listening to audio recordings and typing out the content accurately. So it is a role where typing speed and precision matter far more than social confidence. The work is solo, quiet and flexible in terms of hours.
Entry-level transcribers earn $15 to $25 per audio hour of content. Furthermore, experienced transcribers who work accurately and quickly can earn more, especially in specialised legal or medical transcription. So the income improves considerably as you build speed and accuracy.
Platforms like Rev and TranscribeMe hire beginners. So a short accuracy test is all that stands between you and your first paid job. Furthermore, general transcription can lead to more specialist work that pays a higher rate over time.
Social media management might seem like an odd choice for someone with anxiety. However, managing accounts for businesses is very different from personal social situations. So the role involves creating content and scheduling posts. Almost all of it happens behind a screen rather than in person.
Beginner social media managers typically charge $300 to $700 per month per client. So with 3 clients at that rate, you could earn $900 to $2,100 a month part-time. Furthermore, rates scale upward as you specialise in a platform or industry.
The practical first step is to pick 1 platform and study it thoroughly. Then build 3 to 5 sample posts or a mock content calendar. That gives you something concrete to show potential clients without prior paid experience.
9. Online Tutoring
Online tutoring works well for people with social anxiety who have knowledge in a subject area. So whilst it does involve one-to-one interaction, that happens over video with a single student. That is a very different situation from a meeting room full of colleagues.
Beginner tutors on platforms like Preply and Wyzant typically charge $15 to $25 per hour. Furthermore, tutors who specialise in popular subjects like maths or exam prep can charge $40 to $80 an hour as they build positive reviews.
Furthermore, English language tutoring for non-native speakers is very much in demand across the world. So if English is your first language, you have a practical starting point that requires no formal teaching qualification to begin.
10. Selling Digital Products
Selling digital products is 1 of the most anxiety-friendly income models. So the selling happens passively. You create a product once, list it on a platform and earn income when someone buys it. So there are no sales calls, no client meetings and no social pressure at the point of purchase.
Common digital products for beginners include templates, e-books, printable planners, spreadsheet tools and online mini-courses. So if you have skills in any area, whether it is budgeting, design or a hobby, you can package that knowledge into a product and sell it repeatedly.
Platforms like Etsy, Gumroad and Teachable make it simple to list and sell digital products. No technical expertise is required. Furthermore, a well-designed Canva template or useful planner can generate regular sales once it is listed.
What These Roles Have in Common
Asynchronous Communication
The best online jobs for people with social anxiety share 1 core feature. They are built around async communication. So you write an email and the other person responds in their own time.
You are not put on the spot. You are not expected to think and speak at the same time in a meeting room.
That format alone removes many of the most common anxiety triggers from the working day. Furthermore, written communication gives you time to compose your thoughts. So you can present your best self in every message rather than being judged under social pressure.
Flexible Hours and Autonomy
Most of the roles on this list offer real flexibility over your hours. So you can work during the times when your anxiety is lower. You can take breaks when you need them. Furthermore, you are not expected to be socially available throughout the working day.
That autonomy over your schedule is a genuine life quality improvement for many people with social anxiety. So it is not a trivial benefit. It changes the entire texture of a working day.
The Ability to Build on Your Strengths
People with social anxiety often have qualities that make them very effective in these roles. Attention to detail, clear written communication and thorough research habits are all traits that serve these roles very well. So a preference for doing things well rather than quickly is a genuine asset in online work.
So the goal is not to overcome your personality to fit a standard career mould. It is to find work that already suits who you are.
The biggest mistake beginners make is trying to do too many things at once. So pick 1 role that suits your natural strengths. Commit to it for at least 3 months before you think about pivoting. Furthermore, 3 months is the minimum time needed to build any real traction, whether in blogging, freelancing or transcription.
Build a Minimal Portfolio Before Applying
You do not need prior paid experience to build a portfolio. So, create 3 to 5 samples of the work you want to do.
For writing, publish short articles on a free platform. In design, create sample graphics using Canva. Also, for social media management, build a mock content calendar for a fictitious brand.
Furthermore, this process of creating samples is itself a form of skill-building. So you arrive at your first client interaction with a concrete example of your work rather than an apology for your experience level.
Start on Low-Pressure Platforms
For people with social anxiety, the thought of pitching clients can feel daunting. So start on platforms that structure the process for you. Upwork and Fiverr allow you to list your services and let clients come to you. Rev and TranscribeMe accept applications through a simple online form.
Furthermore, platforms like Etsy and Gumroad remove the pitching process fully for digital product sellers. So you list your product and wait for organic sales to build over time.
Use the Right Tools to Make the Work Easier
The right tools reduce friction and make the daily work of building an online income more manageable. For blogging and affiliate marketing, platforms like Systeme.io offer free plans that include email marketing and landing pages in 1 place. So you can build an email list from your blog without paying for multiple separate tools.
Rytr is an affordable AI writing tool that helps bloggers produce more content. So it is useful for people whose anxiety sometimes makes starting a piece of writing harder. So it is a practical support tool for people whose anxiety sometimes affects their ability to start.
The first 3 months of building any online income from scratch are almost always the hardest. Income is typically zero or very close to it. So this is the period where most people give up. However, it is also the period where the core work happens.
Every article you write and every skill you develop in the first 3 months is an asset. Furthermore, it compounds in value as your portfolio grows and your visibility increases.
Months 4 to 12
This is where the first reliable income typically begins. Freelance writers start landing regular clients. Bloggers see their first affiliate commissions.
Transcribers build speed and accuracy. Social media managers secure their first ongoing retainer.
Furthermore, income in this phase ranges widely. So expect anywhere from $100 to $1,500 a month, depending on your role and effort level.
Beyond Month 12
The bloggers and freelancers who push through the first year begin to see the compound effect work in their favour. Furthermore, online income scales much faster once you have a track record. So the effort in the first 12 months pays increasing returns in years 2 and 3.
According to FlexJobs, work-from-home roles are among the most sought-after by people managing mental health conditions. So the demand for these roles is growing steadily.
Managing Anxiety While Building an Online Career
Set a Simple Daily Routine
One challenge of online work is the lack of external structure. So, for people with social anxiety, this can make anxiety worse rather than better.
So set a simple daily routine with clear start times and end times. That structure gives your working day a clear shape. So it reduces the background anxiety of not knowing what comes next.
Furthermore, working in clear time blocks helps separate your working self from your non-working self. So you are not always half-working and half-anxious about whether you should be working.
Protect Your Energy
Social anxiety is tiring even when you are working alone. So be honest with yourself about when your energy is lowest and plan your most demanding work for your best times. Furthermore, limit the number of client calls or video meetings you take each week to a number that feels manageable.
Many online clients are perfectly comfortable with email-only communication. So it is fine to state your preferred communication method early in a working relationship.
Celebrate Small Wins
The progress of building an online income is slow and often invisible from the outside. Furthermore, it is easy to compare your month 2 to someone else’s month 24 and feel like you are failing. So set small, concrete goals for each week. Publishing 1 article, landing 1 new client or completing 1 transcription job are all real milestones in the early months.
Furthermore, the act of noticing progress, however small, is a genuine tool for managing the anxiety that builds when you cannot see where you are heading.
Getting Started: Your Next Step
If any of the roles in this article resonated with you, the most important step is to pick 1 and begin. So do not wait until your anxiety feels better. Do not wait until you feel ready.
Furthermore, anxiety rarely disappears before action. It usually reduces after you have taken the first step and survived it.
Online jobs for people with social anxiety are not a niche workaround or a lesser path. They are a smart, practical choice for people who know that they do their best work away from the social pressures of a standard office. So choosing remote, async work is not a sign of limitation. It is a sign of self-knowledge.
The Income Is Real
The roles in this article range from entry-level data work paying around $38,000 a year to web development roles paying over $100,000. So the income available through online work is real and real. Furthermore, it does not require you to sacrifice your mental well-being in order to earn it.
Start Where You Are
The online income journey almost always starts slowly. However, it builds reliably for people who stay consistent. So if you have been putting off starting because the anxiety of the process feels too big, let that go. Furthermore, the first step is always the smallest one.
Pick 1 role. Build 3 samples. Apply to 5 opportunities this week.
That is enough to begin. Online jobs for people with social anxiety exist in real numbers and pay real money. The only question left is when you are ready to go after them.
Online Jobs for People with No Experience: 10 Real Options That Pay
The Question Worth Asking Honestly
Online jobs for people with no experience exist in much greater numbers than most people realise. However, they are also surrounded by a lot of noise.
So, before we get into the real options, it is worth saying clearly. There is no single trick that earns $2,000 a week from your sofa with zero effort. That kind of promise belongs in the bin. What does exist is a growing range of genuine online roles that require no prior experience and can pay a living wage once you put in the groundwork.
Why the Online Job Market Has Changed
The rise of remote work has shifted what employers need. Many companies now hire for attitude, basic digital literacy and a willingness to learn rather than for years of prior employment. Furthermore, the freelance economy has created a parallel track where individuals can build skills, find clients and grow income on their own timeline.
So this article is for anyone starting from zero. Whether you have been out of the workforce or are switching careers, these options are worth knowing about. So they apply to anyone looking to earn online without a degree or a long CV.
What This Article Covers
This article covers 10 online roles that are open to beginners. Furthermore, it covers what they honestly pay and the first steps to land your first client or role. Furthermore, it includes honest notes on timelines and effort. So you can make an informed decision rather than a hopeful guess.
What Makes an Online Job Truly Entry-Level?
The Core Criteria
A genuine entry-level online job meets 3 specific criteria. It does not require a relevant degree as a condition of applying. It does not require years of prior experience in the same field. Furthermore, it offers enough of a pay rate to make the time investment worthwhile.
So many jobs that are labelled “no experience required” still expect strong soft skills, basic computer skills and the ability to write clearly in writing. That is not the same as requiring a formal background. So whilst these roles are open to them, they do still require effort and a professional manner.
What to Watch Out For
Not every “online job, no experience needed” listing is genuine. Some roles pay below minimum wage once you account for your time. Some platforms charge joining fees or require you to buy starter kits. Furthermore, some commission-based roles dress up multi-level marketing as remote sales work.
So the safest way to find real opportunities is to use trusted platforms or apply directly on company career pages. Legitimate employers do not ask you to pay before you start working.
The 10 Best Online Jobs for People with No Experience
1. Virtual Assistant
Virtual assistant work is 1 of the most open to online roles for complete beginners. As a virtual assistant, you handle administrative tasks for business owners, executives and entrepreneurs. So your work might include managing email inboxes, scheduling appointments or handling social media accounts.
The appeal of virtual assistant work is that it draws on skills most people already have. If you can organise your own life and handle multiple tasks at once, you have a strong starting point. According to Upwork, freelance virtual assistants charge between $18 and $35 an hour on average.
So as a beginner, expect to start at the lower end of that range. However, rates rise quickly as you build a track record. Many virtual assistants reach $25 to $40 an hour within 12 months.
2. Freelance Writing
Freelance writing is 1 of the most popular online jobs for people with no experience because the barrier to entry is low. You do not need a journalism degree. You do not need a writing portfolio from a previous employer. So what you need is the ability to research a topic, write clearly and meet a deadline.
Beginner freelance writers typically start on content platforms or by pitching small businesses directly. Entry-level rates on platforms like Upwork run from $15 to $35 per article. So as you build a portfolio, those rates can climb to $0.10 or more per word. That puts a 1,000-word article at $100 or higher.
The most practical starting point is to write 3 to 5 sample articles on topics you know well. Publish them on a free platform like Medium and use them as your portfolio. Furthermore, pick a niche early. Generalist writers earn less than those who specialise in finance, health or technology.
3. Data Entry
Data entry is the most direct entry point into online work for people with no prior experience at all. The role involves taking information from 1 source and entering it accurately into another. So you might move details from a paper form into a spreadsheet or database.
Average yearly earnings for data entry roles in the US sit at around $38,867. So it is not the most lucrative option on this list. However, it is 1 of the easiest to break into. Furthermore, it builds habits of accuracy and speed that are valuable in more advanced roles.
Furthermore, data entry work is often available on a part-time or flexible schedule. So it suits people who need to build an online income gradually alongside other commitments.
4. Social Media Management
Social media management is a role that plays to the strengths of people who already use platforms like Instagram, TikTok or LinkedIn regularly. Businesses need someone to create posts, respond to comments and schedule content. So tracking basic results data is also part of the role. So if you understand how these platforms work, you have a usable starting skill.
Beginner social media managers typically charge between $300 and $700 per month per client. So with 3 clients at that rate, you could earn between $900 and $2,100 a month part-time. Furthermore, rates scale upward as you show results and take on more complex work.
The practical first step is to pick 1 platform and learn it thoroughly. Then build a small portfolio from there. Offer to manage social media for a local business at a reduced rate in exchange for a review. That first case study is more valuable than any certificate.
Many companies hire remote customer service representatives with no prior experience in the specific industry. So if you can speak patiently, solve problems under pressure and type quickly, you have the core skills required.
Remote customer service roles typically pay between $14 and $20 an hour at the entry level. So, full-time at that rate puts yearly income between $29,000 and $41,000. Furthermore, many companies provide full training before you start. So the lack of prior experience is not the barrier it might seem.
Companies like Amazon, Apple, American Express and many online retailers hire remote customer service agents regularly. Job boards like FlexJobs and Indeed list hundreds of these roles. So searching for “remote customer service no experience” on a trusted platform is a practical first step.
6. Online Tutoring
Online tutoring is an excellent online job for people with no formal teaching experience. You do not need a teaching qualification to tutor. So what you need is solid knowledge of a subject and the ability to explain it clearly to someone who is struggling.
Platforms like Preply, Tutor.com and Wyzant connect tutors with students. Beginner rates on these platforms start at around $15 to $20 an hour. However, tutors who specialise in high-demand subjects like maths or exam prep can charge $40 to $80 an hour as they build reviews.
Furthermore, demand for English language tutoring from non-native speakers is very strong. So if English is your first language, you have a natural starting point that needs no formal qualification.
7. Proofreading and Editing
Proofreading is a role that suits detail-oriented people who spot errors instinctively. You read content created by others and correct spelling, grammar and punctuation mistakes before publication. Furthermore, editing goes a step further by improving structure, flow and clarity.
Entry-level proofreaders typically earn $15 to $25 an hour. So, as you specialise in legal or academic editing, rates can reach $35 to $50 an hour. Furthermore, the role is fully remote and often flexible, which makes it a practical fit for beginners building online income around other commitments.
The best way to start is to take a free or low-cost proofreading course to sharpen your skills. Then offer your services on freelance platforms or by reaching out directly to marketing agencies and publishers.
8. Transcription
Transcription involves listening to audio or video recordings and typing out the spoken content accurately. So typing speed and accuracy matter more than any formal background.
Entry-level transcribers typically earn $15 to $25 per audio hour. So the actual time to transcribe 1 hour of audio is typically 3 to 4 hours. That puts the effective hourly rate at around $5 to $8 to start.
That is honest. However, experienced transcribers who work quickly and accurately can earn $20 to $25 per audio hour, which improves the maths considerably.
Platforms like Rev, TranscribeMe and GoTranscript hire beginners with no prior experience. So a short test is usually all that stands between you and your first paid assignment. Furthermore, general transcription can lead to more specialised legal or medical transcription roles, which pay much higher rates.
9. Affiliate Marketing and Blogging
Affiliate marketing is 1 of the online income models that requires no prior experience to start and no upfront product inventory to manage. You create content, such as a blog, YouTube channel or social media account. Then you recommend products and earn a commission when readers purchase through your link.
The honest truth about affiliate marketing is that it takes time. Most affiliates earn little or nothing in the first 6 to 12 months. However, the income that builds after that is largely recurring. So a post you write today can earn commissions for years with no further work.
Affiliate marketers who build genuine authority in a niche can earn between $1,000 and $10,000 or more per month. So the income depends on traffic and the commission levels of the programmes they promote.
Furthermore, the niche you choose matters a great deal. Software and business tools tend to carry higher commission levels than physical products. So beginners are often better served by promoting tools they actually use rather than chasing the highest rate.
So it is the best starting point for anyone approaching affiliate marketing from zero.
10. Selling Digital Products
Selling digital products is an option that requires effort up front and very little ongoing work once the product is created. So the entry point is higher in terms of time than some other roles on this list. However, the income potential per hour of effort is also higher.
Digital products for beginners include templates, guides, printables, e-books and online courses. So if you know any area, whether it is budgeting, fitness planning or design basics, you can package that knowledge into a product and sell it repeatedly.
Platforms like Etsy, Gumroad and Teachable make it possible to sell digital products with no technical expertise. So the barrier is lower than it appears. Furthermore, a well-designed Canva template or a budget spreadsheet can sell dozens of times a month with no further input once it is listed.
How Much Can You Realistically Earn Starting from Zero?
The Entry-Level Reality
According to ZipRecruiter, the average annual pay for entry-level online roles in the US sits at around $40,596 a year. So that works out to roughly $19.52 an hour. Furthermore, salaries range from around $25,000 at the lower end to over $83,500 for top earners in more skilled roles.
So the starting point is modest but honest. Entry-level online work is not a shortcut to a very high salary. However, it is a real and open path to income that grows as your skills grow.
The Growth Trajectory
The important thing to understand is that online roles reward effort and specialism over time. A virtual assistant who starts at $15 an hour and learns email marketing and CRM tools can charge $40 to $60 an hour within 18 to 24 months. A freelance writer who starts at $0.03 per word and develops a niche can reach $0.15 to $0.25 per word within a similar timeframe.
Furthermore, online income models like affiliate marketing and digital products do not have the same direct link between hours worked and income earned. So they take longer to build, but can produce income that far exceeds what an hourly rate allows.
What Affects Your Starting Pay
Several factors shape how much you earn when you are starting from zero. The platform you use matters. Freelance platforms often pay less than direct clients.
Your comms skills matter because employers and clients form impressions quickly in text-based interactions. Your niche matters because specialist knowledge commands a premium. Furthermore, your availability and reliability matter more than almost anything else. Clients who find a dependable beginner will often stick with them and pay more over time.
How to Get Your First Online Role with No Experience
Step 1: Pick 1 Path and Commit to It
The biggest mistake beginners make is trying everything at once. So pick 1 role from this list and focus only on it for at least 3 months. Whether you choose virtual assistant work, freelance writing or social media management, commit to learning that path properly before adding anything else.
Furthermore, the second-biggest mistake is abandoning a path before the compound effect has had time to work. So give your chosen path a genuine runway before deciding whether to pivot.
Step 2: Build a Minimal Portfolio Before You Apply
No prior work history does not mean no portfolio. So, create 3 to 5 samples of the work you want to do.
For virtual assistant work, write up a mock system for managing a fictional client’s inbox. For writing, publish 3 articles on topics you know well. Also, for social media management, create a sample content calendar for a made-up brand.
Furthermore, this process of creating samples is itself a form of practice. So you arrive at your first client interaction with a clear example of what you can do rather than an apology for what you have not done yet.
Step 3: Use the Right Platforms for Your Role
Different platforms suit different roles. For freelance writing and virtual assistant work, Upwork and Fiverr are the most open starting points. For customer service roles, direct applications through company websites or specialist remote job boards are more effective.
According to FlexJobs, using niche job boards that vet their listings is the safest approach for beginners. So platforms that screen for genuine employers reduce the risk of wasting time on scam listings or low-quality work.
Furthermore, LinkedIn is an underused tool for entry-level job seekers. So set up a professional profile, connect with people in your target industry and apply for roles that interest you.
Step 4: Price Yourself Honestly but Not Too Low
Many beginners undercut themselves so badly that they attract clients who expect unlimited revisions and impossible turnaround times. So price your work at a rate that is honest about your beginner status without suggesting your time has no value.
A starting rate of $15 to $20 an hour signals that you are a beginner, but a professional one. Furthermore, it leaves room to raise your rates as you gain experience rather than undercutting yourself from the start.
Step 5: Treat Every First Client as a Reference
Your first client is not primarily a source of income. Your first client is a source of a review, a case study and a referral.
So deliver well beyond what was agreed. Respond quickly. Hit every deadline. Handle problems without drama.
Furthermore, always ask for a written review once the work is done. That review is the base of your portfolio. So it makes every next client conversation easier. So extra effort in your first engagement pays dividends well beyond the immediate fee.
Building Toward a Full-Time Online Income
The Realistic Timeline
Most people who build a full-time online income from zero take between 12 and 24 months. So the first 3 months typically produce little or no income. The second quarter is where dependable earnings begin. By month 12, many dedicated beginners are earning between $1,000 and $3,000 a month.
Full-time income, which most people define as replacing or exceeding their previous salary, typically takes longer. Furthermore, it requires spreading across multiple income streams rather than relying on 1 single client.
Combining Income Streams
The most financially resilient online workers combine multiple streams. So a virtual assistant might also write for clients. A freelance writer might build an affiliate blog. A social media manager might sell a template pack on Etsy.
These mixes do not happen overnight. However, building a second income stream from month 9 or 10 means that by month 18, you have 2 sources of online income rather than 1. Furthermore, each added stream reduces the risk that any single client change can disrupt your total income.
The Role of Skill Development
The fastest way to increase online income from an entry-level start is to invest in skills. So a virtual assistant who learns basic bookkeeping can charge more. A freelance writer who learns SEO can charge more. A social media manager who learns paid advertising can charge much more.
Many of these skills can be learned for free through YouTube and Google’s own certificate programmes. Furthermore, the time spent on a new skill pays back quickly in the form of higher client rates. So learning new skills is not optional for beginners who want to grow beyond entry-level pay.
Getting Started: Your Next Step
The best time to start building an online income is now, not after you have figured everything out. So pick the 1 role that suits your natural strengths. Create 3 simple portfolio samples. Apply to your first 5 roles or clients this week.
Online jobs for people with no experience are genuinely open in 2026. However, they require a realistic mindset.
So the first step is always modest. The first rate is always lower than the rate you will earn over time. The first client is always harder to land than the 5th.
The Income Grows with the Effort
Entry-level online roles average around $40,596 a year, according to ZipRecruiter data. So that is a real income, not a side-hustle supplement. Furthermore, many of the paths on this list lead to much higher earnings with 12 to 24 months of focused effort.
Start Now Rather Than Later
Every month you delay is a month of skill-building and track record you do not have yet. So the compound effect of consistent effort over time is the most important factor in online income success. It does not reward waiting.
Furthermore, the online job market rewards people who show up reliably, write clearly and deliver what they promise. None of those qualities requires experience to develop.
So if you have been wondering whether online jobs for people with no experience are a real opportunity or just a marketing phrase, the honest answer is both. The opportunity is real. However, it requires the same effort and consistency that any income-generating path does.