Make Money Writing Poetry Online in 2026 (Yes, Here’s How)
So if you have ever wondered whether you can make money writing poetry online in 2026, the answer is yes. Poetry is not just an art form anymore. In fact, it has become a genuine income stream for thousands of writers around the world. This guide covers 7 real income streams that working poets are building right now.
Why the Poetry Market Is Bigger Than Most People Think
Poetry has real commercial value online in 2026.
Buyers search for custom poems on Etsy and Fiverr every single day. So the demand for poets who write on request is growing, not shrinking. In fact, greeting card companies, advertising agencies and personal gift buyers all pay for poetic writing regularly.
Also, self-publishing and digital content have created new income paths for poets. You no longer need a major publisher to reach a paying audience. Instead, you can sell directly through your own site or a simple digital listing. So the barriers that once kept poets from earning have largely gone.
Notably, brands are beginning to see the power of poetic language in their marketing. Short, memorable lines perform well on social media and in advertising. That opens up a commercial writing lane that most poets have never thought to explore. Furthermore, it pays significantly better than most traditional poetry markets.
In fact, a poet who builds even 2 or 3 income streams has the potential to earn a reliable monthly income. The key is knowing which streams to prioritise. So the rest of this guide walks you through each one in practical detail.
7 Ways to Make Money Writing Poetry Online in 2026
1. Sell Custom Poems as a Service
This is the fastest route to your first paid poetry work.
Custom poem writing means a buyer pays you to write a poem to order. Weddings, birthdays, memorials, anniversaries and corporate events are the most common briefs. So the audience for this service is wide and covers almost every occasion imaginable.
In practice, most sellers charge $20 to $75 per poem. Etsy, Fiverr and Gumroad are the most popular platforms to list this service. You set up a listing, describe your style and tone, then accept briefs from buyers when they arrive.
Importantly, once you build a handful of strong reviews, repeat orders follow steadily. The income from custom poems is not passive. But it is reliable, repeatable and relatively fast to start earning.
Also, you can add value by offering extras such as a printed version or a voice recording of the poem. Each add-on increases the value of a single order without a great deal of extra time. So your earnings per transaction grow as your range of options expands.
For the best results, focus your listing on a single niche. Wedding poems, memorial verses or birthday tributes all attract specific and motivated buyers. In fact, focused listings tend to rank higher and convert better than broad, generic offerings.
Also, take time to study similar listings on Etsy and Fiverr before you set your prices. Look at what strong sellers charge and how they present their services. In practice, your listing title and description matter as much as the quality of your poetry itself. So treat the presentation of your service with the same care you give to the poems you write.
2. Submit to Literary Magazines and Journals That Pay
Not all publications pay poets. But many of the best ones do.
Poetry magazine, published by the Poetry Foundation, pays $10 per line with a minimum of $300 per accepted poem. The Threepenny Review pays $200 per poem. Epoch pays $50 per accepted piece. So if your work is strong and your submissions are targeted, the income from literary journals can add up meaningfully.
For a searchable database of paying markets, Poets & Writers’ guide to literary magazines that pay lists rates, reading periods and submission guidelines for hundreds of publications. It is the most comprehensive free resource of its kind. So it should be your first stop when building a submission list.
In practice, literary magazine income is slow to arrive. Response times run from 6 weeks to 6 months. So treat this stream as part of a broader earning strategy rather than your primary source of income.
That said, journal credits build credibility that opens other doors. Teaching opportunities, speaking engagements and brand commissions all respond well to a track record of publication. Importantly, the two types of work support each other over time.
Also, keeping a submission tracker is essential once you target multiple journals at once. A simple spreadsheet prevents costly double submissions to journals that only allow exclusive work. In practice, the best markets respond well to poets who read the guidelines carefully and follow them precisely. So thoroughness here is as valuable as the quality of the poems themselves.
Greeting card writing is one of the most overlooked income streams for poets.
Large publishers like American Greetings, Hallmark and Blue Mountain actively seek freelance verse writers. Accepted writers earn $50 to $300 per accepted piece. In fact, each piece is just 4 to 8 lines, which means the rate per word is strong compared to most content work.
In practice, acceptance rates at major publishers are low. But smaller card companies, stationery sellers and gift product brands are far more accessible. You can find them through Etsy seller communities, LinkedIn searches or a direct online search for freelance verse submissions.
Importantly, this commercial style is a skill worth developing. It is tight, clear and emotionally direct. That makes it genuinely useful across other markets too, not just greeting cards.
Furthermore, once you understand what sells in the card market, you can write for similar products. Gift tags, art prints, mugs and tote bags all use short verse. So 1 set of skills opens up several related income channels at once.
Also, speed matters in commercial poetry writing. The faster you write clean, saleable verse, the stronger your effective hourly rate becomes. In fact, many experienced card writers complete several pieces per hour and earn a solid income from it.
4. Sell Digital Poetry Products Online
Your poems can earn money around the clock with no ongoing effort from you.
Selling digital products means creating a file once and listing it for sale. Buyers download it instantly after purchase. In practice, Gumroad, Etsy and Payhip are the most reliable platforms for digital poetry products.
Popular product types include PDF poetry collections, printable poetry journals, verse packs for social media and poetry prompt sets for other writers. Most sell for $4 to $15 per download. Importantly, once the listing is live, it earns passively without any further work from you.
For the best results, target a specific and motivated buyer. A wedding poem collection, a grief verse pack or a set of daily reflection poems all serve a clear need. So does a birthday poem pack aimed at buyers who want something personal to share.
Also, you can combine digital products with your custom poem service. A low-cost digital download gives buyers a sample of your style before they commit to a full custom order. In fact, many poets find that digital product buyers become repeat custom poem clients later on.
Notably, building an audience on Pinterest or Instagram drives traffic to your digital listings over time. So the more content you share online, the more your passive product income has room to grow steadily.
In fact, Pinterest is one of the most effective platforms for driving traffic to digital poetry products. Pins have a long shelf life compared to most social media posts. So a well-made pin for each of your product listings can drive steady sales for months after you first publish it.
5. Start a Poetry Blog with Affiliate Marketing
A poetry blog can earn in ways that go well beyond selling your own poems.
The most effective model is affiliate marketing. You write helpful content for the poetry and creative writing niche. Within that content, you recommend tools, platforms and courses and earn a commission on each sale made through your link.
So what kinds of products suit a poetry blog? Writing tools, course platforms, book publishing software and journaling apps all appeal to a poetry audience. Systeme.io pays 60% recurring commissions to its affiliates. That means every reader you refer keeps paying you month after month.
According to Authority Hacker, the average affiliate marketer earns over $8,000 per month. That is a long-term target rather than a first-month result. But it shows clearly what becomes possible when content and the right affiliate programmes are combined.
It covers everything from setting up your first website to earning your first commission. So it is the ideal starting point for any poet who wants to build a long-term content income.
Also, a poetry blog supports every other income stream you build. It drives traffic to your custom poem listings and digital products. In fact, content marketing is the single best lever for growing a poetry business online over the long term.
6. Teach Poetry Online
Teaching is one of the most scalable income models any writer can build.
You can teach through recorded courses, live workshops or one-to-one coaching. Platforms like Skillshare, Teachable and Systeme.io give you the tools to sell a course without any technical knowledge required. In fact, a course you record once can sell for months or even years with no further effort.
Notably, you do not need to be a widely published poet to teach effectively. You need a clear and structured approach to teaching a specific skill. A course on writing love poems, a workshop on spoken word or a coaching programme for poets preparing a first collection all have a well-defined and motivated audience.
Realistic earnings range from $20 per Skillshare enrolment to $200 per seat on a self-hosted workshop. Many poetry teachers earn $500 to $3,000 per month from a mix of courses, coaching and live events. But like most online income, results build steadily as your reputation grows.
Also, live workshops command higher rates than recorded courses and generate income immediately. A 2-hour online workshop with 20 seats at $30 each earns $600 in a single afternoon. So live teaching is worth adding to your income plan from an early stage.
In fact, you can start by offering a free taster workshop to build your first audience. A single free session of 30 to 45 minutes introduces your teaching style to potential paying students. In practice, many poetry teachers fill their first paid workshop from the audience a free taster attracts. So a free session is not lost income but a direct investment in future paid enrolments.
7. Write Poetic Copy for Brands and Businesses
Brands want words that stand apart from standard commercial writing.
Most brand copy is flat and functional. So when a business needs something memorable, they often turn to writers with a poetic instinct and a strong ear for language. Taglines, social media captions and campaign slogans all reward the kind of rhythm and imagery that poets understand instinctively.
In practice, freelance brand copywriters with a creative background earn $50 to $150 per hour. The rates are strong, and the work is varied. Furthermore, once you have a small portfolio of brand work, you can pitch agencies directly rather than waiting for work to come to you.
For poets who want to explore all available paid writing markets, Reedsy’s guide to poetry submissions covers both literary and commercial options in a single well-structured resource. It includes rates, guidelines and useful tips for building a writing income. So it is a practical first reference for any poet building toward consistent paid work.
Also, brand writing builds skills that strengthen your own poetry. Each client brief sharpens your understanding of audience, tone and word economy. In fact, the discipline of writing to a brief makes you a better poet across every other context.
Income depends on which streams you build and how consistent you are.
A poet who combines custom orders, digital products and journal submissions might earn $500 to $1,500 per month within 6 to 12 months of starting. That is a realistic figure for someone working part-time on their poetry income. In fact, the more streams you add, the more stable your monthly total becomes.
For poets who add a blog with affiliate marketing, the long-term ceiling is much higher. Affiliate income builds as your content grows and your search rankings improve. So a blog earning $100 per month in year 1 might earn $1,000 or more per month by year 2 or 3.
That said, poetry is not the highest-paying niche in commercial writing. But the advantage is that the work stays fulfilling. So your motivation to keep creating holds strong even through the quieter early months when results are still building.
Importantly, the income from poetry tends to build more slowly than most people expect. The first 3 to 6 months are often the quietest period. But every listing you add, every piece of content you publish and every submission you send is building a foundation that compounds over time. So patience is arguably the most valuable skill in this entire process.
How to Start Earning From Your Poetry Today
You do not need to pursue all 7 income streams at once.
In fact, the smartest approach is to pick 2 that match your current skills and available time. Custom poems and digital products pair well for anyone who writes efficiently. A blog with affiliate marketing suits those who prefer building for the long term.
Importantly, treat your poetry income like a business from day one. Keep clear records of what you earn and what you spend. Track which markets respond well and which platforms drive the most product sales.
Also, build an email list as early as possible. A list of 300 engaged readers who love your work is worth far more than 10,000 social media followers. Social platforms change their rules without warning. But your email list is yours to keep regardless.
So start with 1 income stream, build it properly and then add the next. The poets who earn reliably online are not always the most talented ones. They are the ones who show up consistently and treat their creative work as a real business.
Furthermore, many poets underestimate the value of consistency over intensity. Working on your poetry income for 1 focused hour every day beats a 7-hour session once a week. In practice, the steady buildup of content, listings and submissions is what builds a reliable income over 12 months. So make your poetry business a daily habit rather than an occasional effort.
Common Mistakes Poets Make When Trying to Earn Online
Most beginners make the same errors when starting out.
The first is relying entirely on literary magazine submissions for income. Journals rarely accept, respond slowly and pay months after publication. So this stream alone will not build the kind of financial stability most people need.
The second mistake is underpricing custom work. Many poets charge $5 to $10 per poem when buyers are willing to pay $30 to $75 for something well-crafted. In fact, higher prices often attract better clients who value your work more highly. So raise your prices with confidence.
The third mistake is ignoring content marketing and SEO. If buyers cannot find your listings or your blog, you will not earn from either. So invest time in learning the basics of search optimisation, or at least use the right keywords in your platform listings.
Also, the fourth mistake is quitting too soon. Most online poetry income takes 6 to 12 months to build real momentum. The poets who push past month 3 are steadily the ones who go on to earn consistently and well.
Furthermore, many poets fail to build a professional online presence early on. A simple website with a portfolio, a contact page and a clear description of your services makes a strong impression on potential buyers. In fact, buyers are far more likely to place a custom order with a poet who has a credible and clear online presence. So treat your website as a business asset from the very start.
Start Building Your Poetry Income in 2026
There has never been a better time to make money writing poetry online in 2026. The tools are accessible, the platforms are free to join, and the market for poets has never been wider. So the only barrier left is taking the first step.
It is built for beginners and covers everything from your first listing to your first commission. So take the first step today and start turning your poetry into a real income.
The poets who succeed online are not always the most gifted. They are the ones who start, stay consistent and keep building. That is the real secret behind every poet who manages to make money writing poetry online in 2026 and keeps growing that income year after year.
Disclosure: This page contains affiliate links. If you sign up through my links, I may earn a commission at no extra cost to you.
The 7 Best Passive Income Ideas for Students in 2026
So if you are a student looking to earn money around your studies, the best passive income ideas for students in 2026 are exactly where to start. Passive income does not mean doing nothing. But it does mean doing the work once and getting paid repeatedly from that effort.
You build a website, upload a product or set up a system. After that, the income flows while you focus on the rest of your life. This guide covers 7 real, proven ways to build that kind of income from scratch as a student, without a large budget or years of experience.
Why Passive Income Makes Perfect Sense for Students
The timing could not be better than right now.
As a student, you have 2 things that most working adults do not. First, you have time to experiment without the pressure of a mortgage or dependents. Second, you have access to skills and knowledge that people genuinely pay for. In fact, many of the strongest passive income streams available today were built by students who simply shared what they already knew.
Also, the cost of living is rising sharply. In fact, a 2025 Bankrate survey found that 56% of Americans say they need more income than they currently earn to feel financially secure. For students, that pressure is even harder.
Notably, tuition costs, rent and food all hit at the same time. Passive income will not fix that overnight. But even an extra $200 to $500 per month gives you real breathing room and far less financial stress.
Furthermore, the tools available in 2026 are better than ever before. You can build a website for free, sell products without holding stock and reach a global audience from a laptop in your room. So the barrier to entry for building passive income has never been lower.
In fact, the student years are arguably the best time to experiment with new income ideas. You have energy, flexibility and the internet at your disposal. Mistakes at this stage cost very little and teach you a great deal. So starting now, even with just 2 to 3 hours a week, puts you ahead of most people your age.
The 7 Best Passive Income Ideas for Students in 2026
1. Affiliate Marketing
Affiliate marketing is the single best starting point for most students.
You promote products made by other companies. When someone buys through your unique link, you earn a commission. In fact, you do not need your own product.
You do not handle shipping or customer service. In practice, you can start with nothing more than a free website and a willingness to write content that helps people make better decisions.
So how does it work in practice? You pick a niche, such as study tools, tech products or personal finance. You write articles that answer the questions your audience is already searching for online.
Then you add affiliate links to relevant products throughout that content. Every time a reader clicks and buys, a commission goes into your account.
Notably, some of the best affiliate programmes pay recurring commissions. Systeme.io, for example, pays 60% recurring commissions to its affiliates. That means every customer you refer keeps paying you month after month. For a student, even 10 active referrals at $27 per month adds up to over $162 in steady monthly income.
According to Authority Hacker, the average affiliate marketer earns over $8,000 per month. That is not a figure you will reach in month 1. But it shows clearly what is possible with the right approach and enough consistency over 12 to 18 months.
The best way to get started is to pick a reliable platform, build a simple website and begin publishing content that your audience finds useful.
This is one of the most student-friendly options on this entire list.
You already create notes, summaries, and study guides as part of your course. So why not sell them? Platforms like Gumroad, Etsy and Payhip let you upload digital files and charge a small fee for each download. You set it up once and earn from it repeatedly without any extra effort on your part.
In practice, the most popular digital student products include lecture summary packs, revision flashcards, essay templates and subject-specific cheat sheets. You can also create templates for tools like Notion, Excel or Google Docs. Study planners, budget trackers and project layout templates sell very well among other students. A well-made Notion template can sell for $5 to $20 and attract buyers for years after you first upload it.
The income from this model starts modestly. But it is truly passive once the file is live. You do the work of creating the product once.
After that, the listing earns on its own without any further effort from you. For students already producing detailed notes and study materials, this is one of the quickest ways to turn existing work into ongoing income.
3. Print-on-Demand
Print-on-demand removes the biggest barrier to selling physical products online.
You do not need to buy stock, rent storage space, or manage shipping at all. Instead, you design products such as T-shirts, mugs, phone cases and tote bags. When a customer places an order, a third-party supplier prints and ships the item directly to them. You simply keep the profit margin.
Platforms like Redbubble, Merch by Amazon and Printful make it simple to get started. You upload your designs and set your prices. The platform handles printing, shipping and customer service. So your role is design and marketing, nothing else.
Notably, niche audiences are the key to making this work. Instead of trying to appeal to everyone, focus on a specific community. Funny quotes for engineering students, minimalist prints for bookworms or subject-specific humour tend to perform far better than broad, generic designs. In fact, many print-on-demand sellers earn $500 to $2,000 per month simply by targeting a loyal niche with consistent, original output.
The upfront time is the main investment here. Building a strong collection of 20 to 30 products takes real effort. But once they are live and discoverable, the income is largely hands-off.
4. Stock Photography and Digital Content
If you have a smartphone with a decent camera, this model is open to you right now.
Stock platforms like Shutterstock, Adobe Stock and iStock pay a royalty every time someone downloads your image or video clip. You upload the content once, and it earns passively from that point on. The more files you upload, the more you stand to earn over time.
Importantly, demand for authentic and real-world photography is growing fast. Stock sites are actively seeking images of everyday life, study environments, diverse people and modern work spaces. You do not need expensive professional equipment. A well-lit, well-composed shot on a good smartphone can sell to buyers worldwide.
Also, you can extend this model to short video clips, sound effects and vector graphics. Adding more content types means more income streams from the same set of skills. Students with a natural eye for design or photography are well placed to build a solid passive library over time. Realistic income in the early stages sits around $50 to $200 per month, growing steadily as your library of uploaded content expands.
YouTube is one of the most powerful long-term passive income platforms available to students.
Once a video is published, it can earn through ad revenue, affiliate links and sponsorships for years after the upload date. The key is choosing a topic with ongoing search demand rather than trend-based content that fades fast. Study tips, subject explainers, product reviews and personal finance content all perform well in student-friendly niches.
However, YouTube does have a threshold to clear before you earn from ads. You need 1,000 subscribers and 4,000 watch hours before the platform lets you apply to monetise. That typically takes 6 to 12 months of steady uploads for a new channel. So it is clearly a long game and not a quick fix.
In practice, the strongest approach is to treat your YouTube channel as 1 part of a wider content system. Link to affiliate products in your video descriptions. Point viewers to a simple website where you have additional content and offers waiting for them. So each video becomes part of a broader system that earns from multiple directions at the same time.
Notably, student creators who reach a modest audience of 10,000 to 50,000 subscribers often earn $2,000 to $10,000 per month from a mix of ads, affiliates and sponsorships. The income is not guaranteed. But for students with a genuine interest in a topic, it is one of the most rewarding options on this list.
6. Investing in Index Funds
This is the most hands-off passive income method of all.
Index funds pool your money with other investors and track the performance of a broad market index, such as the S&P 500. Historically, the S&P 500 has returned an average of around 10% per year over the long run. So if you invest $1,000 as a student and leave it untouched for 20 years, it can grow to roughly $6,700 without you doing anything at all.
In fact, time is your greatest investment asset as a student. Starting at 20 rather than 30 gives compound growth an extra decade to work. Even small, regular contributions build a real portfolio over time.
Apps like Fidelity, Vanguard and Schwab allow you to invest from as little as $1 per transaction. So setting aside $25 to $50 each month builds a solid financial habit and a growing fund.
That said, investing does carry risk. The value of your fund can fall as well as rise. So only put in money you do not need in the short term. But for long-term student wealth building, low-cost index funds remain one of the most reliable and well-tested approaches available.
A niche blog is one of the strongest long-term passive income assets a student can build.
You pick a specific topic, such as student finance, a particular academic subject, gaming or health and fitness. You write helpful articles that answer the questions your audience is already searching for. Over time, those articles rank in Google and attract consistent organic traffic. That traffic can then be turned into income through affiliate links, display ads and digital product sales.
In practice, blogging is slow to get going. Most new sites take 6 to 12 months to see meaningful traffic from search engines. But once traffic builds, it compounds steadily.
An article that ranks well can send visitors and commissions for years without any further work from you. According to Hostinger, affiliate marketing is now valued at over $18.5 billion globally and is one of the fastest-growing income streams for online content creators.
Also, a blog complements every other idea on this list. You can promote affiliate products, sell your own digital templates, link to your YouTube channel and grow an email list all from the same website. So building a blog during your student years gives you a compounding asset that keeps growing long after you graduate.
How to Choose the Right Passive Income Model
You do not need to try all 7 at once.
In fact, trying to pursue every idea at the same time is one of the most common errors that beginners make. Pick 1 or 2 models that fit your skills and your available time first. Affiliate marketing and blogging pair naturally together.
So do digital products and print-on-demand. Start with the combination that makes the most sense for where you are right now.
Here is a simple way to decide. First, think about what you already know or genuinely enjoy. Writing ability points naturally toward blogging or digital study notes.
Also, a visual mindset suits print-on-demand or stock photography well. Comfort in front of a camera makes YouTube worth exploring seriously. Importantly, there is no single wrong answer here. The best passive income model is simply the one you commit to and actually follow through on.
Second, consider how much time you can realistically commit each week. For example, YouTube needs steady uploads to grow an audience. Index funds need almost no ongoing effort once your regular contributions are in place.
Importantly, do not wait until everything feels perfect before you start. The best passive income streams are built by people who begin before they feel fully ready and improve their approach as they go.
Earnings vary widely depending on the model you choose and how consistent you are.
For affiliate marketing, beginners with under 1 year of experience earn an average of $636 per month, according to Authority Hacker. Those with 1 to 2 years of experience earn around $4,196 per month on average. In fact, the income grows steadily as your content library expands and your audience builds over time.
For digital products, realistic earnings range from $100 to $1,000 per month once you have a solid set of listings and some initial traffic, driving buyers to your shop. For print-on-demand, expect $50 to $500 per month in the first year, depending on your niche choice and design quality. Stock photography and content licensing tend to sit in the $50 to $200 per month range early on, growing steadily as your uploaded library expands.
So the honest picture is this. Most passive income streams take 6 to 12 months to produce reliable, meaningful results. Anyone who tells you otherwise is not being straight with you. But for students who start early and stay consistent through the quiet early months, the rewards build in a way that almost nothing else can match.
Common Mistakes Students Make When Starting Out
Knowing what to avoid saves you months of wasted time and effort.
The first major mistake is trying to scale too quickly. In practice, focus beats speed every single time. Pick 1 income stream and build it properly before you even think about adding a second. Spreading yourself too thin leads to weak results everywhere rather than strong results anywhere.
The second is expecting passive income to be hands-free from day one. It is not. Every model on this list requires real upfront work.
So affiliate marketing needs content. Digital products need creation and listing. Index funds need regular contributions. Go in with realistic expectations about what the first 3 to 6 months will look like.
The third mistake is ignoring the tax side of things. In the US, income from passive sources is still taxable. Keep clear records of everything you earn from day one.
If your income grows meaningfully, speak to an accountant or check the IRS guidance for self-employed earners. Getting this right early saves a great deal of stress later on.
The fourth mistake is not building an email list from the start. Social media platforms change their rules without warning. Search engine rankings can shift overnight.
But your email list is yours to keep regardless of what any platform decides to do. Start building it from your very first piece of content. Even a list of 200 engaged readers is worth more than 10,000 social media followers who may never see your posts.
Finally and most importantly, the biggest mistake of all is quitting too soon. Most students who try passive income give up after 2 to 3 months. That is almost always too early.
The compound effect in content and affiliate marketing does not kick in until month 6 at the earliest. The students who stick past that point are consistently the ones who see real and growing results.
Start Building Your Passive Income in 2026
You now have a clear, practical view of the best passive income ideas for students in 2026. The options are real, the tools are freely available, and the income potential is significant, whether you choose affiliate marketing, digital products, print-on-demand or a combination of all three.
It is designed for students with no prior experience and no starting budget, and it covers every step from setting up your first site to earning your first commission.
Also, for a broader look at passive income options, Bankrate’s passive income guide covers a wide range of approaches worth exploring alongside the ones in this article. The students who build lasting income in 2026 will not all be the ones with the best ideas. They will simply be the ones who started today and kept going.
That is the real secret behind the best passive income ideas for students in 2026. Start small, stay consistent and let time do the compounding work. Notably, the effort you put in during your student years will still be paying you back long after you graduate.
Disclosure: This page contains affiliate links. If you sign up through my links, I may earn a commission at no extra cost to you.
How to Start an Online Business in New Zealand (6 Steps)
So you want to know how to start an online business in New Zealand. You are in the right place. In fact, the country offers fast internet, low startup costs and a clean legal framework. All of this makes launching a digital business far simpler than in many other parts of the world.
Whether you live there already or plan to operate remotely, the process is far more accessible than most people expect.
So this guide walks you through every step, from picking the right business model to driving real traffic and earning your first income. By the end, you will have a clear, practical plan and the tools to take action today.
Why New Zealand Is a Strong Base for an Online Business
The country punches above its weight for digital work.
First, internet speeds are fast and reliable across most of the country. That means you can work from almost anywhere, including smaller towns and rural areas, without losing speed or productivity.
Second, the legal setup is clean and simple. You do not need a lawyer or an accountant just to get started. In most cases, you can register and be trading within a few days.
Third, the time zone puts you within reach of both Asian and Western markets. That can be a real edge if you plan to serve a global audience or work with international clients.
Interestingly, the country also has no capital gains tax on most assets. So if your online business grows and you sell it one day, you keep far more of the profit than you would in most other countries. That is a meaningful long-term benefit that many entrepreneurs miss when choosing where to base their business.
Also, the cost of starting a business here is low compared to major markets like the United States or the United Kingdom. That means your overheads stay small while your income potential stays global. For someone who wants to build a side income alongside a full-time job, that combination is hard to beat.
Notably, New Zealand has a well-educated population with high levels of digital literacy. That matters if you plan to sell to a local audience. But it also helps if you want to find freelance clients, collaborators or partners based in the region. The digital business culture here is mature and growing fast.
This is the most important decision you will make.
So your business model shapes how you earn money, how much time you invest and how fast your income can grow. So take your time here before doing anything else. Below are the 4 most popular models for online businesses.
Affiliate Marketing
Affiliate marketing is a great starting point for beginners. You promote other companies’ products. When someone buys through your link, you earn a commission.
In fact, you do not need to hold stock, manage shipping or deal with customer service. It is a low-cost, low-risk way to build a recurring income online.
In practice, affiliate marketers build websites and publish useful, helpful content. Over time, that content attracts readers through search engines. Those readers click affiliate links. So those clicks turn into commissions.
Notably, some of the best programmes in this space pay 40% to 60% recurring commissions. That means every customer you refer keeps paying you every single month.
According to data from Authority Hacker, the average affiliate marketer earns over $8,000 per month. That takes time to achieve. But it shows what is possible with a clear plan and steady effort over 12 to 18 months.
Freelancing
Freelancing is another strong option. You sell your skills directly to clients. Common areas include writing, graphic design, web development, video editing and digital marketing.
In practice, platforms like Upwork and Fiverr connect you with clients in the US, UK and Europe. That means your income is not limited by the size of the local market. You can earn in USD while living in New Zealand.
Also, freelancing gives you near-immediate income potential. You do not have to wait months for search engine traffic to build. You can land your first client within days of setting up a profile and writing a clear offer.
Selling Digital Products
Digital products include ebooks, online courses, templates and printables. You create them once and sell them many times. So the income becomes largely passive once the product is ready to go.
In fact, a well-focused course or ebook in a specific niche can generate steady income month after month. You do not need a large audience to make this work. A clear topic and a strong offer matter far more than a huge following.
Dropshipping
Dropshipping lets you sell physical products without holding stock. When a customer orders, a supplier ships directly to them. You keep the difference between the supplier price and the retail price.
However, margins in dropshipping are often thin. Competition is high. And the customer service demands are greater than with digital models. It can work well, but it is harder to scale profitably than affiliate marketing or digital product sales.
If you plan to start as a sole trader, you do not need to formally register a company. You simply use your existing IRD number and begin trading. That makes it the fastest and lowest-cost route for most beginners. It is also perfectly legal and very common among freelancers and affiliate marketers who are just starting out.
But if you want a separate legal structure, you can register a limited company through the New Zealand Companies Office. In practice, the process is entirely online and takes around 1 to 2 hours. The registration fee is around $90 USD. Once registered, your company has its own legal identity and its own dedicated bank account.
Importantly, for most beginners, starting as a sole trader is the smart choice. You can always move to a company structure later as your income grows and your situation becomes more complex. In practice, there is no need to over-engineer things at the start.
Here is a quick look at your 2 main options.
As a sole trader, you need no formal registration beyond your IRD number. There is no registration fee. Setup is fast with very little paperwork. You and the business are the same legal entity.
As a limited company, you register online via the New Zealand Companies Office. The fee is around $90 USD. You file an annual return each year. It is a separate legal entity from you personally and a better fit for higher revenue levels or multiple shareholders.
For a full breakdown of each structure, the New Zealand government business portal covers each option in plain language. Notably, it also includes a simple tool that helps you pick the right structure based on your situation.
Step 3 – Handle Your Tax Obligations
Tax is not as complicated as it sounds.
As a business owner in New Zealand, you need an IRD number. If you are already a resident, you likely have one. If not, you can apply through Inland Revenue at no cost.
The IRD number is your main identifier for all tax matters in the country. In fact, you will need it before you can register a business or receive income officially.
So, for income tax, sole traders pay their personal income tax rate on business profits. Rates range from 10.5% to 39% depending on your total income. Importantly, tax is not deducted automatically from your earnings. So you will need to set aside a portion of each payment and file your returns yourself, using the myIR online portal.
GST is the other key area to understand. GST stands for Goods and Services Tax. The rate is 15%. You must register for GST if your business earns more than $60,000 NZD per year, which is roughly $36,000 USD.
So if you earn below that, registration is optional. But registering early lets you claim back GST on business expenses, which can reduce your costs.
So here are the key points to keep in mind. First, get your IRD number before you start trading. Second, keep clear records of all income and expenses from day one.
Third, set aside part of every payment for income tax. Fourth, register for GST when your revenue approaches $36,000 USD per year. Finally, use the myIR portal to file your returns online.
In practice, a simple accounting tool or a well-organised spreadsheet will make this much easier to manage from the very beginning.
Step 4 – Get the Right Tools in Place
The right tools save you real time and money.
When you are starting out, you do not need a long list of software. But a few core tools will help you build a more professional business from day one. Here are the ones that matter most.
Website and Funnel Builder
You need a place to send your audience. For online business beginners, one of the best all-in-one platforms available is Systeme.io. It includes a website builder, sales funnel tool, email marketing system, course builder and affiliate management all in one place. The free plan gives you access to all the core features without a credit card.
If you are building an affiliate marketing business, Systeme.io is the platform I recommend. Notably, it pays 60% recurring commissions to affiliates, which is one of the strongest rates in the industry. That means promoting it to your own audience can become a real income stream in its own right.
In fact, email is the most reliable traffic source you can own. Unlike social media platforms or search engines, your email list does not shift with every algorithm update. So start building it from the very beginning, even if you only have a handful of subscribers at first. Every subscriber is a real asset.
Keyword Research
If you are building a content-based business, keyword research is essential. Tools like Jaaxy help you find search terms with enough monthly traffic and low enough competition to rank for. In practice, targeting low-competition keywords is one of the fastest ways to get organic visitors to a brand-new website.
Design Tools
Canva is a free design tool that lets you create professional blog images, Pinterest pins and social media graphics without any design experience. It is one of the most useful free tools available and should be part of your toolkit from the start.
Step 5 – Build Your Online Presence
Your online presence is your digital home.
For most online businesses, a blog or content website is the foundation. It is where your content lives, where your audience finds you and where your affiliate links and product offers sit. Getting this right from the start sets you up for long-term growth.
In practice, building a strong presence means focusing on 3 things.
A Fast, Clean Website
Your website does not need to be complex or expensive. But it does need to load quickly, look clean and work well on mobile. WordPress is the most widely used platform for content websites, and it gives you a solid base to build on. Pair it with a professional theme, and you are ready to go.
Consistent, Useful Content
Content is how your audience finds you online. Each article or post is a chance to rank in search results, attract readers and build trust over time. In fact, quality matters far more than quantity here. A detailed, well-structured 2,000-word article that fully answers a real question will outperform 10 rushed posts every single time.
Also, write in topic clusters. So pick one core subject and publish a series of articles covering different parts of it. That builds your authority in that niche and helps every piece of content in the cluster rank better over time.
A Pinterest Strategy
Pinterest is one of the most underrated traffic sources for online businesses. In fact, it works more like a search engine than a social platform. That means your pins can keep sending traffic for months after you post them.
So for each article you publish, create 3 pins with different angles and headlines. Use keyword-rich descriptions and link each pin back to the article. In fact, over time, this builds a steady stream of free, compounding traffic.
Step 6 – Drive Traffic and Start Earning
Traffic is what turns content into real income.
Without visitors, even the best website earns nothing. So once your site is live and your first articles are published, driving traffic becomes your main focus. Here are the 3 most effective channels for beginners.
Search Engine Optimisation
In practice, SEO means getting your content to rank in Google and other search engines. It is a long-term strategy. Most new sites take 3 to 6 months to see meaningful organic traffic. But once articles start ranking, they generate visitors around the clock without ongoing effort.
Focus on long-tail keywords. These are longer, specific search phrases with lower competition. For example, “how to start a freelance writing business in New Zealand” is far more achievable for a new site than “make money online.” Use a keyword tool to find these gaps and write content that fills them clearly.
Pinterest
Notably, Pinterest can drive traffic much faster than SEO. Many bloggers report getting their first real visitors from Pinterest within 30 to 60 days of launch. Create strong visual pins, use keyword-rich descriptions and pin on a regular schedule. It is free, fast and very well-suited to content-based businesses.
Email Marketing
Furthermore, email lets you stay in touch with your audience after they leave your site. Offer a free resource, such as a short checklist or guide, in exchange for an email address. Then send regular, useful emails that build trust and include relevant product recommendations.
Over time, your email list becomes one of the most valuable parts of your business. It is a direct line to your audience that no platform update or algorithm shift can take away from you.
Income varies widely depending on your model and how consistent you are.
In the early months, most online business owners earn very little or nothing at all. That is completely normal and expected. In fact, the income builds as your content grows, your audience expands, and your commissions compound month after month.
For affiliate marketers, the data from Authority Hacker shows that beginners with under 1 year of experience earn an average of $636 per month. Those with 1 to 2 years of experience earn around $4,196 per month. That is a big jump, and it shows how fast income can grow with steady effort and the right tools in place.
For freelancers, income depends on your skills and the clients you target. Many New Zealand-based freelancers earn $50 to $100 USD per hour when working with US or UK clients. That adds up quickly once you have a steady flow of work and a solid reputation.
For digital product creators, a well-focused course or ebook in a specific niche can generate $1,000 to $5,000 USD per month in passive income once the product is live and the audience is in place.
Importantly, the honest truth is that results take time. Most people who give up do so after 3 months, right before the compound effect starts to kick in. Notably, the ones who stick past the 6-month mark are the ones who begin to see real, growing numbers.
Common Mistakes to Avoid
Most beginners make the same errors.
Knowing what to avoid saves you months of wasted time and effort. Here are the most common mistakes people make when starting an online business.
Trying to Do Too Much at Once
In practice, focus is the most important resource you have as a beginner. Spreading yourself across a blog, a YouTube channel and 5 social platforms at the same time leads to poor results everywhere. Pick 1 or 2 channels and go deep before adding more.
Expecting Quick Results
So online businesses take time to build. A content-based business typically needs 6 to 12 months to produce meaningful income. If you expect strong results within your first month and do not get them, the urge to quit is strong. So set realistic expectations from the start and build for the long term.
Skipping the Legal and Tax Setup
It is tempting to jump straight into content creation and deal with the legal side later. But getting your registration and tax setup right from the beginning avoids costly problems as your income grows. Register with IRD, keep clean records and understand your GST position before your revenue scales.
Promoting Too Many Products
Pick 2 or 3 affiliate programmes and focus on them. Promoting too many products dilutes your message and makes your site feel like a directory rather than a trusted resource. In fact, depth beats breadth every single time.
Neglecting the Email List
Importantly, your email list is the 1 asset you truly own. Social platforms change their rules. Search engines shift their rankings.
But your list stays yours no matter what. Start building it from day one, even when you only have a small number of subscribers to begin with.
Start Your Online Business in New Zealand Today
You now have a clear, step-by-step plan for how to start an online business in New Zealand. So the steps are clear, and the tools are accessible. In fact, the income potential is real whether you choose affiliate marketing, freelancing, digital products or a mix of all 3.
The one thing that separates those who succeed from those who do not is staying consistent. Show up regularly, create genuinely useful content, build your email list and recommend products you believe in. Do that for 12 months, and the results will come.
Start an Online Business in California and Earn Real Income in 2026
If you want to start an online business in California, you are entering the largest state economy in the United States. The state has around 40 million people and a world-renowned tech culture, and one of the most connected, active consumer bases anywhere in the world.
But the state is also one of the most regulated and highest-taxed states in the country. So you need to understand the rules before you begin. The good news is that once you know what is required, the steps are truly manageable.
In fact, thousands of people start an online business in California every year. Many of them build meaningful income without leaving their homes. So this guide walks you through the legal setup, the tax landscape, the best business models and the tools that give you the strongest start.
Why California Is Worth It Despite the Challenges
In fact, it is not the easiest state in which to run a business. It has high income tax rates, a mandatory annual tax and some of the strictest employment laws in the country. These are real costs to factor in.
But for an online business, many of those issues matter far less than they do for a physical shop. If you are running a blog, an affiliate marketing website, a freelance consultancy or a digital product business, you can operate leanly and keep your overheads low.
In fact, the advantages are real. The state gives you access to a huge, tech-skilled audience.
It is home to some of the strongest venture capital networks and startup communities in the world. Furthermore, an online business in the state can sell to customers across the United States and globally. So your market is never just local.
So the key is to know your costs, set up correctly from day one and pick a model that suits the state’s legal rules.
Before you spend a dollar on registration, you need to decide what type of online business you are building. In fact, this is the single key decision. It determines your tax structure, your costs and your earning potential.
So here are the best options for online owners in California right now.
Affiliate marketing is one of the most powerful models available to people who want to build long-term, scalable income online. You create content through a blog, a YouTube channel or a social media presence. When your audience clicks your affiliate links and makes a purchase, you earn a commission from the company whose product they bought.
Notably, the income potential here is truly strong. Systeme.io pays its affiliates a 60% recurring commission. That means every customer you refer keeps paying you every month for as long as they stay subscribed.
So Copy.ai pays 45% recurring. ClickFunnels pays 40% recurring. Stack enough referrals, and you have a passive income stream that builds month after month.
So, affiliate marketing suits people who enjoy writing and building an audience. In fact, it is not instant money. However, it is one of the most rewarding long-term income models available.
Freelancing is the fastest route to earning online. If you have a marketable skill such as writing, design, development or accounting, you can find paying clients quickly through platforms like Upwork and Fiverr. In fact, many local freelancers earn $5,000 to $10,000 per month once they establish a strong client base.
Selling digital products lets you create something once and sell it repeatedly. E-books, courses, templates and stock photos all sell well online. Platforms like Gumroad and Teachable make it easy to list and sell.
Blogging and niche websites take longer to monetise but offer one of the most durable long-term income strategies. In practice, a well-built blog in the right niche can earn through affiliate commissions, display ads, sponsored posts and product sales at the same time.
So choose one model. Build it well. Then expand once it is earning well.
Step 2: Register Your Business in California
So once you know what type of business you are building, you need to register it properly. Importantly, the state does not require you to register a sole proprietorship if you operate under your own legal name. But most serious online business owners should strongly consider forming an LLC.
So here is a clear breakdown of the main business structures available to you in California.
Sole proprietorship is the simplest starting point. No filing is required if you trade under your own full name. It is free to set up.
However, your own assets are not protected from venture debts or legal claims. So this is a real risk if your venture grows.
LLC (Limited Liability Company) is the most popular choice for California online business owners. It costs $70 to file your Articles of Organisation with the California Secretary of State. You file online through the BizFile portal. Approval typically takes 2 to 3 business days.
But be aware of 2 ongoing costs that are unique to California. These catch many people off guard.
Every LLC must pay an annual minimum tax of $800 to the Franchise Tax Board, even if it earns nothing in that year. You also file a Statement of Information every 2 years, which costs $20. So these are non-negotiable ongoing expenses.
Corporation (S-Corp or C-Corp) suit businesses planning to raise investment or scale greatly. Articles of Incorporation cost $100 to file. California corporations also pay the $800 minimum franchise tax annually. C-Corps face a corporate tax rate of up to 8.84%, while S-Corps pay tax at the shareholder level.
Partnership is the relevant structure if you are starting the business with another person. General partnerships require no state registration, though they carry shared personal liability for all partners.
Step 3: Get a Federal Employer Identification Number (EIN)
So once you have chosen your structure, apply for an EIN from the IRS. It is your next step. In fact, think of it as a Social Security number for your business.
You need an EIN to open a separate bank account, to file your taxes correctly and to apply for any business licences. Fortunately, applying for an EIN is completely free through the IRS website. The process takes around 10 minutes online. You receive your EIN immediately on completion.
So even if you do not plan to hire employees, getting an EIN is worth it. It keeps your personal details off business documents. In fact, it makes future banking and tax filing much simpler.
In fact, California has a reputation as a high-tax state, and that reputation is largely deserved. So, for online business owners, there are several tax duties you need to be aware of from the beginning.
State income tax is the most significant burden for California online business owners. If you operate as a sole trader or an LLC treated as a pass-through entity, your income is taxed as personal income. California’s personal income tax rates range from 1% to 13.3%. Importantly, that top rate of 13.3% is the highest state income tax rate in the United States.
So if your online venture earns $100,000 per year and you are in the top bracket, you could owe around $13,300 in state income tax alone. That is before federal taxes. So, financial planning and working with a good accountant are very important in California.
The $800 annual tax applies to all LLCs and corporations, as noted above. So it is due annually, regardless of whether your venture makes a profit. Budget for this cost from day one.
California sales tax may apply to your online business if you sell taxable physical goods to California customers. You register for a seller’s permit through the California Department of Tax and Fee Administration (CDTFA). Fortunately, sign-up is free. However, you must collect and send sales tax on qualifying transactions.
For most digital products and services, such as affiliate commissions, online courses, and consulting fees, California sales tax does not apply. But the rules around digital goods are evolving. So it is worth seeking professional advice if you are in any doubt.
Federal income tax applies on top of state taxes. Online business income is subject to standard federal income tax rates and to the self-employment tax of 15.3% on net self-employment income up to a threshold. So the total tax picture in California can be demanding. In fact, good bookkeeping from day one makes a real difference.
Step 5: Get Any Required Licences and Permits
Importantly, California does not have a mandatory statewide general business licence. However, your city or county may require a local business licence to operate. Fees typically range from $50 to $100. They vary by location.
So if you run your online business from home, check with your local municipality about home occupation permits. Importantly, some cities require these even for businesses with no walk-in customers.
You can use the CalGold portal to find out which licences apply to your type of business and your location. So it is a useful starting point.
Separating your personal finances from your business finances is essential in California. This is especially true if you have formed an LLC. In fact, mixing the two can legally undermine the protection your LLC structure provides.
So open a dedicated business bank account as soon as you have your EIN and business formation documents. Fortunately, most banks offer business accounts with no monthly fees for qualifying small businesses.
From day one, all business income should go into this account, and all business expenses should come out of it. In fact, this makes your annual tax filing far simpler. It also provides a clear record if you are ever audited.
Step 7: Build Your Website and Online Presence
In fact, your website is the foundation of your online business. Whether you are building a blog, a store or a freelance portfolio, a good website gives you credibility and a lasting home for your audience.
In fact, WordPress is the most widely used and flexible platform available. It powers over 40% of all websites globally. So it supports virtually every type of online business model.
Good hosting starts at around $5 to $10 per month. Providers like Bluehost and SiteGround are reliable options.
If you are building an online store, Shopify is worth considering. According to Shopify’s guide to starting a business in California, California’s market offers a huge chance for online sellers who understand the legal landscape.
Your domain name should match your business name, where you can. Importantly, a .com domain is the strongest choice for an American audience. Keep it short and easy to spell.
In California, your website must include a privacy policy if you collect any personal data from visitors. This includes email addresses. So do not skip this step.
The CCPA gives California residents specific rights over their data. Any business serving California customers should be CCPA-compliant. Fortunately, a qualified attorney can help you get this right.
Step 8: Choose Your Monetisation Strategy
So once your website is live, you need a clear and realistic plan for how it will earn money. In fact, this is the step where many new online owners lose focus. So decide on your approach before you start creating anything.
Affiliate marketing remains the most compelling long-term income strategy for content creators and bloggers. You build an audience by creating genuinely helpful content in a niche you understand well. You recommend products and services through affiliate links. When your readers buy, you earn a commission.
In fact, the real power of affiliate marketing lies in recurring commissions. A single reader who signs up for a software plan through your link can pay you a commission every month for years.
That is why the model is so compelling. So your income grows as your content library grows. You do not need to work more hours to earn more.
Selling digital products works especially well for people in California with expertise in high-demand areas. An online course on a topic you know deeply can generate strong recurring revenue. The California market is full of people willing to pay for quality education in areas like finance, health, technology and creative skills.
Freelancing provides the fastest income but the most direct exchange of time for money. Many California freelancers use platforms like Upwork and Fiverr to build an initial client base, then move towards higher-paying direct clients over time.
The Best Online Business Ideas for California Right Now
So if you are still deciding on your business idea, here is a clearer look at the strongest options.
Affiliate marketing for software and tools offers some of the highest recurring commission rates available anywhere. In fact, the California market is full of tech-skilled people who actively seek out software recommendations. So a blog that reviews business tools, marketing software or productivity apps can generate strong affiliate income in this environment.
Online tutoring and education are a natural fit for California’s well-educated population. Platforms like Wyzant and Tutor.com connect tutors with students. Rates for specialist subjects can reach $80 to $100 per hour. Or, building your own course on Teachable or Udemy gives you full control over pricing.
Freelance content writing is in high demand from California’s enormous technology and media industries. Writers with expertise in areas like fintech, software or healthcare can command $0.25 to $0.50 per word or more from specialist publications and company blogs.
Dropshipping and e-commerce are viable in California but require careful attention to California’s sales tax rules. You must collect and remit sales tax on all taxable transactions with California customers. But if you market well and choose the right product niche, the California consumer market is enormous.
Blogging and content creation are two of the most durable long-term income strategies. A blog in a profitable niche, built carefully over 12 to 18 months, can earn through affiliate commissions, display ads, sponsored posts and digital products at once.
What It Really Costs to Start an Online Business in California
In fact, transparency matters here. California is not cheap. Pretending otherwise does new owners a disservice.
So here is a realistic cost breakdown for starting an LLC-backed online venture in California.
LLC formation (Articles of Organisation) costs $70 as a one-time state filing fee. You file this online through the BizFile portal. The annual franchise tax is $800, due each year regardless of revenue. Your first payment is due within 4 months of filing.
An agent, if you choose to use one, typically costs $100 to $200 per year. A local business licence from your city or county will cost $50 to $100, depending on where you are based.
Domain name registration runs $10 to $15 per year. Website hosting typically costs $60 to $120 per year on a basic shared hosting plan. An email marketing platform starts at $0 per month on free tiers. It rises as your list grows.
So the realistic first-year budget for a properly set-up online venture in California is around $1,000 to $1,400. This includes the $800 franchise tax. In fact, that is higher than many other states. But the California market’s size and buying power make it truly worthwhile if you build your venture well.
In fact, understanding what goes wrong for others is one of the fastest ways to avoid making the same errors yourself.
Not budgeting for the $800 annual tax. In fact, this is the most common shock for new owners in California.
Importantly, the tax is due even if your LLC earns nothing in its first year. So set aside $800 from day one. Do not forget this.
Mixing personal and business finances. In fact, in California, mixing funds can legally undermine your LLC’s liability protection. So open a business account before you receive your first payment.
Ignoring CCPA rules. Importantly, if your website has any California visitors, the CCPA may apply to you. Importantly, this is not optional. In fact, a brief review with a qualified attorney early on can save you real trouble later.
Trying to build too many income streams at once. In fact, the most common reason new online ventures fail is spreading effort across too many models at once. So pick one income stream, execute it well for 6 to 12 months and let it earn before you add another.
Failing to track income and expenses from day one. In fact, the tax system in the state is demanding.
Clean records make your tax filing far simpler. They also shield you if you are ever audited. Simple tools like Wave (free) or QuickBooks ($30 a month) are worth using from your very first day.
Your California Online Business Checklist
Here is a simple checklist to use as you set up your online venture. Tick each step off as you go.
Step 1: Choose your model. Pick one. Start there. Do not try to do three at once.
Step 2: Name your venture. Check the name is free. Lock down your domain name too.
Step 3: Form your LLC. File online. Pay the $70 fee. Wait 2 to 3 days for approval.
Step 4: Get your EIN. It is free. It takes 10 minutes. Do it right after your LLC is filed.
Step 5: Open a bank account. Keep your own cash and your business cash apart. This is a must.
Step 6: Get your seller’s permit if you sell physical goods. It is free from the CDTFA.
Step 7: Build your site. Get a .com domain. Set up your host. Write your privacy policy.
Step 8: Choose how you earn. Pick your plan. Stick to it. Give it 6 to 12 months to grow.
Step 9: Drive traffic. Use SEO. Use Pinterest. Build your email list. Be patient.
Step 10: Track your income. Log every sale. Log every cost. File your taxes on time.
That is the full list. Each step is clear. Each step is doable.
Work through them in order. Take your time. Be patient. You will get there.
Getting Started: Your Next Step
In fact, the legal and administrative side of starting an online venture in California is manageable if you approach it in the right order. So register your LLC, get your EIN, open that account and then focus your energy on building something that earns.
If you are drawn to affiliate marketing, blogging or selling products, the tools you pick at the start will shape how quickly your venture earns. In fact, getting this right matters. It saves months of wasted effort.
It is the most useful next step if you are serious about building a digital income stream from California.
Final Thoughts
In fact, California is demanding. It has high taxes, strict regulations and an $800 annual bill that no other state charges quite the same way. But it also has 40 million likely customers, a strong digital economy and a culture that rewards ambition.
For an online owner who chooses their model wisely and builds steadily, the state is an outstanding place from which to operate. So the key is to go in with open eyes, understand your costs and give your business model enough time to compound.
If you are ready to start an online business in California, the most valuable thing you can do today is take the first concrete step. So all the rest follows from there.
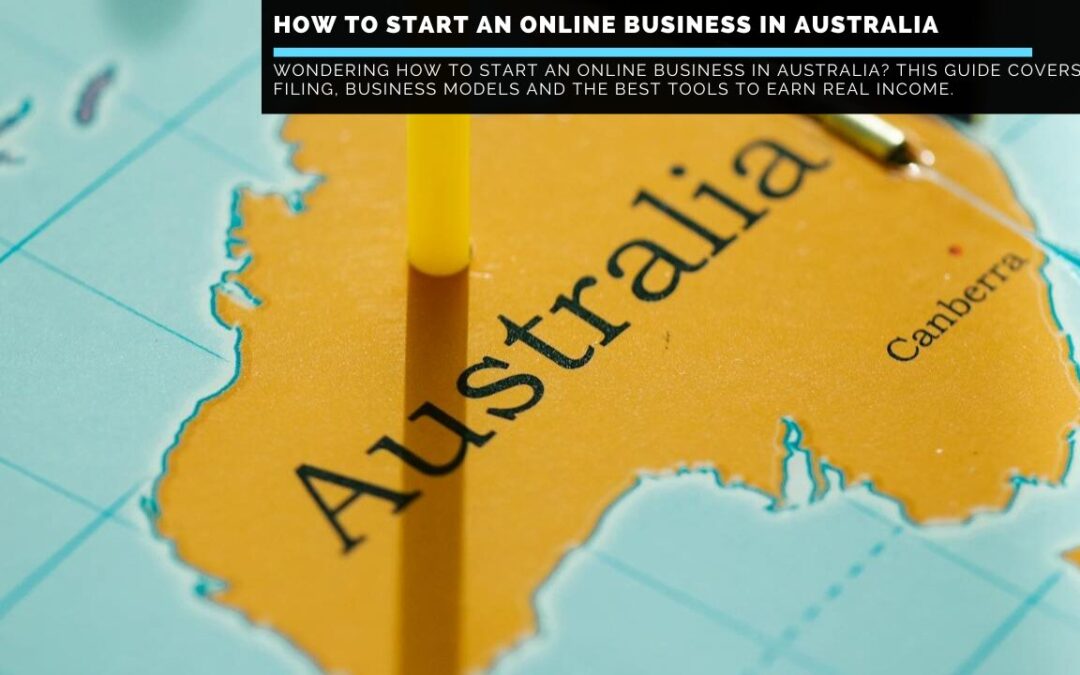
Start an Online Business in Australia: Your 2026 Guide
If you want to start an online business in Australia, you have chosen a truly strong location for it. Australia has a stable economy, a well-structured legal framework for small businesses and a growing population of 26 million people with high internet usage.
In fact, more Australians are building online income streams than ever before. Whether you want to run a blog, offer freelance services or sell digital products, the tools are already in place.
So this guide covers everything you need to know. It walks you through the legal setup, the best business models and the tools that give you the strongest chance of earning real income online from Australia.
Why Australia Is a Great Place to Build an Online Business
Australia offers several genuine advantages that are worth understanding before you dive into the practical steps.
First, Australia has no general barrier to starting an online business. The filing process is straightforward, the government has excellent online tools to help you get set up, and the regulatory environment is transparent and well-documented.
Second, the Australian market connects naturally to the wider English-speaking world. So if you are building a blog or affiliate website, your content can reach readers in the US, UK, Canada and beyond from day one.
Third, in many circumstances, Australia has no capital gains tax on assets held for more than 12 months. So it is attractive for people building long-term digital assets. However, you should always consult a good accountant for advice specific to your situation.
Finally, the Australian government actively supports small business owners through the business.gov.au platform. It provides free tools, guides and help in one place.
In fact, before you register anything or spend a dollar, you need to decide what kind of online business you are building. In fact, this is the most important decision you will make because it shapes everything that follows.
So here are the most realistic and rewarding online business models available to people in Australia right now.
Affiliate marketing is one of the most compelling options for beginners. You create content online, usually through a blog, a YouTube channel or a social media platform. When a reader or viewer clicks your affiliate link and makes a purchase, you earn a commission. In fact, there is no stock to hold, no customer service to run and no products to create yourself.
The income potential is truly strong. Systeme.io, for example, pays a 60% recurring commission to its affiliates. That means every customer you refer keeps paying you every month for as long as they remain a subscriber.
So Copy.ai pays 45% recurring. ClickFunnels pays 40% recurring. Stack enough referrals, and you have a real income stream. It grows each month on its own.
Freelancing and consulting are the fastest routes to income for people with existing skills. Writers, designers, developers, marketers and accountants can all find strong demand online. Platforms like Upwork and Fiverr link freelancers with clients globally. So you are not limited to Australian clients alone.
Selling digital products lets you create something once and sell it repeatedly. In fact, e-books, online courses, templates and stock photos all fall into this group.
Platforms like Teachable and Gumroad make it easy to list and sell. No tech skills are needed.
E-commerce and dropshipping involve selling physical products online without holding stock yourself. A supplier manufactures and ships the product directly to your customer. You earn the margin between your retail price and the supplier cost.
Blogging and content creation are a slower path, but one of the most powerful long-term income generators available. A well-built blog in the right niche can earn through affiliate commissions, display advertising, sponsored content and digital product sales at the same time.
So choose one model to start with. Build it well. Then add others once it earns.
Step 2: Get Your Australian Business Number (ABN)
In fact, an Australian Business Number, or ABN, is the core filing for any online business in Australia. It is an 11-digit number that identifies your business to the government, to other businesses and to the public.
You need an ABN to register a business name and to register for GST where needed. Importantly, without an ABN, clients must withhold tax at the top marginal rate of 47% on any payments to you. So getting your ABN is a non-negotiable first step.
Fortunately, an ABN is completely free to get. You apply through the Australian Business Register, which is the official government platform for this process. Most sole traders receive their ABN instantly after they apply online. That is fast.
To apply, you will need your Tax File Number (TFN), your full legal name, date of birth, residential address and a description of your main business activity. So the entire process takes around 10 to 15 minutes and costs nothing.
Step 3: Register a Business Name
So once you have your ABN, the next step is registering a business name. This applies if you trade under a name other than your own.
ASIC handles this process. The cost is low, and it is fast.
Business name filing costs AUD $44 for one year or AUD $102 for three years. You can complete this through the official Australian Business Sign-up Service, which allows you to bundle your ABN, business name and other filings in a single application.
Before registering a name, make sure it is available by searching the ASIC register. Also, check whether a matching domain name is available online. Your business name and website address should match as closely as possible.
So once your ABN and name are in place, you have the basic legal foundation your online business needs to operate.
Choosing your legal business structure is one of the key decisions you will make. It affects your personal liability, your tax duties and how clients see your business.
So here are the main options for owners in Australia.
A sole trader is the simplest and most popular structure for people starting an online business. There is no separate filing cost beyond your ABN. You report business income on your own tax return.
However, there is no separation between your own assets and your business debts. So if the business runs into legal or financial trouble, your personal assets could be at risk.
Company (Pty Ltd) offers full separation between your own finances and your business funds. It is the strongest legal protection available.
Registration with ASIC costs AUD $597 for a proprietary company. There is also an annual review fee of AUD $321. Companies are taxed at the corporate rate, which is 25% for small businesses with a turnover under AUD $50 million.
Partnership is relevant if you are starting the business with another person. General partnerships are simple to establish but carry shared liability between all partners.
Trust is a more complex structure used by some business owners for asset protection and tax planning. It typically requires expert legal and accounting advice to set up correctly.
For most people starting an online business in Australia, a sole trader structure is the right place to begin. It is free, simple and allows you to get moving quickly. So you can move to a company structure later, as your income grows.
Step 5: Understand Your Tax Obligations in Australia
In fact, Australia has a clear and well-documented tax system for online business owners. Notably, understanding your duties from the start saves you from unexpected bills later.
GST (Goods and Services Tax) is a 10% tax on most goods and services sold in Australia. Notably, you must register for GST if your annual turnover reaches or exceeds AUD $75,000 (roughly $47,000 USD). Below that threshold, GST filing is optional. However, it can be worth doing voluntarily if you want to claim input tax credits.
Fortunately, GST sign-up is free and can be completed at the same time as your ABN application. You register through the ATO (ATO).
Income tax is charged on your business profits at your personal marginal rate if you are a sole trader. Australia has a progressive income tax system. So the tax-free threshold is AUD $18,200 per year, which means you pay no income tax on the first AUD $18,200 of income.
In addition, PAYG (Pay As You Go) withholding is relevant if you plan to hire employees. As an employer, you are required to withhold tax from employee wages and remit it to the ATO on their behalf.
Importantly, for online ventures earning affiliate commissions from overseas programmes, income is still taxable in Australia. So keep clear records of all income, regardless of where it originates.
It is strongly recommended that you work with a good accountant, especially in your first year of trading. In fact, the cost of good accounting advice is almost always worth it. Do not skip this step.
In fact, your website is the core of your online business. It is your home base. Whether you run a blog, an e-commerce store or a freelance portfolio, a well-built website gives you credibility and a home for your audience.
For most online businesses, WordPress is the most flexible and widely used platform around. In fact, it powers over 40% of all websites globally.
It has an enormous range of themes, plugins and tools to support almost any business model. Good hosting plans start at around $5 to $10 per month. So it is affordable from day one.
If you are building an e-commerce store, Shopify offers a more streamlined solution with built-in payment tools.
So your domain name should match your business name as closely as possible. Notably, a .com.au domain signals that you operate in Australia and builds trust with local audiences. Or, an international .com domain works well if you are targeting a global English-speaking audience.
Importantly, in Australia, your website must include a privacy policy if you collect visitor data. This includes collecting email addresses. Fortunately, most website platforms offer simple privacy policy templates you can adapt.
Step 7: Decide How Your Business Will Earn Money
So once your website is live, you need a clear plan for how it will generate income. In fact, this is where many people lose momentum. So being specific about your monetisation approach from the start saves a great deal of wasted effort.
Affiliate marketing remains the most compelling option for people who want to build a long-term passive income stream from Australia. In fact, it is the model that scales best.
So you create helpful content around a niche topic, attract readers who are looking for help and earn commissions when they click your links and buy.
Notably, the beauty of affiliate marketing is that your earning potential is not capped by your hours. In fact, a single well-written blog post can earn commissions for years after you publish it. So that is the power of building a digital asset. You trade time for assets, not cash.
Digital products provide strong margins. In fact, the cost of producing each extra unit is essentially zero after the initial creation. So an online course, an e-book or a template pack can sell hundreds of times without any extra work on your part.
Freelancing gives you the fastest route to income. In fact, many freelancers earn money within their first week of signing up to a platform. However, it pays you for your time, which limits how much you can scale. However, it is an excellent way to generate cash flow while you build longer-term income streams alongside it.
Step 8: Drive Traffic to Your Online Business
In fact, a brilliant website with no visitors is like a shop on an empty street. So traffic generation is the ongoing task that separates online businesses that earn from those that never get going.
So the 3 main traffic sources for online ventures in Australia are search, social media and email lists.
Organic search (SEO) involves creating content that ranks in Google for the terms your target readers are searching for. In practice, it takes 3 to 6 months to see meaningful results. However, once your content starts ranking, the traffic is free, and it compounds over time. In fact, each article you publish adds to the total.
So social media lets you reach potential customers on platforms like Pinterest, Instagram, TikTok and YouTube. Notably, Pinterest is especially effective for driving traffic to blogs and product pages. A strong Pinterest strategy can accelerate traffic growth greatly in the early months of a new site.
In fact, email marketing is the most reliable long-term traffic source because you own the list. So when someone subscribes to your email list, you can reach them directly at any time. In fact, building an email list from day one is one of the best moves you can make early on.
The Best Online Business Ideas for Australians Right Now
So if you are still deciding which model to launch in Australia, here is a closer look at the strongest options.
In fact, affiliate marketing for software tools offers some of the highest commission rates anywhere. Notably, software companies pay recurring commissions because their products work on a monthly fee model.
For example, Systeme.io pays 60% recurring. Copy.ai pays 45%. ClickFunnels pays 40%. So build enough referrals, and those commissions grow into a high monthly income.
Furthermore, creating and selling online courses is a natural fit for people with expertise in a high-demand area. Australians love online education. Platforms like Teachable and Udemy make it easy to build and sell a course without technical knowledge.
In practice, blogging in a good-paying niche is one of the most durable long-term income strategies. In fact, the key is to choose a niche where people are actively searching for advice and where strong affiliate products exist. For example, finance, health, travel and digital marketing are all reliably strong niches.
Importantly, freelance writing and content creation are in high demand globally. So Australian writers with strong English skills are well-placed to work with clients in the US, UK and Canada. Rates for specialist freelance writers can reach $0.30 to $0.50 per word or more.
Common Mistakes to Avoid When Starting an Online Business in Australia
In fact, understanding what not to do is just as valuable as understanding what to do. So here are the most common mistakes that slow people down.
Not getting your ABN before you start trading. In fact, no ABN means clients withhold 47% tax on every payment. That is a lot to lose.
Fortunately, that is avoidable with a free online application. So there is no reason to delay.
Mixing personal and business finances. So keep a separate bank account for your business from day one. It makes tax reporting much simpler and protects your personal finances if anything goes wrong.
Trying to do too much at once. In fact, beginners who try to run a blog, an e-commerce store and a YouTube channel at the same time rarely do any of them well. So pick one income stream and build it properly before adding more.
Not having a privacy policy on your website. In fact, under Australia’s Privacy Act, most businesses that collect personal data must have a privacy policy. Notably, this is a legal requirement, not just advice.
Giving up too early. In fact, most online businesses take 6 to 12 months before they generate meaningful income. So the people who succeed are not always the most talented. They are the ones who stayed consistent long enough for the compound effect to kick in.
Useful Resources for Online Business Owners in Australia
Fortunately, Australia has a strong network of official guides to support new business owners.
The Australian Business Register is the starting point for all filing tasks. It is free to use and covers ABN applications, GST filing and business name filing in one place.
In addition, Business.gov.au provides a range of free guides covering business planning, finance, marketing and legal duties. All free.. In fact, it is one of the most thorough free resources available for small business owners in Australia.
Furthermore, the Australian Taxation Office website has clear guidance on income tax, GST and other tax duties for online businesses. So it is worth reading the relevant sections early on.
Getting Started: Your Next Step
In fact, the practical steps to start an online business in Australia are truly manageable. Here is a simple list.
Get your ABN first. It is free. Then pick your model and set up your site.
Choose how you earn. Make good content. Drive traffic. Be patient.
Build each day. That is the plan.
Register your ABN, choose your structure, build your site and select an earning strategy that matches your skills and schedule. So the roadmap is clear. It really is that simple.
If you are drawn to affiliate marketing, blogging or selling online products, the tools you choose at the start will have a big influence on how quickly you earn. In fact, getting the foundation right saves months of wasted effort.
In fact, Australia is a genuinely excellent country in which to start an online business. The legal framework is clear, the filing process is free and simple, and the earning potential for well-chosen online business models is real and strong.
So whether you choose affiliate marketing, freelancing or digital products, the principle is the same.
Choose your model, set it up right and create steadily. Give it enough time to build. In fact, consistency is the key. It has always been.
If you are ready to start an online business in Australia, the only real barrier between you and your first dollar of online income is the decision to begin.
Texas is one of the best places in the US to start an online business. In fact, it is home to 3.2 million small businesses and ranks as the 8th largest economy in the world. It has no state income tax, a low rules-based burden compared to most other states and a growing population of over 30 million people. Today, I’ll show you how to start an online business in Texas.
The conditions here truly favour owners. So whether you want to build a blog or grow a passive income stream, Texas gives you a solid base to start from. This guide covers everything you need to know. So let us work through it step by step.
Why Texas Is a Great Place to Build an Online Business
Texas stands out for good reasons.
The most obvious advantage is the tax environment. Notably, Texas has no personal state income tax and no corporate income tax.
So the money your online business earns stays in your pocket. That is a real win.
It is one of the main reasons people choose Texas. It really does add up. That is the beauty of it.
Notably, there is also no general business licence needed in Texas. Many states require owners to obtain a general business running licence before they can trade. Texas does not. So the barrier to getting started is lower here than almost anywhere else in the country.
Furthermore, the state is also one of the fastest-growing in the US. In 2024, metropolitan counties in Texas saw a growth rate of around 16%, which is roughly double the national average. That growth means more likely customers, more demand and more economic activity for online businesses to tap into.
Furthermore, the business culture in Texas is famously startup-focused. Furthermore, the state actively supports small businesses through the Texas Economic Development Division and a network of Small Business Development Centres across the state. If you want to start an online business, Texas is a truly smart place to do it.
Your first decision is the type of business you want to run. Notably, there are many models open, and each has its own earning potential, startup costs and time requirements.
Here are the most popular options for online entrepreneurs in Texas right now.
Affiliate marketing is one of the most compelling models for beginners. You promote products or services online through a blog, social media or a YouTube channel.
When someone buys through your affiliate link, you earn a commission. There are no products to create, no stock to hold and no customer service to run.
Some affiliate programmes pay recurring monthly commissions. Systeme.io, for example, pays 60% recurring commission to its affiliates. Copy.ai pays 45% recurring, and ClickFunnels pays 40% recurring. So a single successful referral can keep paying you month after month.
E-commerce and dropshipping let you sell physical products online without manufacturing them yourself. With dropshipping, a supplier holds the stock and ships it right to your customers. You keep the margin between your selling price and the supplier cost.
Freelancing and consulting turns skills you already have into direct income. Writers, designers, developers, accountants and marketers all find strong demand online. The advantage is that you can start earning quickly with little to no startup cost.
Blogging and content creation involves building an audience around a niche topic. Then you earn from that audience through ads, affiliate links and digital product sales. So it takes longer to build, but creates truly passive income over time.
Online courses and digital products let you package your knowledge into a product that sells repeatedly without ongoing effort.
So choose the model that best fits your skills, your schedule and your income goals. Many successful online businesses start with 1 model and add more over time.
Step 2: Choose a Business Name and Check Availability
So once you have settled on a business model, you need a name. Your business name is the foundation of your brand online. It should be clear, memorable and relevant to what you do.
In Texas, you can search for name status through SOSDirect, the Texas Secretary of State’s online filing system. You can run a name search for $1 per search, and that fee is waived if you go on to file right after the search.
Fortunately, if your preferred name is open, you can reserve it for 120 days for a $40 fee. That gives you time to fulfil your business filing without losing the name.
So before falling in love with a name, always check that it is open in Texas. Also, check for a matching domain name online. Your website address should ideally match or closely match your business name.
Notably, also search the US Patent and Trademark Office database to confirm your chosen name has not already been trademarked at the federal level. That step could save you big legal trouble further down the line.
Step 3: Choose Your Legal Business Structure
In fact, this choice matters a lot. It affects your personal legal risk, your tax duties and how trusted your business appears to clients and partners.
So here are the 4 main options open to you in Texas.
Sole proprietorship is the simplest structure. There is no state registration needed if you run under your own legal name.
It costs nothing to set up. However, there is no separation between your personal money matters and your business money matters. So if something goes wrong, your own assets are at risk.
LLC (Limited Liability Company) is the most popular choice for online owners in Texas. It costs $300 to register, or $308 if you file online.
Notably, Texas does not charge an annual fee for LLCs. That makes it far cheaper than many other states. An LLC covers your own assets from business debts and gives your business more trust.
A company (C-Corp or S-Corp) is suited to businesses that plan to raise investment, issue shares or scale quickly. The filing fee is $300 for the Formation filing, plus extra costs for bylaws and other setup. It offers the strongest legal cover but also comes with more admin needments.
Co-ownership applies if you are starting the business with another person. General co-ownerships need no state registration. Limited co-ownerships do need filing and carry fees ranging from $200 to $750, depending on the structure.
So, for most people starting an online business in Texas, an LLC strikes the best balance. In practice, it gives you cost control, simplicity and legal cover all in one. In practice, it gives you legal cover, keeps your taxes simple and signals to clients that you run a genuine business.
So once you have chosen your legal structure, the next step is filing with the right Texas bodies. In fact, it is simpler than it sounds.
For an LLC, you file your Certificate of Formation through SOSDirect, the Texas Secretary of State’s online filing tool. Online applications are usually processed in 2 to 3 business days. You will pay a $300 state filing fee plus an $8 online convenience fee, bringing the total to $308.
As part of the registration process, you also need to appoint a registered agent. A registered agent is an individual or service that receives official legal and tax documents on behalf of your business. So you can act as your own registered agent if you are a Texas resident. Alternatively, expert registered agent services in Texas usually cost between $100 and $300 per year.
After registration, you need to obtain a Federal Employer ID Number (EIN) from the IRS. Think of it as a Social Security number for your business.
You need it to open a business bank account, pay employees and file taxes. Applying for an EIN is free. It takes around 10 minutes through the IRS website. So never pay a third party to do this for you.
Step 5: Sort Your Texas Tax Obligations
Notably, one of the most attractive features of Texas for online owners is the tax environment. However, there are still some key duties to understand.
Notably, Texas has no personal income tax and no corporate income tax. So your online income will not be taxed at the state level the way it would in California, New York or most other states.
However, Texas does levy a franchise tax on certain businesses. In 2025, the franchise tax applies to businesses with gross revenue above $1.23 million. In practice, most early-stage online businesses will not reach that threshold for some time. However, it is key to know it exists.
So if your online business sells taxable goods or services to Texas customers, you need a sales tax permit from the Texas Comptroller of Public Accounts. This applies even if you are running a fully online store. Fortunately, the permit is free to get, and you can apply online through the Comptroller’s website. Once approved, you are needed to collect and remit Texas sales tax on valid transactions.
In fact, splitting your personal money matters from your business money matters is not just good practice. For an LLC or company, it is also a legal matter. Mixing personal and business funds in Texas can expose you to personal legal risk by weakening the legal protection your business structure is meant to give.
So open a dedicated business bank account as soon as your EIN is in place. Most major banks offer business accounts, and many now offer fee-free options for small businesses and startups.
So the process is straightforward. You will usually need your EIN, your Certificate of Formation or other registration documents, your business name and a deposit to open the account.
In practice, once the account is open, all business income should go in, and all business expenses should come out. That clean separation makes tax time much simpler and protects you legally.
In fact, your website is the foundation of your online business. In practice, your website must work on mobile and load fast.
In Texas, as in any US state, your website also needs to include certain legal pages. These include a privacy policy, terms and conditions and, if you are running an affiliate marketing business, an FTC-compliant affiliate disclosure statement.
For most online businesses, WordPress is the most flexible and widely supported tool available. It powers over 40% of all websites on the internet and has a huge range of themes, plugins and links to choose from.
If you are building an e-commerce store, tools like Shopify offer a more streamlined setup with built-in payment handling, stock running and marketing tools.
So your domain name should match your business name as closely as possible and end in .com wherever you can. Keep it short, easy to spell and easy to remember.
Step 8: Pick Your Monetisation Plan
So once your website is live, you need a clear plan for how your business will make money. This is where many beginners get stuck. So having a clear earning plan from the start saves a lot of wasted effort.
If you are doing affiliate marketing, your plan is to create helpful content that draws readers in. So you attract people looking for info on the products and services you suggest. In fact, Shopify’s Texas guide notes that Texas owners have access to a huge US market with strong online spending.
If you are running an e-commerce business, you plan to drive traffic to your listings. So you use search, paid ads or social media to do that.
If you are freelancing, your plan is to find clients who need your skills and deliver consistent, high-quality work that earns referrals.
Notably, the key in any model is to focus on 1 plan first. Building genuine competence in 1 approach before adding more is how most successful online owners in Texas have got to where they are today.
Step 9: Drive Traffic to Your Business
A great website with no visitors is an empty shop. So traffic generation is one of the most key ongoing tasks for any online business.
In practice, the 3 main traffic sources for most online businesses are search engine optimisation (SEO), social media marketing and email marketing.
SEO involves creating content that ranks in Google for the terms your likely customers are looking for. In fact, it takes 3 to 6 months to see useful results. It takes 3 to 6 months to see meaningful results, but the traffic it produces is free and compounds over time. In fact, a blog post that ranks well can keep bringing in visitors for years.
So social media lets you reach likely customers on tools like Pinterest, Instagram, TikTok and YouTube. In certain cases, Pinterest is very useful for driving traffic to blogs and product pages.
In fact, email marketing is the most reliable traffic source of all because you own the list. Notably, when you collect email addresses from visitors, you can reach them at any time. So building an email list from day 1 of your online business is one of the smartest things you can do.
So here is a closer look at the options with the strongest earnings likely for Texas entrepreneurs.
Affiliate marketing stands out because the earning model scales without you having to scale your time. You create content once, and it keeps earning. Recurring commissions from tools like Systeme.io (60%), Copy.ai (45%) and ClickFunnels (40%) mean that a strong content plan can earn passive income month after month.
Selling digital products is another strong option. You create an e-book, a course, a template or a set of printable resources and sell them repeatedly through tools like Gumroad, Teachable or Etsy.
Freelancing gives the fastest route to income for people with marketable skills. Writers, designers, developers and consultants can all find clients quickly through Upwork, Fiverr or LinkedIn.
Blogging is a slower path, but one of the most powerful long-term income generators. A well-built blog in the right niche can earn from many streams at once. For example, affiliate commissions, display ads and digital products all add up.
What Does It Actually Cost to Start an Online Business in Texas?
One of the most common questions people ask is how much it costs to start. The honest answer is that it depends on your business model, but the costs are lower than most people expect.
Here is a realistic breakdown for a typical online business setup in Texas.
LLC registration costs $308, paid as a one-time fee online through SOSDirect. A registered agent service is optional and runs $100 to $300 per year if you use a professional giver.
Your domain name will cost $10 to $15 per year. Web hosting runs $5 to $30 per month, depending on the provider you choose. An email marketing tool starts at $0 per month on free tiers and scales up from there.
A sales tax permit is free to obtain through the Texas Comptroller’s website. So for most online businesses, you can get properly set up and up and running in Texas for well under $500 in the first year. That is one of the lowest-cost startup environments in the country.
Common Mistakes to Avoid When Starting an Online Business in Texas
In fact, knowing what to avoid is just as valuable as knowing what to do. So here are the most common mistakes that trip up new online owners in Texas.
Mixing personal and business money matters. This is the most common mistake and the most avoidable. Open a business bank account on day 1.
Ignoring Texas sales tax duties. Even if your business is fully online, you may still need to collect sales tax on transactions with Texas customers. In fact, getting this wrong can result in back payments and fees.
Trying to do everything at once. Beginners who try to run a blog, an e-commerce store and a YouTube channel at once rarely do any of them well. Focus on 1 model first.
Not having a privacy policy on your website. This is a legal necessity if you collect any data from visitors, like email addresses. Most website tools have simple templates you can customise.
Skipping the business plan. You do not need a 50-page document. However, a clear outline of your niche, your audience, your earning plan and your monthly revenue targets keeps you focused and accountable.
Resources for Texas Online Business Owners
Fortunately, Texas has a strong network of support for business owners at every stage of the journey.
The Texas Small Business Development Centre network gives free advice, workshops and mentoring for owners across the state. You can find a local centre through the Texas Economic Development Division.
The US Small Business Administration (SBA) also gives federal-level resources, loan programmes and training that Texas owners can access alongside state-level support.
Getting Started With Your Online Business Today
So the info in this guide gives you a solid foundation. However, the key step is the first one.
So register your business, choose your model and start building. In fact, the online business landscape rewards consistency far more than perfection.
In fact, Texas is one of the most business-friendly states in the country, and the chances for online entrepreneurs here are truly strong. Learning how to start an online business in Texas is not complex when you break it down into clear steps.
Choose your model, register your LLC, set up your bank account, build your website and start creating content or products that serve your audience. The tools are open, the legal framework is straightforward, and the earnings are real.
So take the first step today. So your future business is waiting.
The Best Side Jobs for Teachers: Real Ways to Earn More in 2026
Because a Passion for Education Should Not Mean a Life of Financial Stress
Teaching is one of the most important jobs in the world. However, it has never been one of the best-paid. If you are a teacher looking for a way to bridge the gap between your salary and your bills, you are far from alone. The best side jobs for teachers are not a sign of failure. In fact, they are a smart, practical response to a very real financial problem that millions of educators face.
According to Pew Research Center, about 1 in 6 US teachers works a second job. So this is not a fringe issue. In fact, it is a widespread reality for educators across the country.
The good news is that teachers are well-placed to earn a strong side income. In fact, you have subject knowledge, communication skills, patience and the ability to explain complex ideas in simple terms.
Importantly, those skills are in high demand far beyond the classroom. So let us walk through the strongest options available right now.
Why So Many Teachers Need a Side Income
The financial case for a teacher’s side job is not hard to make. In fact, the average US teacher salary in 2025 was $72,030, according to data from the National Education Association.
That sounds reasonable on paper. However, when you factor in inflation, teachers were earning 5% less in real terms than a decade ago.
Importantly, for early-career teachers, the numbers are even tighter. The average starting salary for a new teacher sits at just $46,526 per year.
So add student loan debt, rising rent and the cost of classroom supplies and the picture becomes clear. Teaching is a financially stretched profession.
Importantly, the Pew Research data also shows that teachers working second jobs earned an average of $6,090 extra per year from those roles during the school year alone. So, side income is not just possible. It is also meaningful when you choose the right options.
The best side jobs for teachers are ones that align with your existing skills, fit around your school schedule and do not leave you burnt out by Monday morning.
Tutoring is the most natural side job for most teachers and one of the highest-earning options available. Importantly, you already know how to explain your subject clearly. You understand how students learn.
So you are better placed than most people to offer private tutoring support. The rates are strong too.
Notably, in-demand areas like maths, science and standardised test preparation command the highest rates. For test prep exactly, tutors earn $25 to $45 per hour on average.
In major cities, that figure can go much higher. Many teachers start with 2 to 3 students a week and grow steadily from there.
Fortunately, you can find clients through local word of mouth, through platforms like Wyzant, Tutor.com and Preply, or by posting in parent Facebook groups. You do not have to limit yourself to your own subject either.
If you are an English teacher with solid maths skills, you can offer both. The flexibility is entirely yours.
2. Selling Lesson Plans and Educational Resources
If you have spent years creating lesson plans, worksheets and classroom games, you are sitting on an income stream you have not tapped yet. Teachers Pay Teachers is the most well-known platform for selling educational resources.
New sellers typically earn a few dollars to a few hundred dollars per month when starting out. More proven sellers who build a strong catalogue can earn $500 or more per month.
Some top sellers earn thousands. The key is to produce resources that solve real problems for other teachers.
For example, think about the materials you wish had existed when you were starting out. Think about the things your colleagues always ask you to share. Those are your product ideas.
Beyond Teachers Pay Teachers, platforms like Etsy and Gumroad are worth exploring too. Many teachers sell printable classroom decor, behaviour trackers, curriculum maps and editable lesson templates.
Importantly, the beauty of this model is that it is genuinely passive. You create a resource once, and it can keep selling for years without any ongoing effort. That is a very different proposition from trading hours for dollars.
3. Affiliate Marketing and Blogging
Affiliate marketing is one of the most scalable side jobs available to teachers. Your communication skills give you a real edge here.
In fact, the model is straightforward. You build an audience online through a blog, YouTube channel or social media presence. You recommend products and services to that audience. When someone buys through your link, you earn a commission.
In practice, the most natural niche is education for most teacher bloggers. You could write about classroom management strategies, teaching tools, lesson planning software or educational technology.
Parents are also a strong audience. So content about learning at home, study tips and educational resources for kids can attract significant traffic.
Similarly, Copy.ai, a popular AI writing tool, pays 45% recurring. ClickFunnels pays 40% recurring.
Importantly, these are not one-time commissions. They keep paying month after month for as long as your referral stays subscribed.
However, it takes time to build an affiliate income. However, teachers who are patient and steady tend to do very well because they understand how to create helpful content.
That content keeps bringing in traffic and commissions long after it is published. So if you enjoy writing and want to build something that earns while you sleep, affiliate marketing is worth taking seriously.
Teachers write constantly. Lesson plans, assessment rubrics, parent communications, grant applications and unit overviews. That writing ability is a genuine skill and one that businesses, educational publishers and media companies will pay for.
Freelance writing is a strong option for teachers who want to earn on their own schedule. You could write for education blogs, parenting websites, curriculum companies or edtech businesses.
Fortunately, subject specialists are particularly in demand. A science teacher who can write accurate and engaging content about STEM topics is a valuable asset to many organisations.
Rates for freelance writing typically start at $0.10 to $0.20 per word for general content. Specialist writers in niche areas can earn $0.30 to $0.50 per word or more.
So a single 2,000-word article at those rates can earn $400 to $1,000. That is strong money for a few hours of focused writing.
In fact, curriculum development is a closely related process. Many publishers, edtech firms and nonprofits hire experienced teachers to design learning materials and assessments on a freelance basis.
Rates for curriculum developers typically range from $25 to $45 per hour. So platforms like Upwork, Fiverr and LinkedIn are good places to find your first clients.
5. Online Course Creation
If you have deep expertise in a subject, online course creation is one of the most powerful long-term side jobs for teachers. You record a video-based course, upload it to a platform like Teachable or Udemy and earn money each time someone enrols.
The earning potential varies widely. Some courses earn a few hundred dollars a month. Others, in high-demand areas with strong marketing, earn thousands.
Importantly, for teachers, the most obvious course topics are extensions of what you already teach. However, it pays to think beyond the classroom too.
If you are a PE teacher who has studied nutrition, a course on healthy eating for families could find a wide audience. If you are a primary school teacher with a background in child development, a course for parents on supporting learning at home could sell very well.
However, the upfront time is significant. A well-produced online course typically takes 20 to 50 hours to create.
However, once it is live, it can keep earning for years with minimal ongoing effort. That is the power of building a digital asset rather than simply exchanging time for money.
6. Virtual Assistant Work
Virtual assistant work might not be the most obvious fit for teachers, but it is actually one of the best matches available. Teaching requires great organisation, communication, time management and the ability to handle many demands at once.
In fact, those are exactly the skills that business owners pay virtual assistants to provide. As a virtual assistant, you might handle tasks like email management, calendar scheduling, social media posting, research and data entry.
Importantly, the work is almost entirely remote, and the hours are flexible. Rates for VA work typically start at $15 to $25 per hour for general admin tasks.
Specialist VAs who offer services like bookkeeping, copywriting or social media strategy can charge $40 to $75 per hour or more. Platforms like Upwork, Belay and Fancy Hands are good places to find VA clients.
Many teachers also find work through LinkedIn by reaching out directly to small business owners in their area. So if you want a side job that uses your professional skills, pays well and fits around your teaching schedule, virtual assistance is well worth exploring.
Standard tutoring is one thing. However, specialist test preparation tutoring operates at a higher level and pays accordingly.
In fact, standardised tests like the SAT, ACT, GRE and AP exams are a big industry in the United States. Parents invest seriously in preparation and support for their children.
Test prep tutors typically earn $25 to $45 per hour at standard rates. In major cities and premium markets, top tutors earn $80 to $100 per hour or more.
For example, companies like Kaplan, Princeton Review and Varsity Tutors hire experienced tutors to work with students both online and in person. Many experienced teachers build their own test prep practice, charging top rates and growing a client base through word of mouth.
The demand is reliably seasonal. It peaks around exam periods and stays strong throughout the academic year.
So this is a side income stream that fits naturally alongside a full-time teaching role. It is also one where your expertise as a trained educator commands real respect.
8. Print on Demand
Print on demand lets you sell custom-designed products without managing any stock or shipping. You create a design, upload it to a platform like Printful or Redbubble, and the company handles everything else when a customer orders.
Fortunately, for teachers, the natural product lines are obvious. Custom classroom prints, motivational posters, teacher-humour T-shirts, subject-specific mugs and tote bags all sell well in education-related markets.
Parents, fellow teachers and school staff are all natural buyers. Margins per item are modest, typically $3 to $10 per sale.
However, successful sellers build large catalogues and earn from many designs at the same time. The front-loaded work of creating and listing designs pays off over time as more products build up in your shop.
Many teachers use Canva to create their designs, which means you do not need to be a professional graphic designer to get started. The whole business can be run in a few hours a week once your catalogue is proven.
9. Summer School and Adjunct Teaching
For teachers who want to earn more without straying far from their core skills, summer school and adjunct college teaching are natural options. Fortunately, summer school positions at your own school or a nearby district are often the simplest to arrange.
The pay typically runs around $25 to $30 per hour, depending on the district. Adjunct teaching at a community college or university is a step up in prestige and sometimes in pay.
In fact, community colleges regularly hire experienced professionals with subject expertise to teach introductory and intermediate courses. If you have a relevant degree and strong classroom experience, you may well qualify.
Pay for adjunct positions varies widely. However, rates typically range from $2,000 to $5,000 per course per semester, depending on the institution and subject.
Teaching 1 to 2 courses per semester alongside your regular job can add $4,000 to $10,000 per year to your income. Importantly, this option keeps you firmly in your element as an educator.
10. Social Media Management
Most small businesses know they need a social media presence. However, very few have the time or skills to manage it well. That gap is a real chance for teachers who are comfortable online.
Social media managers handle content creation, scheduling, engagement and strategy for business accounts across platforms like Instagram, Facebook, LinkedIn and TikTok.
In practice, the organisational and communication skills teachers use every day translate directly to this kind of work. Rates for social media management typically range from $300 to $1,000 per month per client for a standard package.
So if you can manage 3 to 4 clients at once, that adds up to a meaningful side income. However, finding clients is the hardest part at the start.
Begin by reaching out to local businesses whose social media clearly needs work. Offer a short-term trial at a reduced rate in exchange for a testimonial. Then use that result to attract further paying clients at your full rate.
11. Selling Stock Photos and Educational Video Content
If you have a decent camera and an eye for photography, stock photo platforms like Shutterstock, Adobe Stock and Getty Images will pay you a royalty each time someone downloads one of your images.
So you create the image once, and it can keep earning for years. For teachers, the most natural photo subjects are classroom scenes, educational materials and childhood learning moments.
Earnings per download are modest, typically $0.25 to $2.00 per image. However, a strong library of 500 to 1,000 images earning steady downloads adds up to a reliable passive income stream over time.
Beyond photography, teachers who are comfortable on camera can build YouTube channels around their subject expertise. Education channels that offer genuine teaching content attract strong audiences.
Importantly, they can be monetised through ad revenue, sponsorships and affiliate links once a channel reaches YouTube’s monetisation levels. That makes video content one of the few side jobs that can earn from several sources at once.
How to Choose the Right Side Job as a Teacher
With so many options available, narrowing down where to start is one of the most important steps. A side job that works brilliantly for a maths teacher with free evenings may not suit a primary school teacher who coaches after school 3 days a week.
Here are 4 questions that will help you choose wisely.
What skills do you already have? Your existing teaching skills are valuable far beyond the classroom. Identify which of your strongest skills translates most directly to the options on this list. Start there.
How much time can you honestly commit? Some side jobs, like tutoring and VA work, produce income quickly but require ongoing time input. Others, like affiliate marketing and course creation, demand heavy upfront effort for a slower payoff. So be honest about your schedule before committing.
Do you want active or passive income? Active side jobs pay you for your time. Passive income streams, like selling lesson plans or affiliate marketing, pay you for assets you have already built. In practice, the strongest long-term strategy combines both.
Does it suit your energy levels? Teaching is mentally and physically demanding. So if a side job feels like more of the same draining type of work, it will be hard to sustain. Choose something that complements your existing routine rather than adding to your fatigue.
Getting Started: Your Next Step
So the most important thing is to pick 1 option and start rather than spending weeks researching without acting. Momentum builds quickly once you have made your first dollar outside the classroom.
If you are drawn to digital income streams like affiliate marketing or blogging, your tool choices matter a lot. Getting the right platforms in place from the start will speed up your results.
According to We Are Teachers, most teachers who earn more through side work do so by leaning into skills they already have rather than trying to learn entirely new ones.
That is wise advice for anyone starting out. In fact, getting the foundation right saves you months of wasted effort further down the line.
Teaching is one of the hardest jobs there is. The fact that so many teachers need extra income to make ends meet is a problem with the system, not a reflection of your worth.
The best side jobs for teachers are ones that respect your time. They use the skills you already have. They also give you a genuine financial return for the effort you put in.
So whether you choose tutoring, affiliate marketing or selling lesson plans, the key is to start. Pick 1 option. Give it 3 to 6 months of steady effort. Then measure your progress honestly.
The compound effect of that consistency is what separates teachers who build real side income from those who stay stuck in the planning stage. You have the skills. You have the work ethic. The only thing left is to put them to use outside the classroom.
The Best Side Hustles For Millennials That Actually Pay in 2026
More Millennials Are Earning Outside Their 9-to-5 Than Ever Before
If you are a millennial trying to stretch your income further, you are in good company. The best side hustles for millennials are not some pipe dream cooked up by influencers. In fact, they are real income streams that millions of people are building alongside their regular jobs right now.
According to a LendingTree survey, millennials with side hustles earn an average of $1,119 per month in extra income.
That is not pocket change. So if you have been thinking about starting a side hustle, the timing has never been better.
Why So Many Millennials Are Turning to Side Income
Student loan debt is still biting hard for many people in their late 20s and 30s. The cost of renting has shot up in most major cities. Wage growth has not kept pace with the rising cost of living.
So it is no surprise that more millennials are looking for ways to earn outside their day job. In fact, 31% of millennials currently have a side hustle, according to Bankrate’s side hustle survey.
Importantly, many are not just dabbling. They are treating their side hustle as a long-term financial strategy rather than a short-term fix.
The motivations vary widely. Some millennials start a side hustle to pay off debt faster. Others want to build savings without cutting their lifestyle. Still others are using side income as a stepping stone toward full financial freedom.
Fortunately, the digital economy has removed most of the old barriers to entry. You do not need a shop, a warehouse or much startup capital to earn money online.
In practice, your laptop and a reliable internet connection are enough to get started with most of the options on this list. So let us look at the best ones available right now. First, though, it helps to know why this moment is such a good time to act.
The Get Started Here page pulls together the clearest guidance available on the tools and approaches that give beginners the best chance of building real, recurring online income.
1. Affiliate Marketing
Affiliate marketing is one of the most scalable side hustles available to millennials today. The model is simple. You promote other people’s products or services online.
When someone buys through your link, you earn a commission. There is no stock to manage, no customer service to handle and no deliveries to worry about.
In fact, the real appeal lies in the potential for recurring income. Many software and digital tool companies pay commissions every single month for as long as the customer stays subscribed.
So one successful referral can keep paying you for years. That is a very different model from simply trading your time for money.
Systeme.io is a strong example of this. It is an all-in-one marketing platform covering sales funnels, email marketing, online courses and more.
It pays a 60% recurring commission to affiliates. So if someone signs up for its $27-a-month plan through your link, you earn around $16 every single month from that single customer.
Stack enough referrals, and you are looking at a meaningful passive income stream. Notably, the key to success is building an audience that trusts your recommendations.
That usually means starting a blog, a YouTube channel or a social media presence in a niche you know well. You write helpful content, share honest reviews and let the commissions build over time.
It is not instant money. However, those who stick with it are building an asset that compounds for years to come.
Freelance writing is one of the most accessible side hustles for millennials with solid communication skills. Businesses, blogs and marketing agencies all need a steady stream of written content. Many of them struggle to produce it in-house.
So that gap creates a real opportunity for writers. The rates vary depending on your niche and experience.
Beginners often start at $0.05 to $0.10 per word and work upward from there. Experienced writers in areas like finance, technology or healthcare can charge $0.25 to $0.50 per word or more.
In practice, a single 2,000-word article at those rates can earn $500 or more. That alone makes this one of the best side hustles for millennials who enjoy writing.
Platforms like Upwork and Fiverr are good places to find your first clients. Job boards like ProBlogger and Contena are also worth checking.
The more you write, the faster you get and the better your rates become. Importantly, many freelance writers earn $2,000 to $5,000 a month once they have a roster of regular clients.
Beyond writing, content creation also covers video scripts, social media copy, email newsletters and podcast show notes. So if you enjoy creating in any format, there is almost certainly a type of content work that suits your strengths.
3. Selling Digital Products
Digital products are one of the most scalable side hustles because you create them once and sell them repeatedly. There are no printing costs, no shipping fees and no stock to manage.
So once the product exists, every sale is almost pure profit. The most popular digital products include e-books, templates, Canva graphics, Lightroom presets, spreadsheets and online courses.
If you have expertise in anything from personal finance to graphic design to fitness, you can package that knowledge into something people will pay for. For example, a template that saves a small business owner 3 hours of admin work every week is worth paying for.
Platforms like Gumroad, Etsy and Teachable make it easy to list and sell without any technical knowledge. Many creators start with a simple PDF guide priced at $10 to $30.
In fact, they use that initial product to test demand before building something larger. That is a smart, low-risk way to start.
The key is to focus on solving a specific problem for a specific type of person. Think about the problems you have already solved in your own life. Then consider whether other people would pay to solve the same problem faster.
4. Virtual Assistant Work
Virtual assistance has become one of the most in-demand side hustles of the past few years. As more businesses move online, the need for remote admin support has grown sharply.
In practice, a virtual assistant typically handles tasks like email management, calendar scheduling, social media posting, data entry and customer service. The work is flexible and can usually be done from anywhere with a laptop.
Rates typically start at $15 to $25 an hour for general admin tasks. However, specialist VAs who handle areas like bookkeeping, copywriting or podcast editing can charge $40 to $75 an hour or more.
Sites like Zirtual, Fancy Hands and Upwork regularly list VA opportunities. Many VAs also find clients through LinkedIn or by reaching out directly to small business owners.
So if you are organised, reliable and comfortable with digital tools, virtual assistance is one of the quickest ways to start earning on the side. Interestingly, some VAs build a full-time income from it within 6 months.
The Get Started Here page pulls together the clearest guidance available on the tools and approaches that give beginners the best chance of building real, recurring online income.
5. Online Tutoring and Coaching
If you have expertise in any subject, online tutoring is a side hustle worth taking seriously. The demand for online education has grown sharply in recent years.
Students at every level need support in areas from maths and science to test preparation and foreign languages. Tutoring platforms like Wyzant, Chegg Tutors and Tutor.com connect tutors with students quickly.
Rates typically range from $20 to $80 an hour, depending on the subject and level. Advanced maths, science and test prep tutors often command the higher end of that range.
Beyond academic tutoring, coaching is a much broader opportunity. Life coaches, career coaches, business coaches and fitness coaches all serve a huge and growing market.
In fact, if you have built real expertise in any area of life or business, you can package that knowledge into coaching sessions. Many coaches charge $100 to $300 per hour once they have an established client base.
The overhead is minimal. You need a video calling tool like Zoom, a payment method and the ability to deliver real value to your clients.
Start with a few clients at a lower rate. Then collect testimonials and raise your prices as demand grows.
6. Blogging and Niche Websites
Blogging takes longer to monetise than some of the other options on this list. However, it is also one of the most powerful long-term side hustles for millennials.
A well-built blog in the right niche can generate income through affiliate marketing, display advertising, sponsored posts and digital product sales at the same time. In practice, the typical blogging timeline involves 6 to 12 months of consistent content creation before meaningful traffic arrives.
Once you break through that initial phase, the compound effect kicks in. Old articles continue to rank on Google and earn commissions long after you wrote them.
New articles keep adding to the total. So the income from a blog tends to grow without a matching increase in effort over time. That is the compound effect at work.
The most successful bloggers choose a niche they understand well and serve a specific audience. They research and answer the questions people are already searching for online.
Building trust over time through honest and helpful content is what sets them apart. So they never try to sell something on every single page.
Print on demand lets you sell custom-designed products without holding any stock. You create a design, a customer orders a product with your design on it and the print-on-demand company handles the rest.
In practice, they print, pack and ship the order directly to the customer. You keep the difference between the retail price and the production cost.
Popular print-on-demand platforms include Printful, Redbubble and Merch by Amazon. You can sell T-shirts, hoodies, mugs, phone cases and tote bags, among many other items.
Margins are modest per item, typically $3 to $10 per sale. However, successful sellers build large catalogues and earn from hundreds of designs at once.
The work is front-loaded. You spend time upfront creating designs and listing them on platforms.
Once they are live, sales can come in without much ongoing effort. Notably, many sellers use Canva or simple design tools to create their graphics, so you do not need to be a professional designer to start.
The Get Started Here page pulls together the clearest guidance available on the tools and approaches that give beginners the best chance of building real, recurring online income.
8. Social Media Management
Most small businesses understand they need a social media presence. However, far fewer of them have the time or skills to manage it well. That gap is a real opportunity for skilled millennials.
Social media managers handle content creation, scheduling, engagement and strategy for business accounts across platforms like Instagram, TikTok, Facebook and LinkedIn.
Rates for social media management typically range from $300 to $1,000 a month per client for a standard package. Larger clients may pay $2,000 or more per month.
So if you can manage 3 to 5 clients at once, that adds up to a solid side income or even a full salary replacement.
Finding clients is usually the hardest part at the start. Begin by reaching out to local businesses whose social media clearly needs work.
Offer to manage one account for a month at a reduced rate in exchange for a testimonial. Then use that result to attract paying clients at your full rates.
9. Dropshipping and E-Commerce
Dropshipping is a model where you sell physical products online without holding any stock yourself. When a customer places an order on your store, you purchase the item from a supplier who ships it directly to the customer.
Your profit is the margin between your selling price and the supplier cost. The attraction of dropshipping is the low startup cost.
You do not need to invest in bulk stock upfront. However, margins can be tight, and competition is fierce in popular product categories.
In practice, the most successful dropshippers focus on specific niches with less competition. That is a smarter approach than chasing trending products that everyone else is also selling.
Shopify is the most widely used platform for building a dropshipping store. Many sellers source products from suppliers on AliExpress or through dedicated platforms like Spocket or SaleHoo.
Still, expect to spend 3 to 6 months testing and refining your approach before seeing steady profits.
10. Transcription and Proofreading
Transcription is one of the quickest side hustles to start because the barrier to entry is low. Transcriptionists listen to audio or video recordings and convert them into written text.
Legal, medical and general transcription are the 3 main categories. Legal and medical transcription pays the most, often $20 to $40 per audio hour. However, they may require some specialist training.
General transcription pays less, typically $10 to $25 per audio hour. It is easier to break into without prior experience.
Platforms like Rev, TranscribeMe and GoTranscript accept new transcriptionists regularly. So this is a good option if you want to start earning quickly without a big learning curve.
Proofreading is a closely related skill. In fact, many people combine both to maximise their earning potential. Proofreaders check written documents for errors in grammar, spelling and formatting before publication.
Many publishers, businesses and self-published authors hire proofreaders on a freelance basis. Rates typically range from $25 to $50 an hour for experienced proofreaders.
Both of these options suit millennials who are detail-focused and prefer quiet, concentrated work.
11. Affiliate Marketing for Software Tools
It is worth returning to affiliate marketing specifically in the context of software tools, because this niche offers some of the highest commission rates available anywhere.
Software companies operate on high margins. So they are willing to pay generous recurring commissions to affiliates who send them paying customers.
According to Hostinger’s side hustle statistics, the affiliate marketing industry is now valued at $18.5 billion. In addition, over 80% of businesses now incorporate affiliate marketing into their digital strategy.
So the opportunity for affiliates has never been larger. The types of tools that pay strong commissions include email marketing platforms, website builders, funnel software, AI writing tools and online course platforms.
For example, Systeme.io offers a 60% lifetime recurring commission. Similarly, Copy.ai offers 45% recurring, and ClickFunnels pays 40% recurring.
These are not one-time payments. They are monthly commissions that continue for as long as your referral stays subscribed. That means the income compounds month after month.
Building an affiliate income from software tools takes time and consistent effort. However, the growing nature of recurring commissions makes it one of the most financially rewarding side hustles available for millennials with an interest in digital business.
The Get Started Here page pulls together the clearest guidance available on the tools and approaches that give beginners the best chance of building real, recurring online income.
How to Choose the Right Side Hustle For You
With so many options available, choosing where to focus your energy is one of the most important decisions you will make. In practice, a side hustle that suits someone else’s skills and schedule may be completely wrong for yours.
Here are 4 questions worth asking before you commit.
What skills do you already have? The fastest route to earning money on the side is almost always through skills you have already built in your day job or personal life. Writers, designers, analysts and teachers all have directly transferable skills that clients will pay for.
How much time can you realistically commit? Some side hustles, like freelancing and VA work, can earn money quickly but require ongoing time input. Others, like blogging and affiliate marketing, require heavy upfront work for a delayed payoff. So be honest about your schedule before choosing.
Do you want active or passive income? Active side hustles pay you for your time. Passive side hustles, like affiliate marketing and digital products, pay you for assets you have already built. In practice, the best long-term strategy usually combines both.
What is your risk tolerance? Some side hustles are low risk and low reward. Others, like dropshipping or e-commerce, require testing and may involve some upfront investment. So know what you are comfortable risking before you start.
There is no single right answer here. The best side hustle is the one you will actually stick with long enough to see real results. That means picking something you can see yourself doing steadily for at least 6 months.
Getting Started: The Practical Next Step
Starting a side hustle feels overwhelming when you are staring at a blank page. However, the trick is to pick one option, commit to it for at least 6 months and measure your progress honestly.
If you are drawn to digital business models like affiliate marketing, blogging or selling digital products, the groundwork you lay in the first few months determines your long-term results.
Choosing the right tools, setting things up correctly from the start and understanding how to build an audience all make a big difference to how quickly you earn. So do not skip the setup phase in a rush to see results.
The Get Started Here page pulls together the clearest guidance available on the tools and approaches that give beginners the best chance of building real, recurring online income.
Final Thoughts
The best side hustles for millennials are not secret formulas or overnight success stories. In fact, they are practical income streams built by ordinary people who decided to show up steadily and play the long game.
So whether you choose affiliate marketing, freelancing, digital products or something else entirely, the principle is the same. Pick something that suits your skills and schedule. Build it steadily. Give it enough time to compound.
The data is clear. Millennials are the highest-earning generation of side hustlers right now. The digital tools available today make it more achievable than ever before.
The only thing standing between you and a meaningful second income is the decision to start.
Online Business Ideas for Nurses: 10 Ways to Earn Beyond the Bedside
Why Nurses Are Built for Online Business
Online business ideas for nurses are everywhere online. However, most lists throw together 40 vague suggestions with no real detail on how any of them work. So this article takes a different approach. It covers 10 real online business models that suit nurses specifically, what they honestly pay and how to start each one.
Nurses are uniquely placed to build strong online business models. The reasons are compelling. So the skills that make a great nurse, such as clear communication, deep knowledge and genuine care for people, translate directly into the most valuable online venture traits.
Furthermore, the public trusts nurses more than almost any other field. That trust is a real business asset.
This article covers online business ideas for nurses with real income figures, honest timelines and the first practical steps. So by the end, you will have a specific direction rather than a long list that leads nowhere.
What Makes Nurses Ideal Online Business Owners
The Trust Factor
Trust is the most valuable thing in an online venture. So when a qualified nurse writes a health article or recommends a product, the audience pays attention in a way they would not for a random content creator. That credential is a genuine asset. It is very hard to replicate.
Furthermore, the nursing shortage and the stress of clinical work mean that more nurses than ever are searching for ways to earn income outside the hospital.
So the timing is right. The tools are low-cost. The audience is ready for expert-led health content.
Building an online venture from scratch requires 2 things: knowledge and the ability to explain it. So nurses already have both. The clinical knowledge that took years of study and practice to build is exactly what online audiences are searching for.
Furthermore, nurses spend every shift explaining complex ideas to patients in plain language. That skill is exactly what makes great online content.
The 10 Best Online Business Ideas for Nurses
1. Health and Wellness Blogging
A health blog written by a qualified nurse is a powerful asset. So you write articles about health topics you know well, grow an audience through Google search and earn money through affiliate links, display ad revenue and digital products. It is a genuinely strong model.
The income potential is very strong over time. So a proven health blogger can earn $2,000 to $20,000 a month or more. Furthermore, nurse-authored health content ranks well in Google because it carries real clinical weight. So the authorship credential matters more than ever now that Google actively rewards expert content.
The best starting approach is to pick a specific niche within health rather than covering general wellness. So a nurse who specialises in paediatrics might write about child health. A cardiac nurse might write about heart health for patients and families.
Furthermore, a narrow niche means lower rivalry and faster growth in the early stages.
Income for a health blog typically comes from affiliate links to health products, supplements and wellness tools. Furthermore, display ad revenue through networks like Mediavine pays well once your site reaches 50,000 monthly visitors.
2. Online Nursing Courses and Study Guides
Nurses who have passed licensing exams, earned specialist certs or built deep clinical expertise can turn that knowledge into online courses that other nurses will pay for. So this is a very strong fit. So this is 1 of the most naturally suited online business ideas for nurses. The fit is strong.
According to Teachable, successful course creators earn between $1,000 and $10,000 a month. However, that range covers a wide spectrum. So a nurse launching their first course should expect modest early sales that grow as reviews build.
The strongest course topics for nursing-focused online business models include NCLEX prep guides, speciality cert prep, clinical skills for new nurses and travel nursing career guides. Furthermore, nurses who have personal stories of burnout recovery or difficult career pivots also attract a strong audience willing to pay for that practical wisdom.
Platforms like Teachable, Kajabi and Udemy are all well-suited to nurse educators. All 3 are beginner-friendly. So you can have your first course live within a few weeks.
If you enjoy writing and want a quick income rather than waiting 12 months for a blog to grow, health content writing is the fastest path for nurses. So you use your clinical knowledge to write articles, blog posts, website copy and patient learning materials for health companies, hospitals, health tech firms and wellness brands.
Rates for nurse writers are strong because the credential commands a real premium. So a nurse copywriter can charge $0.15 to $0.50 per word for health content. That translates to $150 to $500 for a single 1,000-word article. Furthermore, some specialist nurse writers charge $100 to $200 an hour for consulting work.
According to Upwork, health and medical writers on proven platforms earn some of the highest rates in the freelance writing space. So a nurse with 5 years of clinical background can command much higher rates than a general health writer with no clinical training.
This is 1 of the best starting points for nurses because income arrives quickly. That matters a lot. So you do not have to wait 12 months for income to build. Furthermore, the skills you develop writing health content for clients also accelerate any other online venture you build alongside it.
4. Telehealth Consulting and Coaching
Some nurses build coaching business models around their area of clinical expertise. It is a very strong model.
So a maternal health nurse might offer postnatal coaching for new mothers. Furthermore, a cardiac nurse might run a heart health coaching practice. A mental health nurse might offer wellness coaching for people who want support without formal therapy.
It is important to be clear about the distinction between coaching and clinical practice. These are different things. So nursing coaches typically position their service as wellness support rather than medical treatment. Furthermore, clear disclaimers and proper scope of practice awareness are essential here.
Income from nursing coaching varies quite widely. So 1-to-1 coaching sessions at $150 to $300 an hour are common for nurses with a clear niche. Group programmes can earn $500 to $3,000 per person. Furthermore, mixing 1-to-1 coaching with group programmes creates a scalable income model that does not cap at your open hours.
5. Creating and Selling Digital Products
Digital products are specifically well-suited to nurses because the knowledge gap between a trained nurse and the general public is large. So patient learning materials, health trackers, meal planning guides, newborn care guides and medication tracking templates are all products that nurses are ideally placed to create and sell.
Platforms like Etsy, Gumroad and Teachable make it simple to list and sell digital products with no inventory, no shipping and no ongoing production work. So you create the product once and sell it many times.
A well-placed Etsy digital product in a focused health niche can earn $200 to $2,000 a month. Furthermore, nurses who build a catalogue of 10 to 15 related products see income compound as buyers purchase many items. So the return on a single week of product creation can compound for years.
6. Medical Proofreading and Editing
Nurses who have strong attention to detail and a love of language can build a very specific freelance business in medical proofreading. So you review medical documents, research papers and health content for accuracy, clarity and clinical correctness.
This niche is underserved because few people combine the clinical knowledge and the language skills needed to do it well. So a nurse who offers this service can command rates of $50 to $100 an hour or more.
Furthermore, this is 1 of the most flexible online business ideas for nurses because it can be done entirely at your own pace. So you take on as much or as little work as suits you. It is also 1 of the easiest to start. So you can pitch your first clients within a few days.
7. YouTube Health Channel
A YouTube channel focused on health learning from a nursing angle is a powerful long-term asset. So you create videos that explain health conditions, demystify medical procedures or help aspiring nurses study for their exams.
YouTube is 1 of the few platforms where health credentials actively help your channel grow. That is a major advantage. So a nurse explaining a cardiac procedure will outperform a general health influencer because the audience trusts the source. Furthermore, Google search sends traffic to YouTube videos, which means your videos can rank for health search terms and attract viewers for years.
The income from YouTube takes time to build. So expect 12 to 18 months before real ad revenue arrives. That is the honest timeline.
However, the mix of ad revenue, affiliate links and digital product sales can generate $3,000 to $15,000 a month for a proven health channel. Furthermore, brand partnerships with health companies are common for nurse YouTubers with engaged audiences.
8. Affiliate Marketing for Health and Wellness Products
Nurses do not need to create their own products to earn affiliate income. So it is an accessible starting point. So you can recommend products you genuinely trust and earn a commission each time a reader purchases through your link.
The health and wellness affiliate space is 1 of the most commercially strong online niches. It pays very well. So affiliate programmes for supplements, health monitors, nursing study tools and health apps all carry commission rates of 5% to 30% or higher. Furthermore, some specialist equipment programmes carry even higher commissions for high-ticket items.
According to Authority Hacker, the average affiliate marketer earns around $8,038 a month. However, that covers experienced marketers at all levels. So a nurse building an affiliate income stream alongside a blog or YouTube channel should expect modest early commissions that grow over 12 to 24 months.
The biggest advantage nurses have in affiliate marketing is the authenticity of their suggestions. So when a nurse recommends a blood pressure monitor or a nursing study resource, the audience treats it as a peer suggestion rather than ad revenue. That trust greatly increases conversion rates.
9. Social Media Health Education
Social media content creation is a strong starting point for nurses who want to build an online venture without the longer timelines of blogging. So platforms like Instagram, TikTok and LinkedIn all reward expert health content when it is presented clearly and engagingly.
Nurse influencers on TikTok and Instagram earn income from sponsored content, affiliate links and their own digital products or courses. So the social media platform acts as the top of a funnel that leads to higher-margin income streams.
Income from social media varies widely. So a nurse with 10,000 engaged followers in a specific health niche can earn $500 to $2,000 a month from sponsored posts and affiliate commissions.
At 100,000 followers, that figure can rise to $5,000 to $20,000 a month. So the upside is real. Furthermore, the content you create for social media can also be repurposed into blog posts, YouTube videos and digital product ideas. So nothing is wasted.
10. Nurse Tutoring and Mentoring
One-to-one tutoring for nursing students is a high-demand service with strong earning potential and very little setup required. So if you have passed your NCLEX, earned a specialist cert or navigated a difficult part of your nursing career, other nurses are willing to pay for that guidance.
Tutoring sessions via Zoom or Google Meet can be charged at $50 to $150 an hour, depending on your speciality. Furthermore, nursing career mentoring, including CV review, interview preparation and career strategy, can command similar rates.
So this is the simplest idea on this list to start. You can take your first client within days.
How to Choose the Right Online Business as a Nurse
Match Your Model to Your Strengths
Not every online venture idea suits every nurse. So the key is to match your chosen model to your existing strengths rather than building new skills from scratch.
A nurse who loves writing should start with a blog or freelance writing. One who is confident on camera should start with YouTube or social media. A nurse with deep specialist knowledge should start with courses or coaching.
Furthermore, consider your timeline carefully. So nurses who need income quickly should start with freelance writing, medical proofreading or tutoring, all of which can earn income within days. Nurses who can invest 12 to 24 months in building a long-term asset should consider blogging or YouTube, which generate modest income early but compound strongly over time.
The Single Most Important Rule
Pick 1 model and commit to it for at least 6 months before adding anything else. That is the most important rule. So the nurse who tries to blog, start a YouTube channel, build a course and run a coaching practice all at the same time will make very little progress.
Focused effort on 1 model for 6 to 12 months always outperforms scattered effort. That is a fact.
Furthermore, the skills and audience you build through your primary model make every extra stream you add later much easier to earn from. Start narrow. Expand from a position of strength.
The Practical Starting Plan
Week 1: Choose Your Model
Read back through the 10 ideas and pick the 1 that best matches your strengths, your open time and your income goals. So if you are not sure, ask yourself which of these you would do even if it did not pay for the first 6 months. The answer usually points to the right model.
Furthermore, do your initial research this week. Two hours is enough.
So search Google for your chosen topic to see what is already out there and where the gaps are. Do not over-research. This is a common mistake.
Week 2: Set Up Your Platform
Whatever model you chose, get your technical setup done in week 2. So register your domain name if you are starting a blog. Set up your Teachable account if you are building a course.
Create your Etsy shop if you are selling digital products. Sign up on Upwork or Fiverr if you are offering freelance writing or proofreading.
Furthermore, set up an email marketing system from the very beginning. This is non-negotiable. Systeme.io offers a free plan that covers email marketing, landing pages and digital product delivery in 1 place. So you can build an email list from your very first piece of content with no separate fees.
For a clear guide to the exact tools and platforms that give nurses the best start, the Get Started Here page is the most useful starting point.
Week 3: Create and Publish Your First Asset
Write your first blog post, create your first product, record your first YouTube video or pitch your first freelance client this week. So do not wait until everything feels ready.
Just start. The first version of anything you create will not be your best. That is expected.
Furthermore, the nurse who publishes 50 imperfect blog posts over 12 months will outperform the 1 who spends 12 months polishing 5 posts. So consistency beats perfection in the early stages.
Common Mistakes Nurses Make When Starting Online Businesses
Staying Too General
The single biggest strategic mistake nurses make is trying to cover all of health and wellness rather than picking a specific angle. Spreading your effort too thin never works. Choose a specific lane and stay in it.
So a blog called “Healthy Living” competes with millions of general wellness sites. You cannot win that fight early on. A blog called “Heart Health for Heart Failure Patients” serves a specific audience and faces far lower rivalry.
Pick your lane and stay in it for at least the first 12 months. That is how you build authority. Furthermore, the more specific your niche, the more trust you build with a specific audience and the easier it becomes to attract the right affiliate partners and sponsors.
Underestimating the Time Required
Most nursing-related online business models take 6 to 18 months to produce meaningful income. So patience is key. So nurses who expect $1,000 a month by month 3 are almost always disappointed and quit before the compound effect kicks in.
Furthermore, the nurses earning $5,000 to $15,000 a month from their blogs and digital products today are almost all people who started 2 to 4 years ago and kept going. So the edge is not talent or credentials. It is the willingness to keep going when results are not yet visible. That is the real advantage.
Not Building an Email List
Your email list is the 1 asset that no algorithm change, social media update or Google penalty can take from you. So many nurses build strong followings on Instagram or TikTok without ever collecting a single email address. Then a platform update reduces their reach, and their entire audience becomes hard to reach.
Start collecting email addresses from day 1. It is one of the most important things you can do. So offer a free lead magnet, such as a health checklist or a medication tracking template, in exchange for a subscriber’s email address. Furthermore, even a list of 200 engaged subscribers can generate real income from every future product launch or affiliate suggestion.
Realistic Income Expectations
The First 6 Months
For content-based models like blogging and YouTube, income during the first 6 months is almost certainly zero. So expect nothing early on. This is the normal experience for any nurse starting an online venture from scratch. It is not a sign that you are failing.
However, freelancing models like content writing, medical proofreading and tutoring can earn income within days. So if you need income quickly, start there. Build a passive income model alongside it.
Months 6 to 18
This is where the first real income from content-based models typically appears. So blog posts begin ranking in Google, YouTube videos start attracting regular viewers, and digital product listings begin earning weekly sales. The compound effect becomes visible. Income in this phase might range from $200 to $1,500 a month for nurses who have published reliably.
So the articles you wrote in month 2 are now earning real traffic. Products you listed in month 1 are getting regular views. The work is starting to compound in a way that produces returns beyond the effort you invested.
Beyond Month 18
Business models that have been built reliably for 18 to 24 months are in a very different financial position. So the nursing online business models earning $5,000 to $15,000 a month today are almost all run by nurses who have kept going.
Furthermore, the clinical credentials that make nursing hard to enter are exactly what make nursing-led online business models hard to replicate. So your years of training and clinical practice become a genuine wall around your online venture that casual health content creators cannot cross. That is a very powerful long-term edge.
Getting Started: Your Next Step
If you have been searching for online business ideas for nurses for a while but have not yet taken your first step, pick 1 model from this list and take 1 action today.
So register a domain, create an Etsy account or sign up on Upwork. Begin something today.
Furthermore, set up your email marketing system from the very start. Do not delay this. The sooner you start collecting email addresses, the more valuable your business becomes.
Online business ideas for nurses are not in short supply. The real question is which 1 you will commit to.
So the models in this article work. The credential you already hold gives you a genuine head start. The trust your audience places in nurses is a business asset that most online creators will never have.
Furthermore, the compound effect of building an online venture rewards patience in a way that clinical overtime never will. So the content you create this week is still earning income in 5 years.
The digital product you build this month can sell every day for years. Pick your model today. Take your first step now. If you are serious about exploring online business ideas for nurses, everything you need to begin is already within reach.
How to Start an Online Business in Malaysia: The Complete Guide
Why Malaysia Is a Smart Base for an Online Business
If you are researching how to start an online business in Malaysia, you have chosen a strong starting position. The foundations here are solid. Malaysia has 1 of the highest internet usage rates in Southeast Asia, a strong digital payments network and a government that actively supports digital business ownership. So the Malaysia Digital Economy Body is a genuine resource worth knowing about.
Furthermore, Malaysia’s English-speaking people give local online business owners direct access to the US, UK, Australian and Canadian markets. These are the highest-spending digital audiences in the world. So the chance here is not limited to the local market. With the right online business model, your customers can be anywhere.
This article covers the online business models that work best for Malaysia-based business owners, what they pay in USD terms and the practical legal and tax steps. So by the end, you will have a specific path forward rather than a general sense of where to begin.
Malaysia’s e-commerce sector has grown greatly in recent years. So the network is there.
The consumer habits, the payment network, and the digital literacy needed to support a thriving online business ecosystem are all in place and growing. Furthermore, the Malaysian government’s Digital Economy Blueprint actively supports online business creation. So the policy setting is supportive.
Furthermore, Malaysia’s geographic position and its multilingual people give online business owners here a distinct advantage. It is a real advantage. So a Malaysia-based blogger, course creator or digital product seller can reach English-speaking, Malay-speaking and Mandarin-speaking audiences all at once. That kind of reach is a real advantage.
Why All Income Figures Are in USD
Most major affiliate programmes, ad networks and digital markets pay their creators in US dollars. So a Malaysia-based affiliate blogger earning commissions from a US platform receives those commissions in USD wherever they are based.
For that reason, all income figures in this article are in USD. So a Malaysia-based blogger earning $2,000 a month in affiliate commissions is earning around 9,300 Malaysian Ringgit at current exchange rates. Furthermore, that exchange rate can work in your favour when the Ringgit weakens against the dollar.
The 5 Best Online Business Models for Malaysia-Based Beginners
1. Affiliate Marketing Through a Blog
Affiliate marketing through a blog is 1 of the most popular and passive online business models for Malaysia-based beginners. The barrier to entry is low. So you create a website around a specific topic, write helpful articles and earn commissions when readers click your links and buy.
The income is passive once proven. So articles you write this month can earn commissions 5 years from now with no further input from you.
Furthermore, the cost to start is minimal. A domain and basic hosting costs around $50 to $100 a year. So you can begin with very little financial risk.
The niche you choose matters a great deal. So think carefully. This choice matters.
So pick a topic at the overlap of something you know well and something with real commercial appeal. That is your sweet spot. Find it.
Personal finance, technology, travel and health are all strong niches for Malaysia-based bloggers targeting English-speaking audiences. Furthermore, Malaysia-specific content within those niches often faces far lower rivalry than general English content.
So a blog about Malaysian travel spots or personal finance for SE Asian readers can outrank bigger sites because the keyword rivalry is much lower and the audience focus is much higher.
According to Authority Hacker, the average affiliate marketer earns around $8,038 a month. However, that covers skilled marketers at all levels. So a Malaysia-based beginner should expect modest early income that builds steadily over 12 to 24 months. That is normal.
Digital products are 1 of the most passive income models for Malaysia-based beginners. So you create the product once and sell it repeatedly. So there is no inventory, no shipping and no ongoing production work. The income continues whether you are working or not.
The most open digital products for beginners include e-books, templates, spreadsheets, Canva graphics, online courses and printable planners. So a Malaysia-based financial expert might sell a budgeting spreadsheet. A trained teacher might sell lesson plan templates.
A designer might sell a Canva social media template pack. The expertise you already have is the raw material.
Platforms like Gumroad, Teachable and Etsy are all open to sellers based in Malaysia and accept payments from buyers worldwide. So you are not limited to Malaysian customers. Furthermore, income from digital product sales is taxable in Malaysia and must be declared to the Inland Revenue Board.
Income from digital products varies quite widely. A well-placed Gumroad product in a focused niche can earn $200 to $2,000 a month.
A full online course from a proven creator can earn $1,000 to $10,000 a month. Furthermore, building a catalogue of 10 to 15 related products means income compounds as buyers purchase many items.
3. Freelance Services
Freelancing is the fastest path to online income for Malaysia-based beginners who need money to arrive quickly. So you offer a skill, find clients and start earning within days. There is no long build-up period.
The most in-demand freelance skills for Malaysia-based online workers include content writing, graphic design, web development, video editing and social media oversight. So if you have any of these skills from your current job or your studies, you already have a sellable service.
Platforms like Upwork and Fiverr are fully open to freelancers based in Malaysia and give you access to a global client base right away. So you are not dependent on local Malaysian clients alone. Your market is global. Furthermore, many Malaysia-based freelancers find their first clients through LinkedIn or former colleagues rather than through freelance platforms.
According to Upwork, freelancers on proven platforms earn anywhere from $15 to $150 an hour, depending on their skill area. So even at entry level, part-time freelancing can earn a meaningful income whilst you build a more scalable income stream in the background.
The smart strategy is to freelance for income now, whilst building a blog or a digital product catalogue in the background. So you use freelance earnings to cover your costs whilst building something that earns money without your direct effort.
4. Online Courses and Coaching
If you have genuine expertise in any area, turning that knowledge into an online course is a high-margin business model for Malaysia-based experts. So you record the course once and sell it to as many students as want it. No ongoing production work is needed.
Platforms like Teachable and Kajabi are open to course creators based in Malaysia and handle payments in many currencies. So your students can be anywhere in the world. Furthermore, Malaysian expert credentials in accounting, finance, learning and healthcare often carry real weight with global audiences.
According to Teachable, successful course creators earn between $1,000 and $10,000 a month. However, that range covers a wide spectrum of creators. So a Malaysia-based beginner launching their first course should expect modest early sales that grow as their reviews and name build.
Coaching sits naturally alongside online courses as a natural extra income stream. So you offer 1-to-1 coaching sessions for students who want personal support beyond the course. Coaching rates of $100 to $300 an hour are common for subject areas with strong market demand.
5. E-Commerce and Print on Demand
E-commerce is a strong fit for Malaysia-based business owners who enjoy product thinking and want to sell physical or digital goods. However, standard e-commerce with stock can be complex. Print on demand is a much more beginner-friendly version. So it is worth thinking about first.
So with print on demand, you upload designs to a platform like Printful or Printify. When a customer orders, the platform prints and ships the product. So you never handle fulfilment. So there is no inventory and no upfront cost.
Income from print-on-demand builds through volume and size. So patience is key. So a Malaysia-based creator with 50 to 100 well-designed products can earn $500 to $3,000 a month from a proven shop. Furthermore, Shopee and Lazada are both strong local e-commerce platforms for Malaysia-based sellers who want to reach the domestic market.
Most Malaysia-based online business beginners operate as sole proprietors. This is the simplest and most practical legal structure for a small online business. So you can sign up as a sole proprietor with the Companies Commission of Malaysia, known as SSM, for a small annual fee. The process is done online.
Furthermore, if your online business grows and earns real income, you may want to register a private limited company, known as Sdn Bhd, which offers limited liability protection. So it is worth getting advice from a Malaysian accountant once your income reaches a meaningful level.
Income Tax in Malaysia
Malaysia has a progressive income tax system for residents. So all online business income must be declared. So all income from online business work, including affiliate commissions, digital product sales and freelance services, is taxable and must be declared to the Inland Revenue Board of Malaysia, known as LHDN.
The tax-free threshold in Malaysia is currently income below RM5,000 after deductions. So, a very small early income may fall below it. However, as your online business grows, keeping accurate records of all income and expenses becomes important.
Furthermore, Malaysia does not currently have a general goods and services tax on digital services sold locally to Malaysian customers, though this area continues to evolve. So it is worth staying updated on any changes to the digital services tax rules as you grow. Tax rules change.
Practical Record-Keeping
Set up a simple system from the start. It saves you a lot of stress later.
So use a free spreadsheet to record every dollar you earn and every valid business expense. Furthermore, set aside a portion of your online income in a separate account to cover your tax bill. So getting into this habit early avoids a stressful tax surprise.
The Practical Starting Plan
Week 1: Choose Your Model and Niche
Do not spend more than 1 week choosing your business model and niche. Be decisive. So think about 3 things: what you know well, what interests you, and what has real commercial value. The overlap between all 3 is your sweet spot.
Furthermore, consider whether you want to target Malaysian audiences or global English-speaking audiences.
Each comes with different rivalry levels. So a blog about Malaysian personal finance serves a specific, lower-rivalry audience.
A blog about general personal finance serves a global audience but competes with far larger, more proven sites. Both approaches work.
Week 2: Set Up Your Platform
Whatever model you chose, get your technical setup done in week 2. Speed matters here.
So register your domain name if you are starting a blog today. Open your Gumroad or Etsy shop if you are selling digital products. Set up your YouTube channel if that is your chosen path.
Furthermore, set up an email marketing system from the very beginning. This is very important. Do not skip it.
Systeme.io offers a free plan that covers email marketing, landing pages and digital product delivery in 1 place. So you can build an email list from your very first piece of content with no separate fees.
Write your first blog post, create your first product, record your first video or pitch your first freelance client this week. So do not wait until everything feels perfect. Just publish something.
Furthermore, the beginner who publishes 50 imperfect blog posts over 12 months will outperform the 1 who spends 12 months polishing 5 posts that never get published. So consistency beats perfection in the early stages. Publish something this week. Improve from there.
Week 4 Onwards: Build Steadily
From week 4 onwards, your goal is consistency. That is the most important principle. So aim for 1 new blog post, 1 new product or 1 new video per week.
Furthermore, keep a simple spreadsheet to track what you publish and what follows. So after 3 months, you will have real data on what is working.
Common Mistakes Malaysia-Based Beginners Make
Spending Before Earning
The most common financial mistake is spending heavily on tools and subscriptions before earning any income. So many beginners spend $200 a month on software before they have earned a single dollar.
Start lean. Keep costs at zero for as long as possible. So use free tools wherever possible in your first 3 months.
WordPress is free to use. Canva has a strong free plan.
Systeme.io has a free plan. Gumroad charges no monthly fee. Furthermore, most major affiliate programmes are free to join. So there is very little reason to spend much before your model is proven.
Trying to Reach Everyone
The most common strategic mistake is trying to appeal to too broad an audience. It produces nothing strong. So a blog that covers personal finance, cooking, travel and technology will struggle to rank in Google because it lacks topical depth.
Pick 1 specific niche and build authority within it. Be the go-to resource for that topic. So a blog that covers Malaysian personal finance in depth will rank faster than a general lifestyle blog. Furthermore, owning a clear niche makes it easier to attract the right affiliate partnerships as your audience grows.
Ignoring the Email List
Your email list is the 1 asset that no algorithm change or platform update can take from you. That is why it matters.
So many online business owners spend years building traffic without collecting a single email address. Then an algorithm update arrives, and their traffic drops. It happens often.
Start collecting email addresses from day 1. It is one of the most important decisions you can make.
So offer a free lead magnet, such as a useful checklist or a short e-book, in exchange for a subscriber’s email address. Furthermore, even a list of 200 engaged subscribers is a meaningful asset that drives income from every future product launch.
Quitting During the Slow Phase
Most content-based online business models do not produce real income in their first 6 months. So the slow phase falls between months 1 and 6. This is when most people quit.
However, this is also the phase that splits people who build real online businesses from those who give up. So the edge in online business is not talent or skill. It is staying power.
It is the willingness to stay steady through the period when results are not yet visible. That is the edge. Furthermore, the people earning $3,000 to $10,000 a month from blogs and digital products today are almost all people who started 2 to 4 years ago and kept going.
Income during this phase is almost certainly zero. So expect no money in the early months.
This is the normal background of building any online business from scratch. It is not a sign that you are failing. Furthermore, every piece of content you create during this phase is a long-term asset that compounds over time.
The key goal during months 1 to 6 is not income. It is improving your craft and building your foundation.
So focus on writing better, creating more useful products and learning the basics of SEO. Do that first, above all else. The income follows the quality. It always does.
Months 6 to 12
This is where the first real signs of traction appear. So things start to feel better. So blog posts begin ranking in Google, Gumroad listings start appearing in search results, and YouTube channels start gaining regular subscribers.
Income during this phase might range from $50 to $500 a month, depending on your niche. Furthermore, this is when the compound effect of your early work becomes visible for the first time.
So the articles you wrote in month 2 are now earning real traffic. That is the compound effect. Products you listed in month 1 are getting regular views and sales.
Months 12 to 24
This is where things start to feel real. Income becomes steadier. So income in this phase for steady bloggers and digital product sellers typically ranges from $500 to $3,000 a month. Furthermore, this is the right time to add a second income stream.
So if you started with a blog, month 12 might be the right moment to create your first digital product. If you started with freelancing, this might be the right moment to start building a passive income asset. Furthermore, your growing audience makes each new addition easier to earn from than the one before.
Beyond Month 24
Malaysia-based online business owners who have been operating reliably for 2 years are in a different financial position than when they started. So the online businesses earning $3,000 to $10,000 a month today are almost all run by people who started 2 to 4 years ago and kept going.
Furthermore, starting an online business in Malaysia gives you access to a truly global audience. So income is not capped by the local market.
The compound effect works the same whether you are based in Kuala Lumpur, Penang or Johor Bahru. Where you are does not matter. What you build does.
The Tools That Help Beginners Build Faster
For Email and Digital Products
Systeme.io covers email, sales funnels and digital product delivery in 1 free plan. So it is the most practical all-in-1 tool for Malaysia-based beginners who want to build an email list and sell products without paying for many tools.
For Writing and Content Creation
Rytris a low-cost AI writing tool that helps bloggers produce more content without losing their voice. So on days when the blank page is an obstacle, Rytr creates article outlines and section drafts that you refine and make your own. Furthermore, it is useful when you are trying to maintain a steady posting schedule alongside a full-time job.
For Keyword Research
Knowing what people are searching for before you write or create greatly increases the chance your content is found. So tools like Jaaxy show you monthly search volumes and rivalry levels for any topic. Furthermore, a 30-minute keyword research session before you write can greatly increase the return on every hour invested.
Getting Started: Your Next Step
If you have been thinking about how to start an online business in Malaysia for a while but have not yet taken your first step, choose your model and take 1 action today.
So register your domain, open your Gumroad shop or pitch your first freelance client. Begin something today. Furthermore, register your business with SSM and set up a simple income tracking system so that your business is on the right legal footing from the start.
Knowing how to start an online business in Malaysia is the easier half of the challenge. Staying steady through the slow early months when income has not yet arrived is the harder part.
The models in this article work. The legal framework is simple. Furthermore, the tools are low-cost and open.
So a steady Malaysia-based blogger can earn $2,000 to $10,000 a month from affiliate income and digital products. The potential is real. A skilled Malaysia-based freelancer can earn $3,000 to $8,000 a month from client services while building a passive income stream.
Furthermore, the compound effect rewards patience in a way that a salary never can. That is a powerful fact. So the time you invest this month is still paying you 5 years from now.
Pick your model, register your business, publish your first asset and build reliably from day 1. If you are serious about how to start an online business in Malaysia, you already have everything you need to begin.