Can You Earn Money by Playing Video Games? (Honest 2026 Guide)
Can you earn money by playing video games? The honest answer is yes. The fuller answer is that the amount you earn and the work required depend on the method you choose.
Some gamers make hundreds of thousands of dollars per year. Others use reward apps for months and barely earn enough for a takeaway coffee. Most people who try gaming for income fall somewhere between those two points, and the method they choose shapes everything.
This guide looks at every real way to earn from gaming in 2026. For each one, you will get a clear sense of what it pays, how long it takes and who it suits best.
The Gaming Economy Is Real and Growing
Gaming is no longer just a hobby. The global gaming industry is worth hundreds of billions of dollars and keeps growing every year. Streamers, esports players, game testers, content creators and mobile gamers all have a real place in that economy. Every one of those roles earns money in a different way and at a different rate, and the path that suits you depends on your skills, your time and how seriously you are willing to take it.
The range of income is wide, though. At the top end, pro esports players compete for prize pools worth millions of dollars.
Full-time streamers with large audiences earn six figures from fan support, ad revenue and brand deals. At the low end, reward app users earn a few cents per hour. Knowing which group you belong to before you start is one of the most useful things this guide can offer.
Streaming is the first method most people think of when they ask whether you can earn money by playing video games. It is also the method with the widest gap between top earners and average ones.
Successful streamers earn money through several income streams. Twitch pays around $2.50 to $3.50 per subscriber per month once you reach partner status.
Bits and direct donations add more on top of that. Brand deals with gaming companies pay flat fees per stream. YouTube ad revenue adds another layer once a channel qualifies.
The hard part is building an audience. Most people who start streaming see almost no viewers for the first 3 to 6 months.
Growing past 50 to 100 viewers who show up each stream requires both gaming skill and a real on-screen persona. The games you pick matter too. Titles like Fortnite or Call of Duty are very hard to break into because thousands of other streamers compete for the same viewers.
Streamers who build a real income treat it like a job. They stream on a set schedule, talk with their community between streams and spread their content across more than one platform. Many also post short clips on TikTok or YouTube Shorts to grow their audience faster than streaming alone allows.
Choosing the right niche within gaming also helps. A streamer who focuses on a specific type of game, such as indie horror, classic role-playing games or speedruns, attracts a more dedicated audience than one who plays whatever is trending. Dedicated audiences are more likely to subscribe, donate and buy from sponsors.
Equipment is not the barrier many people think it is. A decent headset, a reliable internet connection and any modern gaming setup are enough to start. Many successful streamers grew their audience on average hardware before investing in upgrades. The camera, the lighting and the overlay design matter far less than personality and consistency in the early months.
One thing worth knowing is that streaming income is almost entirely delayed. You work for 6 to 12 months before seeing any meaningful return. The people who succeed are the ones who treated that early period as an investment rather than a waste.
Realistic pay for a new streamer: $0 to $100 per month in year one. From year two with 100 to 500 regular viewers: $500 to $3,000 per month. Full-time streamers with 1,000 or more regular viewers: $5,000 to $30,000 per month or more.
Method 2: Esports and Paid Tournaments
Pro esports is real and well-funded. Major title prize pools for games like Dota 2 and League of Legends have reached tens of millions of dollars. The catch is that the skill needed to compete at that level puts you in roughly the top fraction of a percent of all players in your chosen game.
That said, lower-level paid options do exist. Some platforms host online tournaments with prize pools of $10 to $100. Skilled but non-professional players can win these with some consistency. Sites like Battlefy run community-level events for a wide range of titles with small entry fees and real payouts.
Game coaching is a more achievable path for highly skilled players. If you rank near the top of a game’s ladder, you can charge $15 to $75 per hour to coach less skilled players. Platforms like ProGuides connect coaches with students. A skilled player with good communication can earn $500 to $2,000 per month from coaching without ever competing at a pro level.
The coaching route is also a good way to develop the kind of reputation that leads to other opportunities. A coach who helps students improve their rank builds a portfolio of real results. Those results can be shared as testimonials, which attract more students. Over time, a coaching side hustle can grow into a full teaching business with courses, guides and group sessions on top of the one-to-one work.
You do not need to be the best player in the game to coach. You need to be significantly better than your students and able to explain why you are making the decisions you make in clear, simple language. Many elite players never become good coaches because they find it hard to break down the decisions they make by instinct.
Mobile reward apps are the most accessible way to earn gaming income. Platforms like Mistplay, Freecash and Swagbucks pay users to try new games, hit certain levels and give feedback.
The model is simple. Game studios pay the platform to promote their titles to active users. The platform shares a small cut of that with users who download and play.
You earn points for reaching set milestones. Those points convert to PayPal cash or gift cards once you hit the minimum payout.
According to The Penny Hoarder’s tested review of real-money game apps in 2026, casual players typically earn $10 to $50 per month from these apps. Dedicated users who use several platforms at once can push that closer to $100 to $150 per month. Mistplay has paid out over $100 million to users since 2016, which makes it one of the most well-proven platforms in this space.
The ceiling on reward apps matters. Even the most active users rarely earn more than $1 to $2 per hour. This is not a path to real income. It is a way to earn a small bonus for the time you would have spent playing mobile games anyway.
That said, reward apps are worth using if you already play mobile games regularly. They ask nothing extra of you beyond downloading through their platform and playing the games you would have chosen anyway.
The income is small but real. Freecash has paid out over $50 million to users and holds a strong rating on Trustpilot. Mistplay is available for Android users and has a well-documented payout history across hundreds of thousands of users.
The main thing to watch for is apps that make unrealistic promises. Any gaming app claiming you can earn $50 or more per day from clicking and playing is almost certainly not going to pay. Stick to platforms with years of verified user reviews and clear, honest earning rates. Patience and realistic expectations are what separate users who actually earn from those who waste weeks on apps that disappear without paying.
If you are already spending time on mobile games, reward apps are a sensible addition. If you are hoping they will replace meaningful income, you are going to be disappointed. Use them for what they are: a small bonus on the time you were already spending.
Method 4: Game Testing and Quality Assurance
Game testing is a paid role that involves more than just playing games for fun. Testers work through early builds, find bugs, write them up and give feedback to the dev team. The work is often slow and very careful, with the same section played many times to pin down exactly what went wrong.
Entry-level tester roles at studios pay around $15 to $25 per hour. Freelance testing work, which you can find on Upwork, Fiverr or dedicated game test sites, tends to pay per project.
Sites like PlaytestCloud pay $9 to $15 for a 15 to 20-minute session. You do not need to be a great player. You need to write clearly, stay focused and describe what you found in a way the dev team can act on.
Getting started in game testing usually means building a portfolio of test experience and applying to studios directly. Remote entry-level roles exist, and some studios recruit through their own community channels.
One approach that helps beginners is to volunteer for open beta testing programmes and treat them as though they were paid work. Write up detailed bug reports even when no one asked you to.
Keep a log of every issue you find and how you found it. That kind of documented habit is exactly what QA leads look for when hiring junior testers. It also gives you something concrete to reference when applying for paid roles.
Game testing is not glamorous work. It involves a lot of repetition, a lot of note-taking and very little of the free-roaming gameplay that makes gaming fun. But it is a real paid entry point into the gaming industry for people who want to work closer to the creative side of games.
Some studios also hire testers on short-term contracts for specific game launches. These roles are worth watching for on job boards and studio social media pages. They often pay well, offer flexible hours and give testers a behind-the-scenes look at how commercial game development actually works. For someone who wants a foot in the door of the games industry, paid testing is one of the most honest starting points available.
Streaming is the most visible form of gaming content, but not the only one. Several other paths earn money from gaming knowledge without needing a live audience.
YouTube gaming videos with a clear focus, such as tips, tier lists or beginner guides, build on search traffic rather than relying on people finding a live stream. A channel focused on a specific niche keeps earning long after the video is posted. Ad revenue, affiliate links and brand deals all open up as the channel grows.
Gaming blogs and review sites earn through affiliate links, display ads and sponsored content. A blog that reviews gaming hardware, covers game walkthroughs or compares gaming laptops draws readers with real buying intent. Affiliate programmes in this space often pay $5 to $50 per referred sale.
Short-form video on TikTok, Instagram Reels and YouTube Shorts is now one of the fastest ways to build a gaming audience. Clips of big moments, funny bugs or quick tips often go viral in gaming communities. Brand deals follow audience growth even at modest follower counts.
The content creation path is worth taking seriously because it scales. A YouTube video you post today can earn ad revenue for years.
An affiliate link in a blog post can earn commissions long after you wrote it. A TikTok clip that goes viral can bring thousands of new followers in a single day. None of that is possible with reward apps or ad clicking, where your earnings reset to zero every 24 hours.
Content creation takes time to produce results, just like streaming. But the assets you build, the videos, the posts, the audience, keep working for you after the initial effort. That compounding return is what makes content creation one of the strongest long-term paths in the gaming income space.
The best gaming content creators are not always the best players. They are the ones who can explain things clearly, entertain their audience and show up consistently over months and years. If you can talk about games in an engaging way, write clearly about what you know or edit video clips well, you already have the skills that matter most. The gaming knowledge is a bonus on top of those core skills.
Method 6: Selling In-Game Items and Virtual Assets
Some games have economies where rare items, skins or high-level accounts hold real-world value. Counter-Strike 2 is the most established example. Rare weapon skins sell on the Steam Market and on third-party sites for anywhere from a few dollars to tens of thousands.
According to FinanceBuzz’s guide to game apps that pay real money, active traders in games with strong virtual markets can earn $50 to $200 per month. This comes from buying and selling in-game items rather than from gaming skill alone.
The most successful in-game traders treat it like any other market. They track which items are rising in value, buy during dips and sell when demand spikes.
Some items in CS2, like rare knife skins or special edition cases, have grown in value over time. The market knowledge involved is genuinely useful. People who learn to trade in-game items often develop an instinct for spotting value and reading trends that apply well beyond gaming.
Account boosting is another avenue. Skilled players offer to raise other players’ in-game rank in exchange for payment.
This area comes with real risk, though. Many games ban accounts found doing it. Always check a game’s terms of service before offering any of these services. Some games actively pursue boosters with permanent bans, so the financial reward needs to be weighed carefully against the risk of losing an account you have spent years building.
Item trading and boosting are best thought of as niche income paths for people who already spend significant time in specific games and have a natural understanding of how their economies work. They are not starting points for someone new to gaming income. They work best as one layer in a broader strategy that also includes content creation, affiliate marketing or one of the other methods covered in this guide.
Method 7: Brand Deals and Sponsorships
Once a gaming content creator builds even a modest audience, brand deals start to appear. Gaming hardware brands, VPN companies and gaming chair makers all look for creators with engaged followers, not just large ones.
A streamer with 500 focused viewers often earns more per sponsored video than a creator with 50,000 casual followers. Smaller, engaged audiences are more likely to act on a real suggestion. Niche credibility matters more than raw reach.
Realistic rates for smaller creators: $100 to $500 per sponsored stream or video. As audiences grow, those rates go up sharply. Creators with tens of thousands of engaged followers can earn $1,000 to $10,000 per brand deal.
According to Eneba’s 2026 guide to making money playing video games, the most successful people in gaming combine more than one income stream. Depending on a single source leaves too much of your income tied to one platform or one audience.
A streamer who also posts YouTube videos, runs affiliate links, coaches students and takes brand deals is in a far stronger position than one who only earns from fan subscriptions. Each income stream they add protects the others. If Twitch changes its payment structure or an algorithm shift reduces views, the other streams keep income coming in.
Here is how the methods compare honestly:
Highest ceiling: Full-time streaming, pro esports and coaching at high skill levels all offer the most income potential. All require sustained work before they pay anything meaningful.
Mid-range: Game testing, gaming YouTube channels and brand deals are more accessible and produce steadier income. They still need skill and regular effort.
Low but accessible: Reward apps, casual mobile tournaments and item trading are open to almost anyone but capped at modest monthly amounts.
The methods at the top of that list share a common thread. They all require you to treat gaming as a business, not just something you do for fun. They involve consistent output, audience or client relationships and a long-term view. The methods at the bottom require none of those things, which is exactly why they pay so much less.
The Bottom Line
Can you earn money by playing video games? Yes, clearly. The question is whether you can earn enough to matter, and the honest answer is that this depends entirely on how seriously you approach it. The methods with the highest income potential all require treating gaming as a real business, not just a pastime with a bonus attached.
If you want to build a real income that uses your interest in gaming as its foundation, affiliate marketing around gaming products is one of the most natural routes. You write about games, tools and services you already know. You earn commissions when your readers buy through your links. It builds over time and the income compounds as your content grows.
The Get Started Here page on this site gives you a clear, honest starting point for that journey. Can you earn money by playing video games? Yes. And with the right approach, what starts as a love of gaming can become a real and growing income stream.
Affiliate Disclosure: This page may contain affiliate links. If you click through and make a purchase, I may earn a commission at no extra cost to you. I only recommend tools and resources I genuinely believe offer real value.
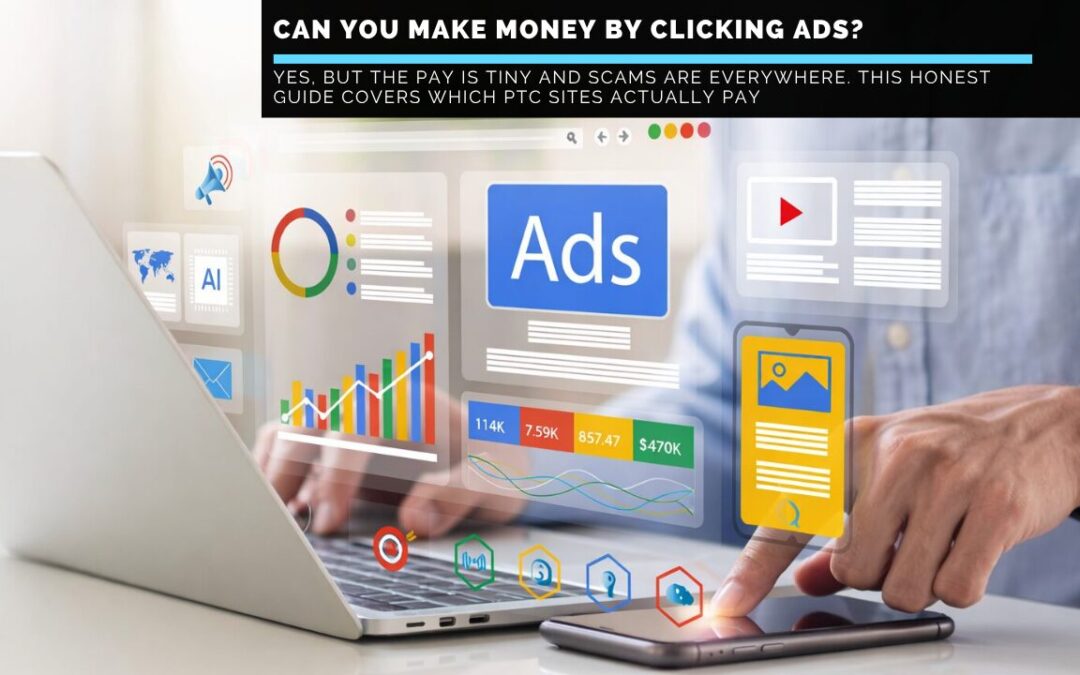
Can You Earn Money by Clicking Ads? The Honest 2026 Answer
Can you earn money by clicking ads? The short answer is yes. The longer, more useful answer is that the amounts are so small that most people who try it either quit in frustration or keep going for months without seeing any real improvement.
This guide gives you the full picture. It covers how paid-to-click sites work, what you can realistically earn and which platforms are safe. It also covers what better options exist if your goal is building a real online income.
What Are Paid-To-Click Sites?
Paid-to-click sites, often called PTC sites, are platforms where advertisers pay to show their ads to real human viewers. The platform takes a share of that ad spend and passes a small portion on to users who click and view the ads. You register for free, log in daily, click through the ads in your dashboard and watch each one for a set number of seconds. Once the timer ends, a small credit lands in your account.
The model is real. Advertisers benefit from having real people view their content. Users receive payments for doing so. The economics are the problem.
Advertisers pay the platform fractions of a cent per impression, and the platform keeps most of that. The share passed to the user is often as low as $0.001 per ad.
Clicking 50 ads per day at that rate earns you $0.05. It takes a very long time to build anything meaningful.
PTC sites have been around since the early 2000s. They have survived because they are free to use, require no skills and have a very low barrier to entry. That appeal draws tens of millions of users worldwide every year.
Legitimate platforms have paid out real money to real people. The key phrase there is “legitimate platforms.” This space also contains a large number of scams that look just like real sites but never pay out.
If you decide to explore PTC sites, the single most important thing you can do before joining any platform is research it independently. Check payment proofs from real users, look for discussions on forums like Reddit’s r/beermoney community and read reviews that were not written by the platform itself. A few minutes of research at the start can save you hours of wasted time clicking ads on a site that was never going to pay.
This is the question most people want answered clearly, so here it is. Clicking ads alone on a single platform typically earns $1 to $5 per month for a user who logs in daily and clicks all available ads. On multiple platforms running at once, that figure can reach $30 to $100 per month with consistent effort.
The upper end of that range requires using three to five platforms at once, completing offer walls and surveys alongside ad clicks and building a referral network. Most regular users land somewhere in the $10 to $50 per month range when combining these activities.
According to SavingsGrove’s 2026 guide to paid-to-click sites, users on platforms like TimeBucks can earn around $20 to $50 per month. That is when they take full advantage of daily bonuses and premium content alongside their standard clicks.
Those figures are honest. They are not impressive, but they represent real money for no skill and minimal effort.
The ceiling on ad-clicking income is important to understand before you commit time to it. Even very active users with referral networks rarely earn more than $200 to $300 per month from PTC activities. Most people earn far less. Clicking ads is a real way to earn a small amount online, but it is not a substitute for any kind of meaningful income.
It is also worth knowing that your earnings per hour from clicking ads are very low compared to almost any other online income method. If you click 20 ads and earn $0.02 in 10 minutes, your effective hourly rate is about $0.12.
Even stacking three platforms at once and completing every bonus task available will not push that figure anywhere near a minimum wage. The appeal of PTC is not its hourly rate. It is the zero barrier to entry and the fact that it requires no skill or prior experience to start.
For someone who genuinely has no other starting point, that matters. For everyone else, the time is better invested in something with a better return.
How PTC Sites Work
When you sign up for a PTC platform, you create a free account and set up a payment method. Most platforms pay via PayPal, Payoneer, Bitcoin or gift cards. Each day, a batch of ads becomes available in your dashboard. You click each ad, watch it for the required number of seconds, usually 5 to 30 seconds per ad and receive a credit to your balance.
Some platforms also include short video ads that pay slightly more than standard banner clicks. These are worth prioritising when available since the per-minute return is better.
The number of available ads varies by platform and by your account tier. Free accounts typically see 3 to 20 ads available per day. Premium accounts, which usually require a paid upgrade fee, unlock more ads and higher per-click rates.
This is where many PTC sites get complicated. Some platforms are entirely legitimate and simply offer more earning potential to paying members. Others use premium membership fees as their real business model, with user clicks just providing cover for what is essentially a scam.
When your balance reaches the minimum payout threshold, which ranges from $1 on some platforms to $10 or more on others, you can request a withdrawal. On legitimate platforms, payments arrive within a few days. On scam platforms, the withdrawal is either blocked, delayed or simply never processed.
Standard per-click earnings on most PTC sites are too small to produce meaningful income on their own. The only real way to earn significantly more is through a referral programme. Most established platforms pay you a share of every click your referred users make. You share your unique referral link, someone signs up through it, and you earn a cut of their activity.
On some platforms, like NeoBux, referral earnings can exceed direct-click earnings fairly quickly once you build an active network. If you have 50 active referred users each clicking 20 ads per day and you earn $0.005 per their click, that adds up to $5 per day from referrals alone.
At that level, a dedicated user with a strong referral network could earn $100 to $150 per month without lifting a finger after the initial setup. Building that referral network takes real effort, though. You need a place to share your link where relevant people will see it.
A simple blog post, a YouTube video or a presence in online communities focused on side hustles are all legitimate ways to build referrals. The skills involved in building referrals are very similar to the skills that power affiliate marketing, which earns far more per hour.
This is one of the more interesting things about the PTC world. The people who extract the most value from it are often the ones who figured out that the referral system rewards content creation and audience building, not just daily clicking. Once they realise that, many of them naturally transition away from PTC entirely and towards affiliate marketing, blogging or other content-driven income streams where the same skills produce far greater results. PTC becomes a footnote in their online income story rather than the main chapter.
Legitimate PTC Sites Worth Using in 2026
Not all PTC sites are scams. Several well-established platforms have multi-year payment histories and real user communities.
Swagbucks is one of the most trusted rewards platforms in the world. It has paid out over $532 million to members and offers ad viewing alongside surveys, offer walls, shopping cashback and other earning options. Swagbucks is most valuable as a combined platform rather than a pure PTC site. The additional earning methods multiply your hourly return.
ySense (formerly ClixSense) has been active since 2007 and has paid out millions to its members. It has evolved to include tasks and surveys alongside ad clicks. It is owned by Prodege, the same company behind Swagbucks and InboxDollars, which gives it strong credibility.
TimeBucks is a modern platform with a clean interface and a wide range of earning methods. Users earn from ad clicks, social tasks, app downloads, surveys and other activities. Per-ad rates are higher than most basic PTC sites, and the platform accepts members from most countries.
NeoBux has operated since 2008 and has one of the most well-documented payment histories in the PTC space. It offers a referral rental system, mini tasks and multiple membership tiers. It takes patience and consistency, but it has a large, active user base.
Freecash operates mainly as an offer wall platform but includes ad-clicking activities. Its minimum payout threshold of just $0.05 makes it one of the fastest platforms to reach your first cashout. That is useful for testing its legitimacy before investing more time.
When joining any of these platforms, always use a separate email address. PTC platforms generate a lot of promotional mail, and keeping them away from your main inbox makes everything easier to manage. Cash out as soon as you reach the minimum threshold rather than letting earnings sit. Even the most reliable platforms can change their terms or close without warning, and withdrawing early protects you from losing what you have earned.
The PTC space contains a large number of fraudulent platforms, and new ones appear every year. According to the US Securities and Exchange Commission’s investor alert on PTC scams, some PTC programmes run as Ponzi schemes. In these cases, money from new users pays earlier users rather than coming from genuine advertising revenue.
In one notable case, the SEC took action against Traffic Monsoon, a PTC-style platform that allegedly collected $207 million from over 162,000 users before it collapsed. That case is a useful reminder that size and apparent popularity are not proof of legitimacy. A platform can look credible, have an active user forum and still be collecting money; it has no intention of paying back.
Warning signs of a fraudulent PTC platform are clear once you know what to look for. Any platform that charges a fee to join is an immediate red flag. Legitimate PTC sites are always free to register for.
A platform that promises unusually high earnings per click, such as $0.10 or more, when the industry standard is $0.001 to $0.01, is almost certainly lying.
Platforms that set minimum withdrawal thresholds so high that users never reach them are designed to collect your time without paying you.
Be wary of any PTC site that asks for your bank account details, social security number or credit card information during registration. No legitimate PTC platform needs this information.
Always check independent review sites and community forums before signing up. Search for the platform name alongside words like “scam” or “payment proof” to see what other users have found.
Why Ad Clicking Alone Is Not a Strategy
Can you earn money by clicking ads? Yes. Can you build financial independence by clicking ads? No.
The economics of PTC do not allow for it. Per-click rates are set in a way that ensures the platform profits, not the user. That ceiling is built into the model. You cannot overcome it with more effort or a better technique.
There is also a time-value problem. An hour spent clicking ads at $0.12 per hour, the effective return is an hour not spent writing a blog post, building an email list or promoting an affiliate product.
The compounding value of those three activities grows over time. The value of ad clicks resets to zero every 24 hours when the next batch of ads refreshes. One activity builds an asset. The other resets daily with no lasting return.
Understanding that distinction clearly is what separates people who earn growing amounts online from those who stay stuck at the same small figure month after month.
The people who earn the most from PTC platforms use them as one small part of a broader online income approach, not as their main focus. Some click ads while waiting for something else to load. Others stack surveys and offer walls on top of their clicks. Many build referral income through content rather than cold sharing.
In doing so, they develop skills that open doors to income streams with no cap on what they can earn.
According to Dollarbreak’s guide to paid-to-click earnings in 2026, running three to five established platforms at once and spending 15 to 30 minutes total each day is the most sensible approach. That keeps the time investment small while extracting the most from each platform’s daily ad cycle.
A Better Alternative: Affiliate Marketing
If the question “Can you earn money by clicking ads?” brought you here because you are looking for ways to build real online income, affiliate marketing is worth your attention. It uses the same starting materials: a laptop, an internet connection and time. The returns, however, are much higher.
In affiliate marketing, you promote products using a unique tracking link. When someone buys through your link, you earn a commission. Unlike PTC earnings, affiliate commissions are not capped at a fraction of a cent.
A single sale can earn $10, $50, $100 or more depending on the product. Recurring SaaS programmes like Systeme.io pay 60% recurring commission for the life of each referred customer. One sale keeps paying every month without any extra work.
The time you would spend clicking ads for $30 per month could instead go towards writing articles that attract search traffic and earn affiliate commissions for years. The skills overlap. Both reward consistency. The difference is the ceiling.
The smartest use of PTC sites in 2026 is as a modest supplement to a longer-term income project, not a replacement for one.
If you are in the early stages of building a blog or an affiliate marketing presence, PTC clicking can earn a small amount of cash. Something real comes in while you wait for your longer-term work to produce results. The income is not impressive, but it is genuine money for minimal effort and keeps you connected to the online earning space while your main project grows.
Think of it this way. PTC income is like finding small change on the pavement. Real money, certainly. You would not turn it down.
Building your financial future around it makes no sense, though. A better approach is to treat it as background noise while your real energy goes into something that grows.
The people who use PTC most wisely treat it as background noise while they focus their real energy on something that can grow. Fifteen minutes a day across three reliable platforms, no more. Then spend the rest of your available time building the income stream that has no ceiling.
An AI writing tool like Rytr makes the content side of that longer-term project significantly faster. Writing blog posts or affiliate content alongside your PTC activity becomes much more efficient. More content in less time means your affiliate income grows more quickly.
The Bottom Line
Can you earn money by clicking ads? Yes, and the income is genuinely real on legitimate platforms. The honest picture is that you will earn $10 to $100 per month with consistent daily effort across multiple trusted platforms, with more possible if you build a referral network.
What clicking ads will not do is replace a meaningful income, scale beyond a fixed ceiling or build an asset that grows in value over time. Every hour you spend clicking ads earns exactly the per-click rate of whichever platform you are using. That rate does not increase, no matter how consistently or how long you do it.
Some people find it demotivating to do work that does not compound. Others are fine with it because the effort required is so low. You are the only one who can judge whether that trade-off makes sense for your situation. What matters is going in with clear expectations rather than hoping the income will somehow grow into something bigger on its own.
The smartest use of PTC sites is as a small, zero-skill income source in the early stages of building something bigger.
Can you earn money by clicking ads? Yes. But there is a far better answer to the question of how to build real income online, and it starts with the same time you are already willing to put in.
The difference is that affiliate marketing and blogging build assets that grow, while ad clicking simply resets each day. Starting with PTC is fine. Staying with only PTC is not a strategy.
If you are ready to build something that compounds over time, the Get Started Here page on this site shows you exactly where to begin. The process is clear, the costs are low, and the timeline is honest. That is a better starting point than any paid-to-click dashboard.
Affiliate Disclosure: This page may contain affiliate links. If you click through and make a purchase, I may earn a commission at no extra cost to you. I only recommend tools and resources I genuinely believe offer real value.
Can You Make Money by Writing a Blog? (The Real Answer for 2026)
Can you make money by writing a blog? The short answer is yes. The more useful answer is: yes, but not in the way or in the timeframe that most people expect.
Blogging has a reputation for producing either overnight millionaires or complete failures, and neither picture is accurate for the typical person who starts one today. The real experience sits somewhere in the middle, and understanding where you are likely to land on that spectrum is the most valuable thing you can learn before you commit any time to the idea.
This article looks at the actual data behind blog income, the factors that separate blogs that earn from those that do not and what you need to know before you publish your first post.
Is Blogging Still a Real Income Source in 2026?
Yes, it is. But it is also more competitive than it was five years ago, which means the gap between blogs that earn well and those that earn nothing has widened. Blogs at the top of that gap share specific characteristics. The ones at the bottom usually share a different set of characteristics that are just as predictable.
The blogging industry is not dying. According to statistics compiled by BloggersPassion’s 2026 blogging data report, there are over 600 million active blogs worldwide in 2026.
Over 4 billion people read blogs. The industry as a whole is valued in the hundreds of billions of dollars and is still growing.
There is clearly money in the space. The question is not whether blogging earns money. The question is whether your blog, specifically, will earn money. That depends on the choices you make before and during the process of building it.
One of the most useful things you can look at before starting a blog is honest income data from real bloggers. The picture is more nuanced than either the optimistic or the pessimistic versions you tend to see promoted online.
The income range for bloggers in 2026 is enormous. On the low end, roughly 33% of bloggers report earning no income at all from their blog. On the high end, a small number of bloggers earn over $1 million per year. Most people who blog seriously, consistently, and strategically fall somewhere between those two extremes.
The most important number in that data is not the average income figure. It is the time correlation. Income goes up as blogs get older, provided the blogger continues to publish, continues to learn and continues to improve. The people earning well in year 5 are the people who did not quit in year 1.
It is also worth noting that niche affects income more than most beginners realise. Two blogs with identical traffic can earn very different amounts.
A personal finance blog with 30,000 monthly visitors can earn $6,000 to $9,000 per month through a mix of premium ads and affiliate marketing. A general lifestyle blog with the same traffic might earn $800 to $1,500.
This is not because one blogger is working harder than the other. It is because advertisers and affiliate programmes in high-value niches pay significantly more per visitor. Choosing your niche with income potential in mind is one of the highest-impact decisions you will make before you write a single post.
According to data compiled by Ryan Robinson at RyRob.com, the average blogger earns around $45,000 per year, though that figure masks a very wide spread. Many people blogging for 1 to 2 years earn $100 to $500 per month.
Many people blogging for 3 to 5 years earn $1,000 to $5,000 per month. Some bloggers blogging for 7 or more years in high-demand niches earn $10,000 per month or more.
The most important number in that data is not the average income figure. It is the time correlation. Income goes up as blogs get older, provided the blogger continues to publish, continues to learn and continues to improve. The people earning well in year 5 are the people who did not quit in year 1.
Why Most Blogs Fail to Earn
Understanding why many blogs fail to produce meaningful income is just as useful as understanding why some succeed. The reasons are consistent and predictable.
Choosing a topic with no commercial appeal. Some niches attract readers but do not attract money. A blog about your personal diary entries may have an audience, but that audience is unlikely to click affiliate links, buy digital products or attract brand sponsorships. Choosing a niche with proven ways to monetise is an early decision that shapes everything that follows.
Expecting traffic before doing the work to earn it. Google does not rank new blogs quickly. Most new blogs see very little organic search traffic for the first 6 to 12 months.
Bloggers who quit during this period quit before the work they have done starts paying off. The ones who stay past month 12 are almost always further ahead by month 18 than they expected to be.
Trying to monetise too early. A blog with 500 monthly visitors and four display ads will earn almost nothing. A blog with 500 monthly visitors and a well-placed affiliate link in a genuinely useful post can earn meaningfully more. The type of monetisation matters as much as the volume of traffic.
Not building an email list. Many bloggers focus entirely on content and SEO, which is important, but skip building an email list entirely. An email list gives you a direct line to your most engaged readers. When you launch a product, recommend a tool or share a new post, you can reach those people without relying on an algorithm to decide whether your content is worth surfacing.
Publishing inconsistently. Google rewards sites that publish fresh, relevant content regularly. A blog that publishes 10 posts and then goes quiet for 3 months is not treating its blog like a business. Consistent publishing, even at a modest pace, beats sporadic bursts of content every time.
Writing for yourself instead of for a searcher. Many beginners write posts they find interesting without first checking whether anyone is searching for that topic. A well-written post on a subject nobody Googles will sit unread.
Keyword research before you write is the habit that separates blogs that grow organically from those that stay invisible. It takes 20 minutes per post, and it is one of the highest-leverage things a new blogger can do.
The blogs generating meaningful income in 2026 are not necessarily the most beautifully written ones or the ones with the most polished design. They share a different set of traits.
A tight, focused niche with proven demand. The blogs earning the most per visitor are focused on topics where readers have a specific problem to solve. Personal finance, affiliate marketing, software tools, health conditions, cooking for specific diets and home improvement are all examples of niches where readers arrive with a clear purpose and where relevant products are easy to recommend naturally.
Long-form, search-optimised content. Posts that rank on Google tend to be thorough, well-structured and genuinely useful. They answer the question the reader typed in and then go further. They use sub-headings to aid navigation, include real examples and cover the topic better than the competing posts they are trying to outrank.
Multiple income streams. The highest-earning blogs do not rely on a single source of income. They combine display advertising with affiliate marketing, and often add digital product sales or consulting on top of that. If one income stream slows down, the others hold the base income stable.
Consistent publishing for years, not months. There is a pattern that plays out across almost every successful blog. The blogger published when nobody was reading, continued when traffic was growing slowly and eventually reached a point where the work from months 1 to 12 started compounding into real returns.
The blogs that earn consistently in year 3 almost all went through an uneventful year 1 that most people would have mistaken for failure. Staying in the game past the quiet period is not glamorous advice, but it is the most accurate predictor of success.
A reader-first approach. The blogs that build real audiences are the ones where readers feel genuinely helped. They recommend products because those products are genuinely useful, not just because the commission is attractive.
They write posts that give readers exactly what they need, even if that occasionally means recommending a free alternative over a paid one. That kind of honesty builds the trust that turns a reader into a customer.
Realistic Income by Niche
Not all niches earn equally. This is one of the most important factors that new bloggers often underestimate. Two blogs with exactly the same traffic can earn very different amounts depending on the niche.
According to Productive Blogging’s 2026 Blogging Income Survey data, the most profitable niches for bloggers in 2026 include personal finance, online business and food. A personal finance blog can earn $8,000 to $9,000 per month with around 50,000 monthly visitors, partly because the advertisers in that space pay very high rates per ad impression. A lifestyle blog with the same traffic might earn a fraction of that.
The reason for this gap is simple. Advertisers pay more to reach people who are about to make financial decisions than they pay to reach people browsing general interest content. Affiliate programmes in the business software, finance and online education spaces also tend to pay higher commissions than those in entertainment or general lifestyle categories.
This does not mean you should write about personal finance if you have no interest in it. A blog written without genuine enthusiasm tends to produce generic, hollow content that does not rank and does not convert. The right niche is one where you have a genuine interest or expertise and where there is also proven commercial demand.
The Income Streams That Work Best
Affiliate marketing is the income stream most commonly cited by bloggers as their primary or most reliable earner. You recommend a product or service, include a unique tracking link and earn a commission when someone buys. SaaS affiliate programmes are particularly powerful because they pay recurring commissions for as long as the referred customer stays subscribed.
A tool like Systeme.io pays 60% recurring commission for life. One successful referral can earn you income every month for years.
Display advertising is the most passive income stream. You join a network, place code on your site and earn based on how many people view the ads. Premium networks like Mediavine pay meaningfully more than Google AdSense, but they require minimum traffic thresholds. For most blogs, display ads become worth pursuing once traffic reaches 25,000 to 50,000 monthly sessions.
Digital products give you the highest profit margin of any income stream. The product is created once and sold without any per-unit cost. An ebook that takes you two weeks to write can sell for years with no further effort. A template, a course or a swipe file can generate passive income from the audience you have already built.
Sponsored posts and brand deals come once you have an established audience. Brands pay you a fee to write about their product or include it in your content. This income stream tends to develop naturally once your blog reaches a meaningful size in a commercial niche.
The most common reason bloggers quit is not that their blog is failing. It is that they underestimated how long success takes and interpreted slow early growth as evidence that it would never work.
Here is a realistic timeline based on what bloggers typically experience.
Months 1 to 3: You are publishing posts, learning how to do keyword research and building the basic structure of your blog. Very few people find your site. You earn almost nothing.
This is normal and expected. It would be a mistake to read this period as evidence that blogging does not work. It is simply the seed-planting phase, and every successful blog has gone through it.
Most bloggers who later earn well will tell you that month 3 looked very similar to month 1 in terms of traffic and income. The growth happens gradually and then, at some point, all at once. Stay the course and trust the process.
Months 4 to 6: If you have been publishing consistently in a focused niche, you may start to see some search traffic arriving on your early posts. You start to see occasional affiliate clicks. Income, if any, is small.
Months 7 to 12: Posts from earlier in the year start to rank more consistently. Traffic grows. You earn your first real affiliate commissions or ad revenue. Income might reach $100 to $500 per month in a good niche with consistent work.
Year 2: Traffic compounds. Posts that ranked on page 2 or 3 of Google in year 1 move to page 1. Income grows more meaningfully and can reach $1,000 to $3,000 per month for focused blogs in commercial niches.
Year 3 and beyond: If you have not stopped, the compounding effect is fully in motion. Many bloggers who reach year 3 with consistent publishing in a viable niche are earning a genuine part-time or full-time income from their blog.
These are not guarantees. They are patterns based on what most bloggers actually experience. The factors that shape where you land are niche selection, publishing consistency, content quality and how well you understand the SEO basics needed to attract search traffic.
What You Need to Start
Can you make money by writing a blog without spending much? Yes. The core costs are modest. A domain name costs around $10 to $15 per year.
Hosting a self-hosted WordPress blog costs around $3 to $5 per month. That is under $80 per year to start a properly hosted blog that you own outright.
Beyond the technical setup, the most important early investment is time. Keyword research takes time. Writing thorough, helpful posts takes time. Building an email list takes time.
None of this is complicated, but it does require consistent weekly effort over an extended period. Think of it less like a sprint and more like a habit you build into your week.
The good news is that tools make every part of the process faster. An AI writing tool lets you produce more content in the same number of hours, which means more posts on the site and more opportunities to rank and earn. Rytr is one of the most affordable options available and suits bloggers who want to increase their publishing rate without spending all their free time writing.
A keyword research tool like Jaaxy helps you find low-competition search terms your blog can realistically rank for. Most beginners skip keyword research entirely in the first few months, which is why their content does not attract organic traffic. Getting this habit in place from the very start gives you a significant advantage over the majority of new bloggers who learn this lesson later than they should.
Can you make money by writing a blog? Yes, genuinely. The data supports it, the income patterns of real bloggers confirm it and the tools available in 2026 make starting easier than it has ever been.
But blogging is not a quick route to income. It is a slow-building business that rewards patience and consistency more than any other quality. The blogs that fail do so mostly because the person behind them quits before the compound effect kicks in, usually around months 4 to 8, when traffic is still low, and income is still minimal.
The blogs that succeed are built by people who chose a focused niche, wrote genuinely helpful content, learned the basics of SEO, built an email list from the start and did not stop when early results were modest.
So, can you make money by writing a blog? Yes, genuinely. The data supports it, and the income patterns of real bloggers confirm it. Tools available in 2026 make starting easier than it has ever been.
But blogging is not a quick route to income. It is a slow-building business that rewards patience and consistency more than any other quality. The blogs that fail do so mostly because the person behind them quits before the compound effect kicks in, usually around months 4 to 8, when traffic is still low, and income is still minimal.
The blogs that succeed are built by people who chose a focused niche, wrote genuinely helpful content, learned the basics of SEO, built an email list from the start and did not stop when early results were modest.
That path is entirely achievable for anyone willing to follow it. No brilliant writing is required. No technical background is needed either. Pick a sensible niche, write content that answers real questions people are searching for and show up consistently for long enough that the work begins to compound.
Can you make money by writing a blog? The honest answer in 2026 is yes, but only if you are willing to treat it like a business from the very first day and give it the time it needs to grow.
Affiliate Disclosure: This page may contain affiliate links. If you click through and make a purchase, I may earn a commission at no extra cost to you. I only recommend tools and resources I genuinely believe offer real value.
How to Make Money by Writing a Blog: The Honest 2026 Guide
If you have ever wondered how to make money by writing a blog, you are not alone. Every week, thousands of people start a blog hoping it will become a real source of income. Some of them are right.
They pick a tight niche, publish consistently, learn the basics of SEO and build a blog that earns real money month after month. Others post for a few weeks, see no traffic and give up.
The difference between those two outcomes is almost never talent or luck. It is understanding how blog income actually works, how long it takes and what you need to do in what order. Most people who fail simply did not know what to expect before they started. This guide covers all of that honestly, including the income methods that work, the ones that are oversold and the realistic timelines you should plan around.
The Truth About Blogging Income
Before getting into the specific income streams, it helps to know what you are really building. A blog is not a slot machine. You do not write a post, publish it and wait for money to arrive. A blog is more like a piece of land you are slowly building a business on.
In the early months, you plant seeds. You write posts, learn what topics attract readers and figure out which keywords have real search demand. At some point, if you are consistent and targeted, Google starts to rank your posts. Readers arrive. Trust builds. Then income becomes possible.
According to Shopify’s guide to making money blogging, data from the 2026 Blogging Income Survey shows that blogs aged 1 to 3 years earn an average of around $205 per month. Blogs aged 5 to 10 years earn an average of $2,621 per month.
That is a significant jump, and it tells you something important. Blogging is a compounding asset. The work you do today is worth more in two years than it is today.
That is not a reason to avoid it. It is a very good reason to start now rather than waiting another month or year.
Everything in blogging starts with niche selection. A niche is the specific topic your blog covers. The more focused it is, the better your chances of ranking on Google and building a loyal audience.
The best niches for income in 2026 combine two things. First, genuine search demand from people actively looking for answers. Second, at least one clear way to monetise the audience you build.
Some niches tick both boxes effortlessly. Personal finance, online business, home improvement, health and wellness, parenting and pet care all have strong search volume and multiple ways to earn.
Broader topics like “lifestyle” or “motivation” tend to struggle because they attract a scattered audience with no clear problem to solve. When your readers all face the same type of problem, you can recommend specific products, tools and resources that genuinely help them. That is where income comes from.
A useful test is to ask yourself: what would my reader search for on Google that I could answer better than anyone else? If you have a real answer to that question, you have the beginning of a viable niche. If the answer feels vague or hard to pin down, the niche may need tightening before you start publishing.
Step 2: Build the Right Foundation
Many beginners skip this step and regret it later. Building your blog on the right platform from the start saves you from having to migrate everything when you get serious about income.
A self-hosted WordPress blog is the standard choice for bloggers who want control over their content, their ads and their monetisation. You own the site outright. No platform can remove your content, limit your functionality or take a cut of your earnings based on its own policies.
The cost is modest. A domain name costs around $10 to $15 per year. Basic shared hosting typically costs $3 to $5 per month.
For under $100 per year, you have a professional, fully-owned blogging platform. That is a better starting point than any free blogging platform, which gives you less control and often looks less credible to readers and advertisers.
Invest a few hours in your site’s design and speed before you publish your very first post. A clean, fast-loading site with a simple layout converts better than a cluttered one. Most readers form an opinion about your site in seconds. A polished first impression keeps them reading.
Step 3: Write Posts People Are Actually Searching For
This is where most bloggers go wrong. They write posts they find interesting rather than posts their target audience is actively searching for. Both things can be the same, but you need to check before you write, rather than hoping they match up after.
Keyword research is the process of finding out what your audience types into Google. You are looking for topics with real monthly search volume and relatively low competition from established sites. A keyword tool like Jaaxy, Ahrefs or even the free version of Google Search Console can show you what people are searching for.
The most useful types of posts for beginner blogs are comparison posts, review posts, how-to guides and best-of lists. These attract readers who are already close to making a decision or solving a problem. That intent matters. A reader who searches “best email marketing tool for bloggers” is far more likely to act on your affiliate recommendation than one who landed on a broad overview post.
Write each post to answer a specific question as fully as possible. Cover what the reader needs to know, link to relevant resources and make the content genuinely useful rather than just long. Length matters less than thoroughness.
Income Method 1: Affiliate Marketing
Learning how to make money by writing a blog almost always starts with affiliate marketing, and for good reason. You recommend products you actually use or have researched properly. When a reader clicks your link and buys, you earn a commission. No product to create, no stock to manage and no customer service.
The key to doing this well is trust. Readers who feel you genuinely recommend something are far more likely to buy through your link than those who sense you are pushing products for commission. Honest reviews that include both strengths and weaknesses convert better than pure promotion.
SaaS affiliate programmes are among the best available. Tools like Systeme.io pay 60% recurring commission for the life of each referred customer.
One conversion can keep paying you every month indefinitely. That kind of compounding income is one of the biggest advantages of building an audience around software tools, online business resources and digital products.
High-ticket programmes in finance, online business, web hosting and software tend to pay the most per conversion. Amazon Associates, on the other hand, pays lower commissions but covers almost every product category, which makes it useful for product-focused review blogs.
According to Bluehost’s guide to making money blogging, affiliate marketing is the fastest way to monetise a blog because you can add links from day one, even before you have significant traffic. The income scales with your audience rather than requiring a minimum traffic threshold.
Income Method 2: Display Advertising
Display ads are the most visible way blogs earn money. You join an ad network, place code on your site, and the network shows relevant ads to your visitors. You earn based on the number of views and clicks those ads receive.
The entry-level network is Google AdSense, which accepts most blogs and can be applied for from the start. Rates are modest, typically $2 to $5 per thousand visitors, depending on your niche. For most new blogs, AdSense is a starting point rather than a serious income stream.
Premium networks pay significantly more but require minimum traffic. Mediavine Journey opens at 1,000 monthly sessions. Mediavine itself requires 50,000 monthly sessions.
These networks earn $15 to $40 or more per thousand visitors in high-value niches like personal finance and online business. The same traffic that earns $50 from AdSense could earn $400 or more from Mediavine.
The most profitable strategy is to hold off on display ads until you qualify for a premium network. Cluttering your site with low-paying ads early on slows your page speed and gives readers a poor experience before you have built enough trust to retain them.
Once your blog has an established audience, brands will pay to have their products or services mentioned in your content. A sponsored post is one where a brand pays you a flat fee to write about them, typically within a post that also includes your regular content.
Rates vary widely based on your audience size, your niche and the brand’s budget. Smaller niche blogs with 10,000 monthly readers might earn $100 to $500 per sponsored post. Larger blogs with 100,000 or more monthly readers can charge $1,000 to $5,000 or more for the right brand partnership.
The most important rule with sponsorships is to only accept deals that are relevant to your audience. A personal finance blog taking money to promote an unrelated casino service will damage its credibility permanently. Readers notice when something does not fit, and trust, once lost, is hard to rebuild.
Disclosing paid partnerships is also a legal requirement in the US under FTC guidelines. A clear, brief disclosure at the start of any sponsored post is all that is needed.
Income Method 4: Selling Digital Products
Selling your own digital products is one of the highest-margin income methods available to bloggers. You create the product once and sell it unlimited times with no production cost per sale.
Good beginner digital products include ebooks, email swipe files, templates, spreadsheets, printable guides and short courses. The best ones solve a single, specific problem for a clearly defined type of reader. A general guide on “blogging” competes with thousands of free resources. A focused product like “The Affiliate Blog Setup Checklist: 30 Steps for Your First Profitable Post” solves a real problem for a real buyer and has far less competition.
Platforms like Gumroad and Payhip let you list and sell digital products with no monthly fee. Your blog drives the traffic. The product converts that traffic into income. As your audience grows and trusts your content, conversion rates tend to improve naturally.
The larger your audience, the more attractive your digital products become. A blog with 20,000 monthly readers selling a $27 ebook to even 0.5% of visitors earns $2,700 per month from that single product alone.
Income Method 5: Email List and Newsletter Income
Building an email list is one of the most important things a blogger can do, and it directly feeds every other income stream. Unlike social media followers, your email list is yours. No algorithm can reduce your reach. No platform can take it away.
Every post you write should give readers a reason to subscribe. A well-targeted lead magnet, which is a free resource you offer in exchange for an email address, is the most effective way to grow a list quickly. A checklist, a mini guide or a short email course that solves a specific problem for your niche audience converts far better than a generic “sign up for updates” form.
Email newsletters can be monetised directly through affiliate links, sponsored placements and product sales. Readers who receive regular value from your newsletter are some of the most engaged and highest-converting audience members you will have. An email list of 1,000 targeted subscribers can produce more income than 10,000 social media followers.
Systeme.io offers a generous free plan for email marketing that works well for bloggers just getting started. As your list grows, the income potential from each email you send grows with it.
A blog with 2,000 engaged email subscribers can generate more income per month than a blog with 20,000 monthly visitors who never sign up for anything. The relationship your email list creates is simply stronger than the one built by a page view alone.
Your blog is not only a direct income source. It is also your portfolio. Well-written posts on a focused topic demonstrate your knowledge and your ability to communicate clearly. Businesses and publications actively look for writers with a track record of quality content in their niche.
Freelance writing clients typically pay $50 to $300 per article at the entry level, rising to $500 or more per piece as your reputation builds. A blog with 10 to 20 strong posts on a topic gives you credibility that a bare portfolio does not.
Consulting follows a similar path. If your blog is about a professional topic, whether that is marketing, finance, fitness, photography or anything else requiring real expertise, your content demonstrates that expertise in public. Potential clients can read your work before they contact you. That pre-qualification removes a lot of the friction in landing consulting clients.
According to AskEustache’s blog monetisation guide, the most successful bloggers match their monetisation method to their traffic level. Freelancing and consulting work best in the early stages because they do not require a minimum traffic to generate income. They are especially powerful for bloggers in professional or business niches.
Income Method 7: Online Courses and Memberships
Teaching what you know through an online course is one of the highest-value things a blogger can offer. A focused course on a topic your audience needs can sell for $47 to $500 or more. Unlike digital products, courses often include video, audio or community access, which justifies a higher price and builds deeper loyalty.
Platforms like Teachable and Udemy handle the hosting and payment processing. Your blog drives the traffic and provides the context that makes your expertise credible. A reader who has consumed 20 of your blog posts before seeing your course offer is far more likely to buy than someone who has just discovered you.
Membership sites are a step further. Instead of a one-time purchase, members pay a recurring monthly fee for ongoing access to your content, your community or your guidance. This creates predictable monthly revenue that grows as your membership base grows.
The most realistic path to a profitable course or membership is to spend 12 to 18 months building an audience first. A small, loyal audience will buy from you. A large but disengaged audience will not.
What Actually Drives Blog Income
Understanding how to make money by writing a blog comes down to one fundamental principle. Traffic without trust does not convert. Trust without traffic does not scale. You need both, and they take time to build together.
The fastest path forward is to pick one niche and commit to it. Write two or three well-researched, genuinely useful posts per week for 12 months. Build your email list from the very first post.
Add affiliate links where they fit naturally. Let traffic grow before adding display ads.
At the 6-month mark, you will have enough data to see what topics are drawing readers. Double down on those. At the 12-month mark, many bloggers in focused niches start to see consistent income from affiliate marketing and early display ad revenue. At 18 to 24 months, the income often reaches a point where blogging becomes a meaningful source of monthly revenue.
None of that is quick. All of it is genuinely achievable. The bloggers who succeed are not the most talented writers. They are the most consistent ones.
Running a blog is significantly easier with the right tools in place from the start.
For writing and content creation, an AI writing tool speeds up your output without replacing your voice. Rytr is one of the most affordable options available and works well for bloggers who want to publish more content without spending all their available time on it.
For email marketing, Systeme.io’s free plan handles list building, automated sequences and basic funnels. It integrates with your blog and lets you start growing a list from your very first post without any upfront cost.
For keyword research, a tool like Jaaxy helps you find low-competition search terms that your blog can realistically rank for. Choosing the right keywords before you write is one of the highest-leverage habits a new blogger can build.
The Bottom Line
Knowing how to make money by writing a blog is not complicated, but it does require patience and a realistic plan. Every income stream mentioned in this guide is genuinely achievable. None of them produces results overnight. All of them reward bloggers who treat their blog like a business from day one, rather than a hobby they will monetise someday.
Start with a clear niche. Build your site properly. Write posts people are searching for. Add affiliate links early and grow your email list from your first post.
Monetise with display ads once you qualify for a premium network. Then layer in digital products, courses and brand deals as your audience grows. Each income stream you add makes the whole business more stable.
Consistent, focused blogging has one of the most powerful compounding effects of any income-building activity you can do from home. Anyone with a laptop and an internet connection can access it. The best time to start was 12 months ago. The second-best time is today.
If you are serious about learning how to make money by writing a blog and want a clear, no-hype starting point, head over to the Get Started Here page on this site and start building something real.
Affiliate Disclosure: This page may contain affiliate links. If you click through and make a purchase, I may earn a commission at no extra cost to you. I only recommend tools and resources I genuinely believe offer real value.
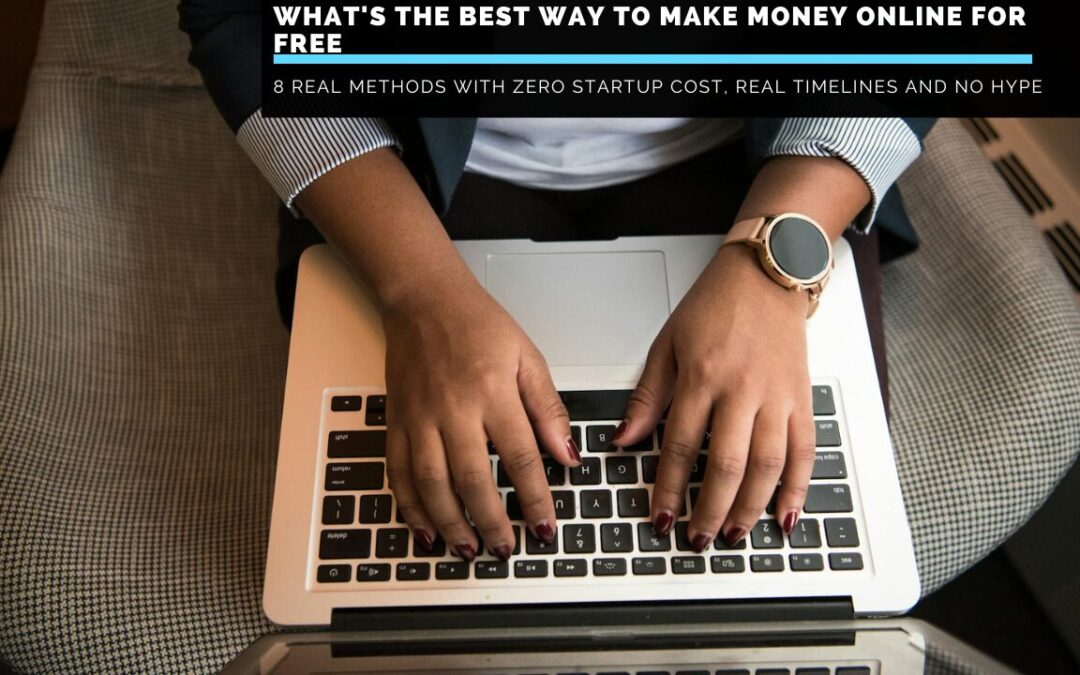
What’s The Best Way To Make Money Online For Free? (2026 Guide)
What’s the best way to make money online for free? It is one of the most searched questions on the internet, and for good reason. Earning real income without spending anything first is a genuinely appealing idea, especially when money is already tight.
The good news is that free online income is entirely real. The honest answer, though, is that free and easy are not the same thing. Most people who search this question deserve a straight answer rather than a list of wild income claims built around survey sites.
This guide covers 8 ways to make money online without spending anything to start. For each one, you will get a clear sense of what it can earn, how long results take and who it suits best.
Free Does Not Mean Instant
Before looking at the specific methods, it helps to understand one key distinction. Some free online income methods pay small amounts very quickly. Others pay significantly more but take months to get going.
Both types are free to start. They just demand very different things from you.
Quick-pay methods like surveys and microtasks are free and fast, but cap out at modest amounts. They suit people who need a small income boost right now without any learning curve. Slow-build methods like blogging, affiliate marketing and freelancing are also free to start but take time, effort and patience before real money appears. These suit people who are willing to invest time now in return for something that grows over months and years.
The people who do best online are the ones who are clear about which category they are entering before they begin. This guide separates the methods clearly so you can choose with realistic expectations.
1. Freelancing: Free to Start and Pays Quickly
Freelancing is often the best answer to what’s the best way to make money online for free, especially for people who need income relatively fast. You sign up on a platform, build a profile and start pitching clients. No course fees, no software to buy and no waiting months for traffic to build.
The range of in-demand freelance services is wide. Content writing, copywriting, social media management, graphic design and video editing are all in high demand. So are data entry, virtual support and basic web work.
All of these are free to start. Platforms like Upwork and Fiverr take a commission from your earnings rather than charging upfront, which means the startup cost is genuinely zero.
According to JumpTask’s guide to earning money online without investment, freelance writing is one of the most flexible free-entry income methods in 2026. Beginners with no track record can still find clients who pay fair rates for good content, especially in a specific niche.
The freelance growth path is clear. You start at lower rates to build reviews. Then you pick a niche and grow a portfolio.
From there, your rates go up, and you attract better clients. Entry-level freelance writers earn $25 to $50 per article. Specialist freelancers with a clear focus and solid track record earn $100 to $300 per piece or more.
The limit is that freelancing trades time for money directly. You cannot earn while you sleep. That is why many freelancers eventually combine client work with a longer-term income stream like blogging or affiliate marketing on the side.
An AI writing tool like Rytr speeds up article production significantly. For freelancers trying to maximise earnings per hour, it is one of the most practical tools available at a very low cost.
2. Affiliate Marketing: The Best Long-Term Free Income Model
If you are willing to play the long game, affiliate marketing is almost certainly the best answer to what’s the best way to make money online for free. This is especially true in terms of long-term income potential. You promote other people’s products or services using a unique link.
When someone buys through your link, you earn a commission. No product to create, no stock to hold and no customer service to manage.
The startup cost is zero or very close to it. A simple WordPress blog costs around $3 to $5 per month for hosting. Social media platforms are free. You can start an affiliate marketing presence on Pinterest, Instagram, TikTok or YouTube without spending anything.
The recurring commission model makes affiliate marketing powerful. Tools like Systeme.io pay 60% recurring commission for the lifetime of each referred customer.
That means a single referral that converts keeps paying you month after month without any extra work. Refer 10 paying users, and you’ll earn several hundred dollars per month from that alone.
The honest timeline is 6 to 12 months before meaningful income arrives. That is the part most people are not told upfront, and it is the biggest reason so many beginners quit too early. The first 3 to 6 months feel slow, and the temptation to quit is real. The people who stay with it through that period are the ones standing in a much less crowded space once the compound effect kicks in.
Our guide walks through the whole process clearly and honestly, with no fluff.
3. Blogging: Slow to Build but Genuinely Lasting
A focused blog is one of the best free online income models available because of how many income streams it supports at once. Once a blog is established, it can earn through display advertising, affiliate commissions, sponsored posts and digital product sales, all at the same time.
The startup cost is close to zero. Free platforms exist, though a self-hosted WordPress blog on inexpensive hosting gives you much more control over how you monetise. The main investment is time, not money.
The biggest beginner mistake is choosing a topic that is too broad. A blog about “lifestyle” or “health” competes with thousands of sites that have years of authority. A blog about “affiliate marketing tools for side-hustlers” or “low-carb meal prep for busy parents” targets a much smaller audience but faces far less competition. Tight niches win in 2026.
Consistent publishing over 12 to 18 months is what separates blogs that grow from those that stagnate. Two well-written, genuinely helpful posts per week over a year produce a far more valuable asset than 10 rushed posts over 6 weeks followed by silence.
Display ad networks like Mediavine pay well once a blog reaches 50,000 monthly sessions. Many niche blogs hit that milestone within 18 months of steady, focused publishing. Beyond ads, affiliate commissions from a trusted audience can easily double or triple monthly ad revenue.
One of the most powerful things about a blog is that it compounds. An article you publish today may rank on Google in 6 months and keep bringing visitors for 3 years. Each post becomes a long-term asset. A blog with 200 well-targeted articles is a very different thing from a social media account with 200 posts that have all aged out of the algorithm.
4. Surveys and Microtasks: Truly Free and Instantly Accessible
Surveys and microtasks are the most accessible of all free online income methods. There is no skill needed, no profile to build and no waiting period. You sign up for a platform like Swagbucks, Survey Junkie, Amazon Mechanical Turk or Prolific and start earning within minutes.
Many people dismiss surveys because the pay feels small. But they serve a real purpose for beginners. They prove to you that earning online is possible.
That first $5 payout means far more than it looks, because it is real money from a real platform. It changes how you think about what is achievable. Use them as a confidence builder while you invest time in something bigger.
The income from surveys is modest but honest. Most people earn between $1 and $5 per hour of effort.
Survey Junkie pays out via PayPal at a $5 threshold. Swagbucks offers gift cards and PayPal payments from $3. Prolific is often cited as one of the better-paying survey platforms and focuses on academic research tasks.
The value of surveys for a beginner is not the income ceiling. It is the zero barrier to entry. You can begin earning something today, which builds confidence and momentum while you develop a more meaningful income stream on the side.
According to Due’s guide to making money from home for free, the most successful beginners treat surveys as a bridge rather than a destination. They use the small, consistent earnings to maintain motivation during the slower early months of building something more scalable.
5. Print-on-Demand: Creative Income With No Upfront Cost
Print-on-demand is free to start and suits people who enjoy creating simple visual designs. You upload designs to a platform like Redbubble, Teepublic or Printify. When a customer orders a product, the platform prints and ships it. You earn a share of every sale without ever touching the product.
Canva is a free design tool that is more than capable of creating effective print-on-demand designs. You do not need professional graphic design software or experience to get going. Many successful print-on-demand creators use Canva exclusively.
The key to doing well is niche specificity. Generic motivational quotes on t-shirts are some of the most saturated products in the market. A design that speaks directly to a specific hobby, profession or community, such as nurses, dog owners or yoga fans, stands out and converts far better.
Earnings from print-on-demand start slowly as you build a catalogue of listings. A portfolio of 50 to 100 focused designs across multiple products is where most creators start to see consistent monthly income. Some creators earn $500 to $3,000 per month once they have a strong enough catalogue in a focused niche.
The passive nature of this model is one of its biggest draws. A design you upload today can keep earning for years with no further work required.
6. Virtual Assistant Work: Zero Investment Required
Virtual assistant work is one of the quickest ways to start earning online for free. Businesses and busy entrepreneurs need help with emails, social media, scheduling, data entry, customer support and research. You offer those services remotely, and they pay you by the hour.
The barrier to entry is low. If you are organised and comfortable using basic tools like Google Workspace and Zoom, you already have the foundation. Platforms like Upwork and Belay are free to join. Most clients at the entry level care more about reliability and clear communication than about prior VA experience.
VA rates start at around $15 to $25 per hour for general admin work. Specialist tasks like social media management or email marketing support reach $35 to $60 per hour. Many experienced VAs build long-term relationships with regular clients, which creates a stable and predictable monthly income.
VA work is also a natural gateway to higher-paid freelance services. Many people who start as general VAs pick up specific skills from their clients and move into more specialist roles at better rates within 6 to 12 months.
One often-missed benefit of VA work is what you learn from seeing inside other people’s online businesses. You see their funnels, their content strategy, their email sequences and their product launches from the inside. That knowledge is worth more than most paid courses, and it comes as part of the job.
7. Selling Digital Products: Free to Create and Passive to Sell
Digital products are one of the closest things to passive online income. You create the product once and sell it as many times as you like with no extra cost per unit.
Good digital products you can create for free include ebooks written in Google Docs, templates built in Canva, email swipe files, printable worksheets and short guides. The most successful digital products solve a single, specific problem for a single, specific buyer. A template called “30 Pinterest Pin Templates for Affiliate Bloggers” will always outsell a generic “Social Media Pack.” The reason is that it speaks directly to a real buyer with a real need.
Platforms like Gumroad and Payhip let you list and sell digital products with no monthly fee. Etsy has a 20 cent listing fee per item, but gives you access to an audience that already searches for downloadable products. These are as close to free as any commercial selling platform gets.
The challenge is visibility. Without a traffic source, products do not sell themselves. Combining a digital product with a blog, an email list or social media content is what makes this model produce consistent income. The content drives awareness, and the product converts that awareness into money.
8. Writing on Medium: The Partner Programme
Writing on Medium is one of the most overlooked free income opportunities for people who enjoy writing. Medium is a free publishing platform with millions of readers. The Medium Partner Programme allows writers to earn money based on how much time paying Medium members spend reading their articles.
Signing up for a Medium account is free. Applying for the Partner Programme is also free once you have published a few articles. You do not need a website, a hosting account or any technical know-how. You just need to write and publish.
Earnings from Medium vary widely. Beginners who publish consistently on focused topics typically earn $100 to $500 per month within 3 to 6 months. Writers who publish frequently on high-demand topics and build a following earn $1,000 to $5,000 per month or more.
The best topics on Medium for income include personal finance, online business, productivity, self-improvement and technology. Articles that offer a specific, useful outcome perform better than vague personal stories.
“How I Earned My First $500 Online With No Investment” will outperform “My Journey Into Online Income” every time. The first promises a clear, useful result. The second does not.
Honest Comparison: Quick Pay vs Long-Term Income
Understanding which of these methods produces quick income and which builds over time is one of the most useful things you can take from this guide.
Quick income (within days to 4 weeks): Surveys, microtasks, freelancing and virtual assistant work all produce first earnings within a few weeks. These are the best starting points for anyone who needs some income right now.
Medium-term income (1 to 3 months): Print-on-demand and Medium writing can produce meaningful income within 60 to 90 days with consistent effort. They require more upfront time than surveys but produce better returns.
Long-term income (6 to 18 months): Affiliate marketing and blogging take the most time before they pay meaningfully, but they produce the most durable and scalable income over time. Every article or affiliate link you create becomes a long-term asset.
The smartest approach is to combine both. Start with one quick-pay method to build income and confidence now.
Build a long-term asset-based income stream in parallel. The quick income keeps you going financially. The long-term asset grows into something that earns for you while you sleep.
The Tools That Make It Easier
Running any online income stream becomes significantly more efficient with the right tools, most of which are available for free or very close to it.
A free email platform like Systeme.io lets you build an email list, send campaigns and set up basic funnels at no cost. An email list is one of the most valuable things you can build online because it is an audience you own directly, with no algorithm between you and your subscribers.
Canva’s free tier handles everything from Pinterest pins and blog graphics to digital product design. It is the single most useful free tool for visual content creation available in 2026.
Google Search Console is free and essential for bloggers and affiliate marketers. It shows you exactly which search terms are bringing people to your site, which pages rank best and where you have opportunities to grow.
Choosing the Right Free Method for You
According to Wix’s guide to making money online, the most important factor in choosing a free income method is how well it fits your time, interests and skills. A free method that does not suit your life is one you will not stick with long enough to see results.
A useful starting question is how quickly you need income. If you need money within the next month, start with freelancing, VA work or surveys. If you can invest 6 to 12 months of consistent effort, affiliate marketing or blogging will produce far more income over the long run.
A second useful question is what you enjoy doing. The people who succeed online are the ones who choose a method they find genuinely interesting. Showing up consistently for 12 months is much easier when the work connects with something you care about.
The Honest Answer
So what’s the best way to make money online for free? The straight answer is that there is not a single best method for everyone. The best method for you is the one that matches your skills, your available time and how quickly you need results.
If you want something, you can start today with zero cost and zero skill, surveys and microtasks are a legitimate starting point. If you want to build something real that compounds over time and produces meaningful income, affiliate marketing or blogging is where to put your energy.
What’s the best way to make money online for free in 2026 is really answered by what you are willing to put in. The money itself costs nothing to start. The time and effort are what the returns are built on.
Affiliate Disclosure: This page may contain affiliate links. If you click through and make a purchase, I may earn a commission at no extra cost to you. I only recommend tools and resources I genuinely believe offer real value.
The Best Online Business For Beginners in 2026 (Honest Guide)
The best online business for beginners in 2026 is not the one with the highest income ceiling. It is the one you will stick with long enough to make it work. That might sound like an odd way to start a business guide, but it is the most honest thing anyone can tell you.
Most beginners fail online, not because they chose a bad model. They fail because they chose one that did not match their personality, their time or their skills. That is the real problem. This guide exists to help you avoid that mistake before you make it.
This guide covers 7 business models that work for beginners right now. For each one, you will get a clear sense of what it costs to start, how long results take and who it suits best. No inflated income claims, no models that need a big budget and no methods that require years of experience to even attempt.
What Makes an Online Business Beginner-Friendly?
Before looking at specific models, it helps to know what to look for. Not every online business is easy to start. Some need skills that take years to build. Some need money you may not have yet.
A good beginner online business tends to have four things. First, it has a low or zero startup cost. Second, it does not need specialist technical skills.
Third, it has a clear path to first income within a fair timeframe. Fourth, it can be run part-time alongside a day job while it grows. If a model fails on most of these four points, it is probably not the right starting point.
All 7 models below meet most or all of those conditions. Some suit people who enjoy writing. Others suit people who are creative, organised or comfortable in front of a camera. The best one for you depends on what you already do well and what you find genuinely interesting.
1. Affiliate Marketing
Affiliate marketing is one of the most popular answers to the question of what is the best online business for beginners in 2026. The model needs no product, no stock and no customer service. You create content that links to other people’s products and earn a commission when someone buys through your link.
The cost to start is close to zero. A simple WordPress blog runs for around $3 to $5 per month in hosting. Free tools like Canva handle basic graphics. That is all you need to begin.
The real draw is the recurring income some programmes offer. Systeme.io pays 60% recurring commission for the life of each referred customer. One sale can keep paying you month after month without any extra work on your part.
The best affiliate marketers in 2026 are not those with the biggest audiences. They are the ones whose content answers real questions for real buyers. A review post that helps someone decide between two tools is worth ten times more than a generic “best tools” roundup. Specificity and genuine usefulness are the two things that drive affiliate income over the long term.
According to Shopify’s guide to the best online business ideas, affiliate marketing works best when paired with helpful, specific content. A blog post that answers one clear question for one clear type of reader will always convert better than a broad, general article.
The honest timeline is 6 to 12 months before real income shows up. That is the part most guides leave out.
The people who succeed here treat it as a long-term asset, not a quick cash fix. They keep publishing, keep improving their content and stay in the game long enough for the compound effect to kick in.
Blogging works as a standalone business in its own right. A focused blog earns through several streams at once: affiliate links, display ads, sponsored posts and product sales.
The most common beginner mistake is choosing a topic that is too broad. A blog about “health and wellness” competes with millions of long-established sites. A blog about “affiliate marketing for side-hustlers” or “low-carb cooking for busy parents” has far less competition and draws a much clearer audience. Tight niches win in 2026.
New blogs typically take 6 to 12 months to build real traffic and 12 to 24 months to produce meaningful income. That surprises a lot of people. But it is also why blogging produces such durable returns. By the time your blog is earning, most of the people who started at the same time as you have already quit.
Display ad networks like Mediavine pay well once you hit 50,000 sessions per month. Many focused niche blogs reach that point within 18 months of steady publishing.
Blogging rewards people who show up often and consistently. Two well-written, genuinely helpful posts per week over 12 months will outperform 10 rushed posts per week for 6 weeks and then nothing. Quality and consistency beat volume every single time.
One often-overlooked advantage of blogging is how well it pairs with other income streams. Your blog can host affiliate links, promote digital products, support an email list and attract sponsor interest all at the same time. Over time, multiple income sources running through a single blog create a business that is far more stable than any single-stream approach.
Keyword research is essential from the start. Writing about topics with real search demand in a low-competition niche is the difference between content that ranks and content nobody ever finds. A free tool like Google Search Console shows you what people are already searching for so you can plan content around real demand.
3. Freelancing
Freelancing is the best option for beginners who want to earn money fast rather than wait months for an audience to grow. If you have a skill someone else needs, you can earn within days of setting up a profile.
In-demand freelance skills include writing, editing, graphic design, video editing, social media management, bookkeeping, virtual support and basic web work. You do not need expert-level skill to start. Many clients on Upwork and Fiverr look for beginners who charge fair rates while building their track record.
The growth path for freelancers is simple. You start at lower rates to collect reviews. Then you find a niche and build a portfolio.
From there, your rates go up, and you attract better clients. A freelance writer in a focused niche can earn $100 to $300 per article. A social media manager can charge $1,000 to $3,000 per client per month. Neither of those rates requires years of experience to reach.
The limit of freelancing is that it scales only through your time. You cannot earn from it while you sleep. That is why many freelancers eventually move into digital products or an agency model. But as a starting point, nothing else on this list brings income as fast.
Using an AI writing tool like Rytr speeds up your output without cutting quality. It is one of the most affordable options available. This matters for freelancers who want to take on more work at the same standard without burning out on long hours.
Digital products have one of the best cost structures of any online business. You build a product once and sell it as many times as you like with no extra production cost per unit.
Good digital products for beginners include ebooks, templates, Canva graphics, email swipe files, printable sheets and short guides. The ones that sell best solve one clear problem for one clear type of buyer.
A product called “The Pinterest Starter Kit for Bloggers” will outsell a generic “Social Media Guide” every time. The reason is simple. It speaks directly to who it is for and what problem it solves.
Platforms like Gumroad, Payhip and Etsy let you list digital products with no monthly fee. Etsy has a built-in audience of buyers who already search for digital downloads, which takes some of the traffic pressure off you.
The main challenge is getting seen. Without a way to reach your target buyer, products do not sell on their own.
Pairing a digital product with a blog, an email list or a social media account is what makes this model click. The content brings people in, and the products turn that attention into income. Many beginners start by creating one strong product, then use it as the anchor for a whole content strategy built around the problem it solves.
5. Print-on-Demand
Print-on-demand lets you sell physical products without holding any stock. You create designs, list them on products through a platform like Printful or Printify and only pay for production when a customer actually orders.
This model suits beginners who enjoy creating designs but do not want the hassle of managing stock or shipping. Canva is good enough to create many styles of print-on-demand design, so you do not need costly software to get going.
The range of products is wide. T-shirts, mugs, tote bags, phone cases, wall prints and notebooks are all popular. The key to doing well is niche focus.
A generic motivational quote on a t-shirt competes with thousands of similar items. A design that speaks directly to a specific hobby, job or community stands out clearly. Buyers scroll past the generic stuff. They stop when they see something that feels made for them.
Etsy is the most popular starting platform for print-on-demand beginners because it already has buyers looking for unique, personalised items. You still need to optimise your listings with good photos and keyword-rich titles, but the traffic problem is smaller than building your own store from scratch.
A practical starting point is to create 10 to 20 listings in one focused niche rather than spreading across many unrelated categories. This gives the Etsy algorithm a clear signal about what your shop is about. Shops that focus on one niche tend to get better search placement than shops that list random products across dozens of categories.
YouTube and podcasting are longer plays than the other models on this list. They take more time to build but produce some of the most reliable and varied incomes of any online business once they are going.
A YouTube channel can start earning through the Partner Programme once it hits 1,000 subscribers and 4,000 watch hours. Ad revenue alone pays between $1 and $5 per 1,000 views, depending on the niche. The real money comes from layering in affiliate links, sponsor deals and product sales on top of that.
Podcasting follows a similar path. Sponsorships become realistic once a show reaches around 5,000 listeners per episode. Before that point, affiliate links in your show notes are the most accessible income stream.
Both take 12 to 18 months of steady output before numbers start moving in a meaningful way. The creators who build real income here are the ones who treat the first 50 episodes or videos as a learning phase. They are still going when others have already stopped.
According to Hostinger’s guide to online business ideas for 2026, content creation in a clearly defined niche builds both authority and income over time. The key is picking a topic you can speak to with genuine interest for years. Not just for a few months until it starts to feel like a grind.
7. Virtual Assistant Services
Virtual assistant work is one of the quickest routes to building your own online business. You help busy business owners with day-to-day tasks they do not have time for. Email, social media posting, calendar management, data entry, research and customer support are all common VA tasks.
The barrier to entry is low. If you are organised and easy to communicate with, you are already most of the way there. Basic comfort with Google Workspace and Zoom is enough for most entry-level clients.
VA rates start at around $15 to $25 per hour for general admin work. Specialist VAs who focus on social media, email marketing or online business support can charge $35 to $60 per hour. Many experienced VAs eventually build small agencies, bringing in other contractors and scaling beyond what one person can handle alone.
VA work is also a natural stepping stone into other online business models. Many bloggers, affiliate marketers and social media managers started as VAs. The client work teaches you systems and skills that later power something bigger.
One overlooked benefit of VA work is the access it gives you to how real online businesses operate. When you work closely with business owners, you see their funnels, their email sequences, their content strategies and their product launches from the inside. That knowledge is genuinely valuable, and most people who start as VAs carry it forward into whatever they build next.
Choosing the Right Tools
Whatever model you pick, a few tools make running an online business much easier.
An email list is one of the most valuable things you can build online. Unlike social media followers, your email subscribers are yours. No algorithm can take them away.
Tools like Systeme.io handle email marketing, landing pages, funnels and digital product delivery in one place. The free plan is genuinely useful, and paid plans start at $27 per month.
An AI writing tool speeds up content production across almost every business model on this list. Rytr is one of the most affordable options available. It is well-suited to beginners who want to produce more content without spending all their available time on it.
A keyword research tool is essential for bloggers and affiliate marketers. Finding topics with real search volume and low competition is often the gap between content that ranks and content that nobody ever finds.
According to GoDaddy’s guide to the best online business ideas, the most important factor in choosing a business model is fit, not just income potential. A model that clashes with your personality or schedule is one you will not stick with long enough to see real results.
Here is a simple way to narrow it down.
People who enjoy writing and can wait for results do best with affiliate marketing or blogging. These take time but produce something that keeps earning long after the work is done.
People who need income fast and have a skill to offer are better suited to freelancing or VA work. These pay within weeks but require active input rather than passive returns.
Creative people who enjoy making things tend to do well with print-on-demand or digital products. Low startup cost and no ceiling on how many units sell.
People who are comfortable talking, whether on camera or through audio, can build something real with YouTube or a podcast. The timeline is longer, but the audience loyalty that builds is unlike anything else on this list.
The honest truth is this. Most people who build real online income did not find a magic model. They picked one that suited them, stuck with it through the slow early months and kept adjusting until it worked.
One more thing worth saying. The early months of any online business feel slow. Traffic is low. Sales are few.
Most people give up during this phase, which is exactly why the ones who stay eventually face far less competition. The people who stick around past month six are the ones standing in a much less crowded space. That is not a coincidence. It is just the natural result of showing up when others stop.
Pick one model. Start small. Stay with it longer than feels comfortable.
Most of the people who earn real income online are not especially talented or lucky. They just picked something and kept going when it would have been easier to stop. That is the whole secret, and it is available to anyone who chooses to use it.
One Thing That Matters More Than the Model You Choose
There is a reason this guide started the way it did. The best online business for beginners in 2026 is not a universal answer. It changes depending on who you are. But one thing is true for every model on this list.
Showing up consistently over a long enough period of time is what separates the people who earn online from the people who try and give up. Not skill. Not budget. Consistency.
A beginner who publishes two blog posts per week for 18 months will outperform someone with better writing skills who publishes for 3 months and stops. A freelancer who pitches clients every week for 6 months will find more work than someone who sends 10 pitches in a burst and then waits.
The internet rewards volume and consistency over time. That is not exciting advice. It is the most useful advice there is. And it is freely available to anyone who chooses to act on it, regardless of their starting budget, their technical skill or their background.
The Bottom Line
The best online business for beginners in 2026 is not a single model that works for everyone. It is the one that fits who you are, what you enjoy and how much time you have each week.
All 7 models above can produce real, lasting income. None of them works overnight. All of them reward the people who treat their business like something worth building rather than a quick shortcut to cash.
Affiliate Disclosure: This page may contain affiliate links. If you click through and make a purchase, I may earn a commission at no extra cost to you. I only recommend tools and resources I genuinely believe offer real value.
What Are the Best Ways to Make Money Online for Beginners?
If you have ever searched for what are the best ways to make money online for beginners, you have probably seen the same thing. Lists of methods with income figures that belong to the top 1% of earners. Tools and skills that take years to develop. And almost no honest talk about how long it really takes or how much effort is needed at the start.
This guide is different. Every method below is open to a true beginner. For each one, you will get a realistic sense of what it takes, how fast it pays and who it suits best.
There are no get-rich-quick promises here. There are no methods that only work if you already have an audience or a budget to spend on ads.
The most common reason beginners fail online is not a lack of skills or time. It is bad expectations. They try one method for 6 weeks, see little income and conclude it does not work. In most cases, they gave up just before the work began to pay off.
Most online income methods fall into two groups. The first group is direct income, where you trade your time for money. Freelancing and virtual assistant work are good examples. These pay quickly but are hard to scale.
The second group is slow-build income, where you put in time upfront, and the returns grow over months. Blogs, affiliate sites and digital products sit in this group.
The best setup for a beginner is to do both at once. Use direct income to cover your bills today. Use slow-build income to grow something that earns for you in the future.
One more thing that helps a lot in the early months is keeping a simple log of what you do each week. It does not need to be complicated. A note in your phone or a basic spreadsheet works fine.
Track posts published, clients contacted, and hours worked. When results are slow, your log shows you that progress is happening even if the bank balance does not reflect it yet. That matters more than most people realise.
1. Affiliate Marketing
Affiliate marketing is one of the most popular ways to earn online, and for good reason. You share a product using a unique link. When someone buys through that link, you earn a cut. No stock, no delivery and no support emails.
The real draw is the type of commission some products pay. SaaS tools often pay a share of every monthly payment for as long as the person you referred stays a customer.
A tool priced at $97 per month at 40% commission pays you $38.80 every month per referral. That adds up fast.
According to Shopify’s guide to making money online, content-based affiliate sites are among the most reliable long-term income models online. The key is writing helpful content around topics people search for and linking to relevant products in a way that feels natural rather than pushy.
The honest timeline for affiliate marketing is 6 to 12 months before real income starts to show. It is slow at the start. That is exactly why most people quit before it pays off, and also why those who stick with it face less competition over time.
A good niche makes a big difference. Tight, focused topics with a clear audience convert better than broad lifestyle topics. If you are unsure which products to promote, look for software tools your target audience already uses and check whether they offer an affiliate programme. Most do.
A blog on its own is a real income model in 2026. It earns money through display ads, paid posts and product sales, as well as any affiliate links it carries.
The best thing about blogging for a beginner is that you do not need tech skills to start. WordPress makes setup simple. What matters far more than tech is the ability to write posts that help people and that target topics they are already searching for. That is a learnable skill, not a natural gift.
New bloggers should focus on tight, low-competition niches rather than broad topics. Writing about “how to set up your first Systeme.io funnel” is easier to rank for than “how to make money online.” The more specific you are, the better your chance of ranking and the more useful your content is to the people who find it.
Income from ads starts small and grows as traffic builds. The Mediavine network requires 50,000 sessions per month to join. That takes time, but blogs in focused niches with a steady posting habit often get there within 12 to 18 months.
The real value of blogging is that each post keeps working long after you write it. A well-ranked article brings in visitors every day without any extra effort. That longevity sets it apart from almost every other content format.
It is also worth knowing that blogging and affiliate marketing work best together. A blog gives you a place to put your affiliate links in context. Your readers trust your writing before they click.
That trust is what turns a click into a sale. It is also what makes a content-based affiliate site far more durable than a social account that relies on algorithm reach.
3. Freelancing
Freelancing is the fastest path to real online income for most beginners. You offer a skill, find a client and get paid. No waiting for traffic, no building an audience and no months of unpaid work before you see a result.
In-demand beginner freelance skills include content writing, social media posts, graphic design, video editing, data entry, virtual support and basic web work. You do not need to be an expert. Most platforms let you start at lower rates while you build up reviews and past work to show new clients.
NerdWallet’s guide to making money online highlights freelancing as one of the most credible options for anyone with a useful digital skill. It also notes that AI tools have not killed freelance work. Instead, they have created new demand for freelancers who use AI well to produce better output faster.
The smart move for a new freelancer is to pick a focus early. General writers and general designers are hard to sell. A writer who only works with affiliate blogs, or a designer who only makes Pinterest pins, is easier to find and easier to hire.
Entry-level freelance writing pays $25 to $50 per article. With a clear niche and some solid examples, it grows to $100 to $250 per piece within a few months.
One thing that holds many beginners back is not having examples to show. The fix is simple. Write 3 to 5 sample articles in the niche you want to work in. Publish them on a free Medium account or share them as a Google Doc link.
You do not need paying clients to build a portfolio. You just need work that shows what you can do.
Writing faster without losing quality is also much easier with an AI tool. Rytris one of the most affordable on the market and a good fit for beginners who want to produce more without burning out.
4. Selling Digital Products
Digital products are one of the few ways to get close to true passive income online. You make the product once and sell it over and over with no extra work per sale and no cost per unit.
Good beginner digital products include ebooks, templates, Canva designs, printable sheets, swipe files and short guides. The ones that sell best are tight and specific. A guide called “start a business” has thousands of free rivals. A product called “20 Pinterest pin templates for affiliate bloggers” solves one clear problem for one clear type of buyer.
Platforms like Gumroad, Payhip and Etsy let you list digital products with no monthly fee and very little setup time. Etsy is a good starting point because it already has buyers searching for downloadable products. You do not have to build all your own traffic from scratch.
The main challenge is being seen. Without some form of traffic, whether from a blog, email list or social content, products do not sell on their own. Building one traffic source alongside your product is the key to making this model work.
Pricing is something a lot of beginners get wrong. Starting too low signals a low value. A well-made template or guide that solves a real problem can sell for $7 to $27 and feel like a bargain to the right buyer.
Test a price, see how it converts and adjust. Most people price up over time as their product gets reviews and their brand grows.
Virtual assistant work is one of the quickest entry points into online income for people who are well-organised and easy to communicate with. Businesses of every size need help with tasks that take up time but do not need special skills. Managing emails, booking meetings, posting on social media, entering data and handling customer queries are all standard VA tasks.
The bar to entry is low. If you can use Google Workspace, Zoom and a basic project tool like Trello or Asana, you are ready to start. Clients value reliability and clear updates above all else at the beginner level.
Platforms like Upwork and Belay connect VAs with clients without requiring you to find work from scratch. A clear, complete profile works best. Show what tasks you handle and how you communicate. That is usually enough to get your first reply within a few weeks.
General VA work starts at around $15 to $25 per hour. More focused tasks like social media support or email marketing work fetch $35 to $60 per hour. As you build a track record with repeat clients, income grows without requiring you to take on more new clients.
VA work also opens the door to higher-paid freelance services. Most people who start as general VAs pick up specific skills from their client work and move into better-paid roles over time.
One more thing worth knowing about VA work: the clients who pay best are not always the biggest companies. Small business owners and solo online entrepreneurs often need the most help and are the quickest to hire. They are also more likely to give you ongoing work rather than one-off tasks. That makes your income more stable and predictable from month to month.
6. Online Surveys and Microtasks
Surveys and microtasks are the lowest barrier to entry of anything on this list. No skill needed, no setup and no cost. Platforms like Swagbucks, Survey Junkie and Amazon Mechanical Turk pay you to complete surveys, watch short videos, test apps and tag images.
The income is modest. Most people earn $1 to $5 per hour of effort. Survey Junkie pays out via PayPal at a $5 threshold. Swagbucks pays through gift cards or PayPal at a $3 minimum.
FinanceBuzz’s beginner guide to making money online recommends surveys as a useful starting point for people who need income with zero experience. The guide is clear that surveys will not replace a salary. They are a bridge, not a business.
The value of surveys for a beginner is not the money itself. It is the habit of doing something every day that earns even a small amount. That habit builds confidence and keeps momentum going while you develop a more serious income stream alongside it.
If you do decide to use surveys, stick to a small number of well-known platforms rather than signing up for dozens at once. Three or four reliable platforms will give you enough to work with without spending hours sorting through low-quality or scam sites. Swagbucks, Survey Junkie and Prolific are consistently rated among the most trustworthy options for US users.
7. Selling on Etsy or Through Print-on-Demand
Etsy and print-on-demand platforms suit beginners who are creative or who enjoy making things, even at a basic level. Etsy already has an audience of buyers searching for handmade goods, vintage items and downloadable products. You do not have to build that audience yourself.
Print-on-demand removes all risk from selling physical products. You upload a design. When a customer orders, the platform prints and ships the product.
You earn the gap between the retail price and the cost to produce it. No stock, no upfront spend and no fulfilment work.
Getting started on Etsy or a print-on-demand platform takes a few hours. Good product photos, keyword-rich titles and clear descriptions are the three things that make the biggest difference to whether a listing gets found and bought.
Most beginners on Etsy make their first sale within 2 to 4 weeks of launching if the product is well-targeted. Building a real income usually takes 3 to 6 months of adding listings and learning from what sells.
Before you launch, spend an hour looking at what is already selling in your category. Search your main keyword on Etsy and look at the listings with the most reviews. Note the price points, the photo styles and the way they describe the product.
You are not copying them. You are learning what buyers in that category respond to, and that knowledge will make your own listings much stronger from the start.
User-generated content, or UGC, is one of the best beginner-friendly options in 2026. Brands pay people to film short product videos that the brand then uses in its own ads and social posts.
The key thing that makes UGC different from influencer work is that you do not need an audience. Brands are not paying for your followers. They are paying for your ability to make a genuine-looking video that their customers can relate to. A creator with 50 followers can earn just as much as one with 50,000.
Beginner UGC creators typically earn $75 to $300 per short clip. Established creators working with bigger brands earn $500 or more per video.
You need a smartphone with a good camera and decent lighting. Platforms like Billo and Trend connect brands with creators. The first step is building a small set of sample videos in a niche you know. Then pitch brands directly or apply through a UGC platform like Billo or Trend.
Once you have a few paid pieces of work, ask brands for a short testimonial you can share. A portfolio of 5 to 10 strong sample videos with a couple of real client reviews is usually enough to start landing regular work. From there, the rates go up, the brief gets clearer, and the work becomes faster to produce.
Honest Timelines for Each Method
The most useful thing any guide on what are the best ways to make money online for beginners can offer is honest timelines. Here is a clear breakdown.
Fast income (days to 4 weeks): Freelancing, VA work, tutoring and surveys can all pay within the first few weeks. These trade time for money directly, so results arrive fast.
Mid-term income (1 to 3 months): Etsy, print-on-demand and UGC content creation typically produce first meaningful income within 60 to 90 days. More setup is needed, but the model becomes more self-running over time.
Long-term income (6 to 18 months): Affiliate marketing, blogging and digital products all take time before income compounds. The early months are largely an investment of effort with modest returns. Months 6 to 18 are where results start to show up.
The most reliable plan is to start with one fast-income method while building a long-term income stream in parallel. This removes the financial pressure that causes most people to give up.
A practical example is to freelance write for clients three days a week and spend one session per week publishing a new blog post. The client work pays you today. The blog builds something that pays you in two years.
Neither one alone is the full picture. Together, they create a business with both immediate income and long-term assets. That combination is more stable than betting everything on one model that takes months to produce results.
The One Thing That Makes the Biggest Difference
There is one thing that almost every person who builds real online income has in common. They choose one method and stick with it long enough to see what it can do. Most do not jump to a new method when results are slow in month two. They stay with it through month six, which is usually when things start to shift.
Knowing what are the best ways to make money online for beginners matters less than picking one and committing to it. The best method is the one you will show up for every week for the next 6 to 12 months. That is the honest answer.
Most people who build real online income do not have a special advantage. They just pick something that suits them, learn as they go and stay in the game long enough to see the results. The fact that you are still reading this rather than closing the tab is a good sign. It suggests you are already more serious than most people who search this topic.
Affiliate Disclosure: This page may contain affiliate links. If you click through and make a purchase, I may earn a commission at no extra cost to you. I only recommend tools and resources I genuinely believe offer real value.
What’s the Best Ways to Make Money Online at Home in 2026?
So many people ask what’s the best ways to make money online at home. It is a fair question because the options have never been this wide open. The trouble is that most articles on the topic are packed with wild income claims or full of methods that need years of skill and a big budget to even attempt.
This guide takes a different approach. Every method here is real and open to a beginner working from home with limited time and little or no budget. There are no tricks buried at the end, and no upsells waiting for you halfway through.
No crypto. No MLM. No promise of passive income by next Tuesday.
What you will find instead is a clear, honest look at 9 ways to earn money online in 2026. For each one, you will get a sense of what it involves, how long results take and who it suits best.
Why Most “Make Money Online” Advice Falls Short
Before getting into the list, it helps to know why so much advice in this space lets people down. Most articles list 50 methods without telling you anything useful about how any of them work. They treat blogging and day trading as if both are equally simple to start. They skip the fact that most methods take months before real income shows up.
The truth is that most legit online income streams need steady effort over time. That is not a reason to avoid them. It is a reason to pick carefully based on your life, your time and what you find interesting. Picking the wrong method for your situation is one of the quickest ways to give up before the work starts paying off.
With that said, here are 9 methods with real earning scope that are open to beginners in 2026.
1. Affiliate Marketing
Affiliate marketing is one of the most talked-about ways to earn online, and for good reason. The model is simple. You promote other people’s products. When someone buys through your link, you earn a cut.
No creating, no shipping and no support to deal with. You are essentially a referral partner, and the product owner handles everything else.
The real draw is recurring income. SaaS tools often pay monthly commissions for as long as your referred user stays subscribed.
One person referred to a $97 per month tool at 40% commission, which earns you $38.80 every month. That adds up fast. Refer 10 people, and you are earning nearly $400 per month without doing anything extra.
According to Shopify’s guide to making money online, content-based affiliate sites that publish helpful, well-targeted articles are among the most reliable long-term income models online. The phrase to note is “well-targeted.” Affiliate marketing built on real content takes time to grow, usually 6 to 12 months before real income arrives.
The best place to start is picking a niche you care about and building a blog around it. Tools like Systeme.io pay 60% recurring commission for life. Promoting tools your readers would actually use means you help people and earn at the same time.
Blogging and affiliate marketing often go hand in hand. However, blogging on its own is a real income model through ads, paid posts and digital product sales.
A blog earns display ad revenue through networks like Mediavine or Raptive once it hits enough traffic. Mediavine needs at least 50,000 sessions per month. That sounds like a lot at the start, but focused blogs in low-competition niches reach that level within 12 to 18 months of steady publishing.
The quicker win for a new blogger is affiliate income while traffic builds. Write honest, helpful posts around topics your readers search for. Add links where they fit. Even a small blog with 5,000 monthly visitors can earn $300 to $800 per month if the content is well-aimed and the products match the audience.
Blogging rewards patience more than most other methods. Posts you write today may rank on Google in 6 months and keep bringing traffic for years. Each article is a long-term asset, not a social post that dies in 48 hours.
That longevity is one of blogging’s biggest advantages over social media. A well-ranked post from two years ago can still be your top traffic source today. The effort compounds in a way that most other online income models simply do not.
3. Freelancing
Freelancing is one of the quickest routes to real income online because you trade an existing skill for money straight away. You do not wait for traffic to grow. If you can write, design, edit video, run ads or manage social media, clients are looking for someone like you right now.
Sites like Upwork and Fiverr match freelancers with clients worldwide. A solid profile with work samples is usually enough to get your first enquiry within a few weeks. Rates start low while you build reviews, but rise quickly as your track record develops.
NerdWallet’s guide to making money online calls freelancing one of the most credible options for anyone with a useful digital skill. It also notes that AI has not killed freelance work. It has created a new scope for freelancers who use AI to work faster and deliver better output.
Using an AI writing tool like Rytr to speed up your drafts lets you take on more clients at higher rates without burning out. That mix of human skill and fast output is something clients value.
Beginner freelance writers typically earn $25 to $50 per article at the start. With a clear niche and a strong portfolio that grows to $100 to $300 per piece.
The other advantage of freelancing is what it teaches you. Working closely with clients builds skills fast. Many successful bloggers and course creators started as freelancers. The client’s work funded their business while also sharpening the skills that later powered their own content.
4. Selling Digital Products
Digital products are one of the few income models that get close to being passive once the product exists. You build it once and sell it over and over with no stock, no postage and no cost per unit.
The range of things that sell well is broad. Ebooks, templates, Canva graphics, stock photos, printable sheets, and swipe files all do well when aimed at the right buyer. The key is being specific.
A general guide on starting a business competes with thousands of free resources. A product like “10 ready-to-use email templates for affiliate marketers” solves a real problem for a real type of buyer and has far less competition.
Platforms like Gumroad, Etsy and Payhip make it easy to list and sell with no technical skill. Getting your first sale depends on how clearly you have aimed the product and how visible it is to the right people.
Pairing digital product sales with a blog or social content that brings in the right readers is one of the most effective setups going. Over time, the content brings traffic, and the traffic brings sales.
5. Creating and Selling Online Courses
Online courses are a step above digital products in terms of depth of value and, usually, price. A well-built course on a focused topic can sell for $47 to $497 or more, depending on the subject and the credibility of the teacher.
You do not need to be a world-class expert. You need to be far enough ahead of your students to show them a clear path from where they are to where they want to be. If you have done something others want to learn, you have the raw material for a course.
Platforms like Udemy and Teachable handle hosting, payments and delivery. Udemy has a big built-in audience, so it can bring organic sales, though the rivalry is intense. Teachable gives you more control, but needs you to drive your own traffic.
The most successful course creators in 2026 are making shorter, focused courses rather than huge programmes. People want speed and clarity. A tight 2 to 3-hour course that solves one problem well beats a sprawling programme that covers everything loosely.
Virtual assistant work suits people who are well-organised and good at staying on top of tasks. You do not need a specialist technical skill to get started. Businesses of all sizes need help with email, booking, data entry, social media and customer support.
The barrier to entry is low. If you know your way around Google Workspace, Zoom and basic tools like Trello or Asana, you have enough to begin. Platforms like Upwork, Belay and Virtual Assistant Jobs are good places to find your first clients.
General VA rates start at around $15 to $25 per hour. Specialist tasks like social media management or email marketing support can reach $40 to $75 per hour. Income grows as you build a reliable base of clients who trust your work.
VA work is also a natural path into higher-paying freelance roles. Many people start as general VAs and move into copywriting, project management or digital marketing as separate services at better rates.
The learning curve is gentle because you pick up skills from the clients you work with. Each client exposes you to a different part of running an online business. Over time, that broad exposure makes you a stronger, more versatile freelancer who can charge more and work with fewer clients.
7. Selling on Etsy or Amazon
Selling physical products through big marketplaces suits people who like making things or want to run a product business without building a store from scratch.
Etsy is ideal for handmade goods, vintage items and printable digital products. The platform already has buyers looking for exactly these things. Good photos, clear titles and fair prices are the main things you need to start getting sales.
Amazon FBA takes a different approach. You source products, send them to Amazon’s warehouse, and Amazon handles storage, shipping and support. The margins are tighter because of fees, but the access to Amazon’s huge buyer base makes up for it.
Print-on-demand is a low-risk take on product selling with no upfront stock needed. You upload designs to platforms like Printful or Printify. They print and ship only when orders come in. Margins are slimmer than in bulk production, but the risk is close to zero.
8. Transcription and Captioning
Transcription is an underrated option. It needs no special skill beyond fast, accurate typing and careful listening. Transcriptionists turn audio recordings into written text for businesses, law firms, medical offices and media companies.
Platforms like Rev, TranscribeMe and GoTranscript take on beginners. Rev pays between $0.45 and $1.50 per audio minute, depending on the content.
A quick and accurate transcriptionist can earn $15 to $25 per hour. That is a solid starting rate for work that needs no qualifications and can be done at any hour that suits you.
Captioning is a related and slightly better-paid niche. Adding accurate captions to video is in high demand as more platforms and brands make it a standard part of their output. Captioners working on specialist content like legal or medical recordings can charge more.
The main limit of transcription is that it does not scale well. Income is tied directly to the hours you put in. It is a solid way to start earning quickly, but most people use it as a bridge while building something more scalable on the side.
9. Content Creation on YouTube or a Podcast
YouTube and podcasting are long-term plays. They deserve a place on this list because the income they can produce over time is real and significant. Both reward people who show up often and know their subject, not those with the fanciest gear.
A YouTube channel earns ad revenue through the Partner Programme once it hits 1,000 subscribers and 4,000 watch hours. Ad revenue alone pays $1 to $5 per 1,000 views at that stage, which is modest on its own. The higher income comes from affiliate links in video descriptions, brand deals and selling products to an audience that trusts you.
Podcasting follows a similar path. Sponsorships become realistic once a show reaches around 5,000 listeners per episode. Before that, affiliate marketing through show notes is the easiest income stream to start.
Both channels take 12 to 18 months of steady output before the numbers get meaningful. The creators who build real income here are the ones who treat their channel as a long-term asset from day one, not a quick experiment.
Honest Timelines: What to Actually Expect
One of the most harmful things about most “make money online” content is the refusal to be honest about timelines. Here is a plain breakdown.
Quick income (1 to 4 weeks): Freelancing, VA work and transcription can all produce first income within a month. In some cases, within days of landing a first client. These methods trade your time for money directly, so results arrive fast.
Medium-term income (3 to 6 months): Digital product sales and online courses can produce good income within a few months. This assumes you already have an audience or are willing to promote your products actively.
Longer-term income (6 to 18 months): Blogging, affiliate marketing, YouTube and podcasting all take longer before income compounds into something meaningful. This timeline puts many people off. That is exactly why those who stick with it face far less competition the further along they get.
The best setup for a beginner working a full-time job is to start with one quick-income method for momentum, then build a longer-term content-based stream at the same time. Freelancing while building a blog earns money straight away and creates a growing asset on the side.
This two-track approach is common among people who build successful online businesses without quitting their day job first. It removes the financial pressure that causes most people to give up. When your bills are covered by client work, you can build your content business at a pace that is sustainable rather than desperate.
No matter which method you pick, a few tools make the whole process faster and simpler.
An all-in-one platform like Systeme.io handles email, landing pages, funnels and affiliate tracking in one place. The free plan is enough to run a real business.
Paid plans start at $27 per month. For anyone building an affiliate or digital product business, it removes the need to juggle five different tools at once. That matters when your time is limited, and you want to spend it on the work that grows income rather than on managing tech.
An AI writing tool helps with content across almost every method on this list. Whether you are writing blog posts, client articles, course scripts or email sequences, tools like Rytr cut the time needed without cutting quality. For beginners who feel unsure about their writing, AI support bridges the gap between where your writing is now and where it needs to be.
A keyword research tool helps you find topics people are already searching for rather than guessing. Finding low-competition, high-intent keywords is often the gap between content that sits unread and content that ranks and converts.
How to Choose the Right Method
According to Hostinger’s guide to making money online, the biggest mistake most beginners make is trying too many methods at once. Splitting effort across 4 or 5 income streams before any of them gets going is one of the most reliable ways to see poor results across all of them.
Pick one method. Give it at least 3 to 6 months of honest, steady effort. Only look at adding a second stream once the first is working or has clearly shown it is not the right fit.
The method with the best chance of sticking is the one you will keep coming back to, even when results are slow. Pick based on what you find genuinely interesting, not just what looks like the biggest earner. A method you enjoy is one you will work on through the hard early months. A method chosen purely for money is one you will drop the first time it feels like a grind.
Ask yourself: which of the 9 methods above do you find genuinely interesting? Start there.
One more thing worth saying here. You do not need to get it perfect before you start. Most people who build real income online made a mess of things at the beginning.
They chose the wrong niche, promoted the wrong products or spent months on content before finding their rhythm. None of that was wasted time. It was how they learned. Starting imperfectly beats planning forever.
Take the First Step Today
A lot of people ask what’s the best ways to make money online at home and then spend months reading more articles without ever actually starting. Research feels productive, but it is often a way of putting off the real work. The learning happens when you begin, make mistakes and adjust from there.
Pick one method and take one real step toward it today.
No hype and no income claims that exist to impress rather than to actually help.
Every method on this list can produce real income. None of them work overnight. All of them reward the people who keep showing up. That is the only honest answer to what’s the best ways to make money online at home in 2026.
Affiliate Disclosure: This page may contain affiliate links. If you click through and make a purchase, I may earn a commission at no extra cost to you. I only recommend tools and resources I genuinely believe offer real value.
How to Create an Online Course That Sells: 9 Proven Steps
If you have been wondering how to create an online course that sells, the timing has never been better. The global e-learning market is set to surpass $375 billion by 2026. More people than ever are paying for clear, expert-led online education.
They want someone to hand them a proven path from where they are now to where they want to be. If you have knowledge, a skill or real-world experience that helps people get a specific result, you have everything you need to start.
The catch is that most courses fail not because the content is poor but because the creator skipped the steps that actually make a course sell. This guide walks you through 9 proven steps covering the full journey from idea to income.
Step 1: Choose a Topic With a Proven Market
The most common mistake new course creators make is building a course around what they know rather than what people are actively paying to learn.
A profitable course topic sits at the meeting point of 3 things: your genuine knowledge or experience, a problem your audience urgently wants to solve and a market where people are already spending money on solutions.
That last point is often overlooked. The fact that people are already buying courses, books and tools in your niche is not a reason to avoid it. It is proof that demand exists.
Strong course topics tend to be specific rather than broad. A course called “How to Lose Weight” competes with thousands of others. A course called “How to Lose 20 Pounds After 50 Without Giving Up the Foods You Love” speaks to a defined group with a specific problem.
The more clearly your topic matches a specific outcome for a specific person, the easier it becomes to market and sell.
To test your topic, spend time in the online communities where your target audience already hangs out. Reddit, Facebook Groups and Quora are useful starting points. Look for the questions people keep asking. Note the frustrations they share.
Pay attention to the exact words they use to describe their problems. That language will become the foundation of your course title, your marketing copy and your sales page.
Step 2: Validate the Idea Before You Build It
Spending 3 months building a course and then finding that nobody wants to buy it is one of the most demoralising outcomes in online business. Validation is how you avoid that entirely.
The core idea is simple. Sell the course before you create the full content. This is called a pre-sell or a beta launch. You create a basic outline, write a short sales page that describes the result your course delivers, and promote it to your audience.
If people pay, you build. If nobody pays, you have lost a few hours rather than several months.
A pre-sell does not mean delivering something unfinished. It means being upfront with early buyers that the course is in progress. They get access at a lower price in return for their early support and feedback.
Many course creators price beta enrolments at 30% to 50% below their planned full price. This makes the offer appealing to early adopters and provides cash to cover production costs.
If you do not yet have an audience, validation can also come from research. Look for similar courses on Udemy, Teachable or Coursera. Check how many reviews each course has collected.
High review counts signal strong demand. Read the negative reviews carefully too. They often reveal exactly what existing courses are getting wrong, and that is your opening to do better.
Step 3: Define the Result Your Course Delivers
People do not buy online courses. They buy the result the course promises. Nobody wakes up wanting to watch more video lessons. They wake up wanting to land their first paying client, speak confident Spanish or finally understand how to invest their savings.
Your course needs a clearly defined before-and-after outcome. This result should be the central idea around which every module and lesson is built.
Write it out as a single sentence. For example: “By the end of this course, you will have published your first blog post, set up your affiliate links and created a 3-month content plan.” That kind of clear, concrete promise is far more compelling than “you will learn everything about affiliate marketing.”
According to Shopify’s complete guide to creating an online course, using action verbs when writing your learning outcomes is one of the most effective ways to make them specific. Words like build, launch, create and earn communicate real outcomes rather than vague knowledge gains.
Once your result is defined, every content decision becomes simpler. Does this lesson contribute to the stated outcome? If not, cut it.
Does this exercise move the student measurably forward? If not, replace it with one that does.
Step 4: Structure Your Course for Completion
A course that buries students in information is not a valuable course. It is expensive confusion. The structure of your course matters as much as the content itself.
Start with the end result and work backwards. Ask yourself: what is the very last thing my student needs to know or do to reach the outcome this course promises? That becomes your final module.
Then ask: what needs to happen just before that? Work backwards step by step until you reach the starting point your student brings on day one. This approach produces a curriculum that feels logical and builds steady forward momentum.
A practical structure for most online courses looks like this. Aim for 4 to 8 modules, each covering a distinct phase of the journey. Each module contains 3 to 6 short lessons, ideally 5 to 15 minutes each. Each lesson ends with a clear action step.
Short, focused lessons beat long, lecture-heavy ones because they give students something to act on straight away. Action builds momentum. Momentum drives completion. Completion produces the reviews and referrals that grow your course business.
Include a quick win in your very first module. Give students something they can act on and see results from right away. That early success creates trust and commitment.
It also reduces refund requests. A student who has already achieved something of value is far less likely to ask for their money back.
Step 5: Create Content That Keeps Students Engaged
Your course content does not need to be perfect. It needs to be clear, organised and delivered with real care for your students’ success. A course filmed on a basic webcam with honest, well-prepared teaching will outsell a slick, overproduced course with shallow content every single time.
That said, a few basics matter. Audio quality is the single most important production factor. Students will forgive an average video, but they will abandon a course the moment the audio becomes hard to follow.
Invest in a decent USB microphone before anything else. Budget options like the Blue Snowball cost less than $50 and produce clean, professional sound that is more than good enough for online courses.
For video, a modern smartphone on a tripod with natural light from a window in front of you will look professional on any screen. You do not need studio lighting or an expensive camera to get started.
For each lesson, use a simple three-part structure. Open with the context: explain what you are covering and why it matters. Deliver the core teaching with clear steps and real examples. Close with a summary and a single action for the student to take before moving on.
This pattern creates clarity and gives students a sense of progress after every lesson.
Using an AI writing tool to help script or outline your lessons can cut your preparation time sharply. Rytr is one of the most affordable options on the market and is well-suited to producing lesson outlines, slide copy and supporting written materials quickly and efficiently.
Step 6: Choose the Right Platform for Your Course
Where you host and sell your course shapes both your experience as a creator and your students’ experience as a learner. The right choice depends on your budget, your comfort with tech and how much control you want over pricing and customer data.
There are broadly two types of platforms to consider.
Course marketplaces like Udemy and Skillshare give you access to an existing audience. Students search the platform and find your course without you needing to drive all the traffic yourself.
The tradeoff is real: you have limited control over pricing, you share revenue with the platform, and you do not own the relationship with your students. Udemy is also known for heavy discounting that can undercut the perceived value of your course.
Self-hosted platforms give you full control. Tools like Teachable, Kajabi and Thinkific let you build a branded course school, set your own prices and keep your customer data. They typically charge a monthly fee rather than taking a cut of each sale.
For beginners who want to keep costs low, Systeme.io is worth a serious look. It includes a full online course builder, along with email marketing, sales funnels, and payment processing, all on a free plan. This means you can build and launch your first course without paying for separate tools.
The platform is simple to use and requires no technical knowledge.
As LearnWorlds’ comprehensive guide to selling online courses explains, the platform you choose affects not just how you deliver content but how you price, market and grow your course business over time. Think about where you want to be in 12 months rather than just what is easiest to set up today.
Step 7: Price Your Course With Confidence
Underpricing is one of the most damaging mistakes new course creators make. It is a surprising truth, but a low price often signals low value. Potential students who might have paid $197 without hesitation will scroll past a $27 course, wondering what is wrong with it.
Your price should reflect the value of the result your course delivers, not the number of hours of content it contains.
A 2-hour course that reliably helps someone land their first $1,000 freelance client is worth far more than a 20-hour course that covers everything loosely and delivers nothing concrete.
As a general guide, beginner-level courses tend to sell for $97 to $197. Courses with a clear, specific outcome for a defined audience often land between $197 and $497. More complete programmes with community access or coaching elements can comfortably reach $500 to $2,000 or more.
Tiered pricing is a smart way to serve different types of buyers. A self-study tier gives access to the core content at your standard price. A premium tier adds group Q&A sessions, a private community or work reviews at a higher price point. Many course creators find that a solid share of buyers choose the premium tier, which lifts average revenue per student.
Offer an early bird price when you first launch. This creates urgency, rewards your most loyal audience members and gives you an early cash boost to put into marketing. A 30% to 40% discount for the first 48 to 72 hours of launch is a common and effective approach.
Step 8: Build a Sales Page That Converts
Your sales page is where a curious visitor either becomes a paying student or clicks away for good. Getting this page right is not optional.
A sales page that converts follows a clear order. Start with a headline that speaks to the specific person your course is for and the specific result it delivers. Something like “How Freelance Beginners Are Landing Their First Paying Clients in 30 Days or Less” tells the right visitor they are in the right place.
Follow the headline with a short section describing the problem your ideal student is currently facing. Make them feel seen and understood. Use the same language you collected during your research phase. When a potential buyer reads your page and thinks “this is exactly how I feel,” your sign-up rate goes up sharply.
Then present your course as the solution. Walk through what is inside using bullet points that describe specific outcomes for each module rather than generic topic titles. “Module 3: How to write a pitch email that gets replies” is far more compelling than “Module 3: Email marketing.”
Include social proof early. Student testimonials, even from a small beta group, do more for your sales than several paragraphs of your own copy. A single genuine testimonial from someone who got a real result is powerful.
End with a clear call to action and a money-back guarantee. A 30-day guarantee removes the final barrier for hesitant buyers.
Most reputable course creators offer one. Most buyers never use it. The business risk is low, and the conversion benefit is high.
Step 9: Market Your Course Before and After Launch
A great course with no marketing is an invisible course. The creators who build a steady income from online education are not always the ones with the best content. They are the ones who build an audience before they launch and keep promoting consistently after.
Build your audience before you launch. An email list is the most valuable marketing tool you can have for a course business. Start building yours before your course is ready.
Offer a free resource related to your course topic in exchange for an email address. A checklist, a short guide or a mini email course all work well. Share useful content as your list grows so your subscribers know and trust you before you ever make an offer.
Use content marketing. Write blog posts, record short videos or publish on social media about topics related to your course. This builds your authority and gives potential students a taste of your teaching style.
Content that ranks in Google search creates a long-term stream of visitors that keeps delivering students months after it is published.
Run a launch sequence. In the week before your course opens, send a series of emails that build interest, address common objections and create urgency. A simple 5-email sequence works well: introduce the course, share the result it delivers, answer key questions, share a student win and close with a final reminder.
Host a free webinar or workshop. A live session covering part of your course content is one of the highest-converting tactics available. Someone who spends 60 minutes with you learning something real has experienced your teaching firsthand. They are far more likely to invest in your full course than someone who only reads a sales page.
According to Entrepreneur’s six-step guide to creating a course that sells, staying consistent on one or two chosen marketing channels matters more than spreading yourself thin across all of them. Pick one, build traction and expand once you have a system that works.
Keep selling after launch. Your course does not stop being relevant once launch week ends. Set up a simple funnel that enrols new students on a rolling basis.
Use your free resource to grow your list every day. Send new subscribers through your launch email sequence automatically so your course generates enrolments month after month.
Common Mistakes That Kill Course Sales
Even with a solid plan in place, a few consistent errors can cost new course creators significant time and income.
Waiting until the course is perfect before launching. A course that is 80% polished and launched earns feedback and income. A course that sits at 98% for 6 months while you keep tweaking earns nothing. Launch early, gather feedback and improve based on what real students actually need.
Making the course too long. More content does not mean more value. Students do not want vast. They want efficiency.
A course that delivers its promised result in 4 focused hours is worth more to a busy person than a 40-hour course they will never finish. Cut every lesson that does not directly serve the outcome you promised.
Ignoring the student experience after enrolment. Getting a student to buy is only half the job. Getting them to complete the course and achieve a result is what produces the reviews, referrals and repeat purchases that make a course business last.
Check in with students regularly. Answer questions promptly. A student who succeeds becomes your best marketing tool.
Relying on a single launch with no ongoing plan. A launch week is a sprint. A sustainable course business is a marathon.
Set up systems that generate leads and enrolments on a rolling basis. Build your email list every day. Treat your course as a living business rather than a single event.
Which Platform Should You Start With?
The best platform is the one you will actually use. Complexity is a bigger threat to your progress than any platform limitation.
For beginners building a first course alongside a full-time job, an all-in-one platform removes the technical friction that stops most people from ever launching. Systeme.io’s free plan includes everything you need to host your course, process payments, manage your email list and build a simple sales funnel.
You can go from nothing to a published, purchasable course in a single weekend without writing a line of code.
No income guarantees and no unnecessary complexity.
The Bottom Line
Knowing how to create an online course that sells is one of the most valuable skills you can build as an online entrepreneur. It combines the leverage of a digital product, which you create once and sell many times, with the credibility of being seen as an expert in your field.
Done well, a single course can generate income every month for years after the initial work is complete.
The steps are clear: validate before you build, focus on the result rather than the volume of content, structure for completion and market steadily before and after launch. None of this requires a big budget, a large existing audience or years of experience.
It requires a willingness to start before you feel fully ready and the patience to keep going long enough for results to compound.
If you are ready to take the first practical step toward building your own course business, head over to the Get Started Here page. Everything you need to begin is explained in plain language, with no hype and no shortcuts.
How to Build an Email List With Facebook: 8 Smart Ways
If you want to know how to build an email list with Facebook, you are sitting on one of the most powerful and underused tools in online marketing. Most people treat their Facebook presence as a broadcasting channel. They post content, collect likes and then wonder why none of it turns into sustainable income.
The key shift is learning to use Facebook not as a destination but as a starting point. The goal is to direct people toward your email list, which is an asset you actually own and control.
This guide covers 8 practical strategies for using Facebook to grow your subscriber base. Every tactic here is straightforward enough to start this week. Zero budget is fine to begin with.
Why Your Email List Matters More Than Your Facebook Following
Before getting into the tactics, it is worth being honest about a fundamental problem with building your business on Facebook followers alone. Facebook controls the algorithm. It decides who sees your posts and when.
Organic reach for business pages has declined sharply over the years and will likely keep declining. On average, a business page post reaches only a small fraction of its followers without paid promotion.
Your email list is different. When you send an email to a subscriber, it lands in their inbox directly. No algorithm filters it, and no platform decides whether your content is worth showing.
You own that relationship in a way you never truly own your Facebook audience.
That said, Facebook has over 3 billion monthly active users. That is an enormous pool of potential subscribers you would be foolish to ignore. The smart approach is to use Facebook to find people and then move them off the platform and onto your list as quickly as possible.
According to MailerLite’s guide to building an email list with Facebook, around 70% of Facebook users visit local business pages at least once a week. That gives you a genuine opportunity to convert followers into subscribers if you go about it the right way.
Strategy 1: Optimise Your Facebook Page for Sign-Ups
Most people set up their Facebook page once and never think about it again. Your page is actually valuable real estate for capturing email leads, and a few small tweaks can make it work much harder for you.
The Call to Action button. Your Facebook page has a prominent CTA button visible just below your cover photo. You can set this to “Sign Up” and link it directly to your email opt-in page.
This is one of the simplest and most overlooked list-building tweaks for any business page owner. Go to your page, click “Edit Action Button” and select “Sign Up.” Then paste in the URL of your landing page or opt-in form.
Your cover photo. The cover photo is the largest visual on your page and the first thing most visitors see. Use it with purpose.
Add a short line of text to the image telling visitors they can get a free resource by clicking the sign-up button below. Keep the message brief and benefit-focused. Something like “Get our free beginner’s guide: click below to subscribe” works well.
The About section. Many page owners leave the About section blank or fill it with generic business information. Include a direct link to your opt-in landing page here.
Add a short sentence explaining what someone gets when they join your list. Most visitors will look at this section when deciding whether to follow or engage further.
Page tabs. Facebook used to allow embedded sign-up forms as custom tabs. This feature has changed over time, but you can still use the tab section to link directly to an external opt-in page.
None of these changes takes more than 20 minutes to implement, and together they make your page a consistent source of new subscribers.
Strategy 2: Use Facebook Groups to Build a Warm Audience
Facebook Groups are one of the most underused list-building tools on the platform. A well-run group builds the kind of trust and community that makes people genuinely want to hear from you outside of Facebook.
The model works like this. You create a free group around a topic your ideal audience cares about. You provide consistent value inside that group through tips, answers to questions and helpful resources.
As people get to know you and trust your knowledge, they become far more receptive to signing up. They want to hear from you outside of Facebook.
There are 2 practical ways to capture emails through a Facebook Group.
Membership questions. When someone requests to join your group, Facebook lets you ask up to 3 screening questions. One of those questions can ask for their email address in exchange for a useful free resource.
You might say something like: “Would you like a free copy of our beginner’s checklist for starting an online business? If so, drop your email below, and we will send it straight to your inbox.” Many group admins report a high proportion of new members willingly sharing their email address when offered something useful in return.
Group posts with opt-in offers. Once members are in your group and trust you, regular posts linking to your lead magnet landing page perform well. These work best when they feel like a natural part of the conversation rather than an advertisement.
A post that says “I just updated our free guide to affiliate marketing for beginners. Drop a comment if you want the link” creates engagement and drives opt-ins at the same time.
The key with groups is patience. A small group of 200 highly engaged, niche-focused members is worth far more than a passive group of 5,000 who never interact.
Strategy 3: Create a Lead Magnet Worth Signing Up For
Every tactic in this guide works better when you have a strong lead magnet behind it. A lead magnet is the free resource you offer in exchange for an email address. It is the reason someone chooses to give you access to their inbox.
The most effective lead magnets are specific, immediately useful and directly relevant to the problem your audience is trying to solve. Broad, vague freebies underperform. A tightly focused checklist or short guide that solves a single, specific pain point will always outperform a sprawling 50-page ebook that tries to cover everything.
For an audience building an online business, strong lead magnet ideas include a keyword research checklist, a beginner’s guide to starting a blog or a free email swipe file for affiliate promotions. A short video tutorial on setting up a website also works well. Each one solves a real problem quickly and gives the reader an immediate win.
Your lead magnet also needs a proper home. You need a dedicated landing page that presents the offer clearly, explains who it is for and makes it easy to sign up. No navigation menus, no distractions and no competing offers. Just the lead magnet, a headline, a few bullet points explaining what is inside and a sign-up form.
Tools like Systeme.io make it easy to build these pages without any technical knowledge, and the free plan is more than enough to get started.
Strategy 4: Post Content With a Clear Opt-In Call to Action
This is the most basic Facebook list-building strategy, and it is also the one most businesses do wrong. They either post content with no call to action at all, or they post calls to action with no content value to support them.
The approach that works is to post genuinely useful content and then tie it naturally to an opt-in offer at the end.
Here is a simple example. You post a Facebook update sharing 5 quick tips for writing better blog posts.
At the end, you add: “If you found this useful, we have a free guide with 20 more strategies. Click here to grab your copy. Link in the first comment.”
This works because it follows a logical sequence. You deliver value first. You then offer more of the same value in exchange for an email address. The reader is already in the mindset of finding your content helpful, and the transition to signing up feels natural rather than pushy.
A few principles that consistently improve the performance of these posts:
Posts that ask a question at the start get more engagement. More engagement means more people see the post through Facebook’s algorithm. More visibility leads to more sign-ups.
Video posts reach a wider audience than text or image posts. A short 2 or 3-minute video sharing a useful tip with a sign-up link in the description can outperform text posts significantly.
Pinning your best opt-in post to the top of your page means every new visitor sees it first. This is a simple tactic that many page owners overlook entirely.
According to Social Media Examiner’s guide to growing your email list with Facebook, boosting these types of posts with a small budget can dramatically extend their reach. It puts your content in front of people who do not yet follow your page but fit your ideal audience profile.
Strategy 5: Run Facebook Lead Ads
Facebook Lead Ads are one of the most efficient paid tools for email list building available to any online business owner. They are worth understanding, even if you start with a very small budget.
A standard Facebook ad drives people to an external landing page where they fill in a form. Lead Ads work differently. When someone clicks on a Lead Ad, a form opens within Facebook itself without leaving the platform.
Facebook pre-fills the user’s name and email address from their profile information. All they have to do is review the details and tap “Submit.”
This dramatically reduces the friction between seeing your ad and signing up. People do not have to type anything, navigate to another website or wait for a page to load. The result is a higher conversion rate compared to standard traffic ads sending people to external opt-in pages.
To set up a Facebook Lead Ad, go to Ads Manager and choose “Lead generation” as your campaign objective. At the ad set level, you choose your audience, budget and placement. At the ad level, you create your visual, write your copy and build your Instant Form. The form should explain what the subscriber receives in return for signing up and include a brief privacy disclaimer.
A budget of $5 to $10 per day is enough to start testing Lead Ads. Your cost per lead will vary depending on your niche, your offer and how well your ad creative resonates with your audience. Many online business owners in the make money online space report costs per lead of $1 to $5. That is achievable when targeting a well-defined audience with a strong free offer.
Once someone fills in a Lead Ad form, you need their email to reach your email platform automatically. Most email marketing tools, including GetResponse, Systeme.io and ConvertKit, integrate with Facebook Lead Ads either natively or through a tool like Zapier.
Strategy 6: Use Facebook Live to Drive Subscribers
Facebook Live consistently receives more organic reach than any other type of content on the platform. Facebook actively pushes Live videos to more followers and notifies people when you go live, giving your content a reach boost that pre-recorded content rarely achieves.
For list building, the strategy is simple. Host a short live session on a topic your audience cares about. Deliver real, useful content during the session. At the start, the middle and the end of the live, mention your free resource and direct viewers to your sign-up link.
This works particularly well when you repeat the same live session format regularly. An audience that knows you go live every Tuesday at 7 pm builds a habit of tuning in. Over time, this creates a warm, engaged audience that is far more likely to subscribe when you make the offer.
The live session does not need to be long or polished. A 15 to 20-minute Q&A or tips session is plenty. The most important element is that you give viewers something genuinely useful during the session. People who leave a live feeling like they learned something concrete are the ones who go on to join your list.
After the live session finishes, the recording stays on your page as a regular video. Pin it to the top of your page or share it in your group to extend its reach further. Include the opt-in link prominently in the video description and the first comment.
Contests are one of the fastest ways to grow an email list through Facebook. Done correctly, they attract a large number of sign-ups in a short time and generate significant organic reach through sharing and tagging.
The basic structure is straightforward. Offer a prize that is highly relevant to your specific audience. Require an email address as part of the entry process. Then promote the contest through your page, your group and optionally through a small paid boost.
The most important rule when running a contest for list-building purposes is to choose a prize that your ideal subscriber actually wants. Broad prizes like an iPad attract entrants with no interest in your niche who unsubscribe the moment the contest ends.
A prize tied directly to your content works far better. Think of a 6-month tool subscription, a niche course or a coaching session. Those entries come from people who are genuinely interested in what you do.
Tools like Systeme.io and Gleam.io make it easy to set up entry forms that collect email addresses and connect with your email platform. Keep the entry process simple.
Asking for a name and email is fine. Adding too many steps increases drop-off and cuts your total entry numbers.
Promote the contest in multiple places. Post about it on your page, share it in your group and consider a small paid boost to reach new people beyond your existing followers. A contest running for 5 to 7 days with a $20 to $50 boost can add several hundred new subscribers. Results vary by niche and the appeal of the prize.
Be transparent with entrants about what they are signing up for. Let them know they will receive your regular emails after the contest. This reduces unsubscribes and keeps your list quality high.
Strategy 8: Use Retargeting to Convert Warm Traffic
Retargeting is a more advanced strategy, but worth understanding. It is one of the most cost-effective ways to convert interested people into email subscribers.
Here is how it works. Someone visits your website or landing page but does not sign up. Facebook allows you to show targeted ads specifically to those people after they leave.
Because they have already shown an interest by visiting your site, they are far more likely to respond to a follow-up ad. A cold audience that has never heard of you is a much harder sell.
To set this up, you need a Facebook Pixel installed on your website. The Pixel is a small piece of code that tracks who visits your pages. Once the Pixel has collected enough visitor data, usually a minimum of 100 visitors to a specific page, you can create a custom audience in Ads Manager. From there, run ads targeted at those exact visitors.
A retargeting ad for list building might say something like: “You visited our beginner’s guide to affiliate marketing. Did you grab your free checklist yet? Click here to download it.” This message feels personal because it directly references what the person has already looked at.
Klaviyo’s guide to using Facebook for email marketing explains that when you combine Facebook advertising with your existing email data, you can also build lookalike audiences. A lookalike audience is a group of Facebook users who share characteristics with your existing subscribers. Targeting these people with your opt-in offer is often more efficient than targeting cold audiences from scratch.
Retargeting and lookalike audiences are best suited to the stage when you have some existing traffic and a small budget to work with. Even $3 to $5 a day spent on retargeting can produce consistent sign-ups from people who were already interested but needed a second nudge.
Putting the Pieces Together
You do not need to use all 8 of these strategies at once. Trying to implement everything simultaneously is a reliable recipe for doing none of it well. Instead, start with the 2 or 3 tactics that fit your current situation best.
If you have zero budget, start by optimising your Facebook page and creating a group. Build your lead magnet and post consistently useful content with a clear call to action. These 3 things alone can produce a steady stream of new subscribers if you stick with them over several months.
If you have a small budget of even $5 to $10 a week, add a Lead Ad campaign for your best lead magnet. Target a specific, defined audience based on interests relevant to your niche. Track your cost per lead and refine the audience and creative based on results.
If you are ready to invest more seriously, layer in retargeting and lookalike audience campaigns. These consistently produce a lower cost per lead than cold traffic campaigns because you are reaching people with a proven connection to your content.
The most important principle across all of these strategies is consistency. Facebook rewards accounts that post and engage regularly. An account that posts 4 or 5 times per week outperforms one that posts daily for 2 weeks and then disappears for a month.
Set a posting rhythm you can actually maintain alongside your other commitments. Even 3 posts per week with clear calls to action, combined with a well-optimised page and a strong lead magnet, will produce results over time. The compounding effect of a growing email list means that every subscriber you add today has the potential to become a customer for years to come.
Writing and scheduling your Facebook content becomes significantly faster when you use an AI writing tool to handle first drafts and post captions. Rytr is one of the most affordable options available and is well-suited to beginners who want to produce consistent content without spending hours on it.
Growing an email list through Facebook without tracking your results means you have no way of knowing which tactics are worth your time and which are not. Set up basic tracking from the start, and you will be able to make smarter decisions as your strategy develops.
Google Analytics. Add UTM parameters to every link you share on Facebook. A UTM tag is a short piece of text added to the end of a URL that tells Google Analytics exactly where a visitor came from. For example, a link to your lead magnet page shared in a Facebook post might end with ?utm_source=facebook&utm_medium=post&utm_campaign=leadmagnet. This lets you see precisely how many sign-ups are coming from each Facebook activity.
Facebook Insights. Your Facebook page and group both have built-in analytics. Page Insights shows you which posts get the most reach, engagement and link clicks. Use this data to understand what your audience responds to and create more content in that style.
Your email platform. Check your subscriber growth report regularly. Look for spikes in sign-ups and trace them back to specific Facebook activities. If a particular post or live session drove a noticeable increase in sign-ups, that tells you something worth repeating.
Review these numbers once a week. It does not need to take more than 10 minutes. The goal is to spot patterns, double down on what works and stop wasting time on what does not.
One Thing Most People Overlook
The single most common mistake people make when trying to build an email list through Facebook is treating it as a one-step process. They post a link to their opt-in page, nobody signs up, and they conclude that Facebook does not work for list building.
The reality is that most people need several exposures to an offer before they take action. Someone might see your post about a free checklist and scroll past it. Then they might hear you mention it in a Facebook Live.
Then they see a retargeting ad a week later. On the third or fourth exposure, they click through and sign up.
This is why consistency and a multi-touch approach matter so much. Each piece of Facebook activity you do is another touchpoint that moves a potential subscriber one step closer to saying yes.
Be patient with the early months. An email list built through consistent, honest content and a genuine free offer will contain subscribers who actually want to hear from you. That quality matters far more than the raw number of people on your list.
The Bottom Line
Knowing how to build an email list with Facebook gives you access to one of the world’s largest audiences. The platform has tools that work at every budget level, from free organic strategies through to highly targeted paid campaigns. The platform rewards consistency, genuine value and a clear understanding of what your audience actually needs.
Start by getting your page fully optimised. Create a lead magnet worth signing up for and post useful content regularly with a clear call to action. Consider adding a Facebook Group if you want to build a deeper level of community and trust.
Then layer in paid tactics as your confidence and budget grow.
Your email list is the most valuable asset you will build online. Every strategy in this guide is designed to help you grow it faster using one of the most powerful platforms on the internet.
Everything is laid out in plain, honest language with no unnecessary complexity.
Affiliate Disclosure: This page may contain affiliate links. If you click through and make a purchase, I may earn a commission at no extra cost to you. I only recommend tools and resources I genuinely believe offer real value.