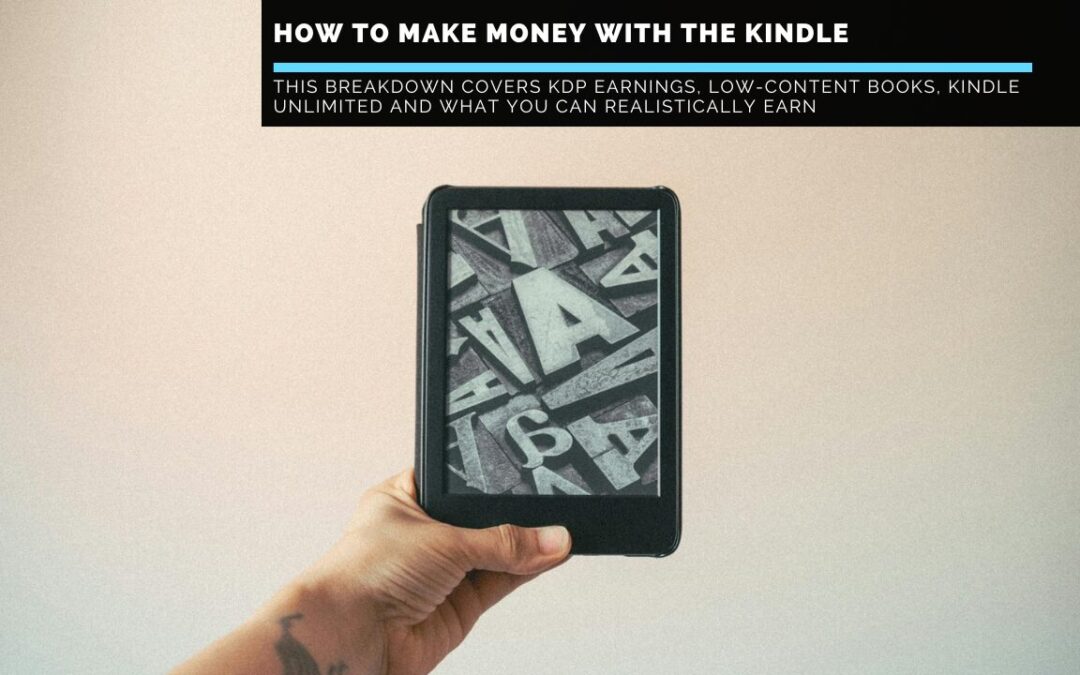
How to Make Money With the Kindle- A No-Nonsense 2026 Guide
If you have ever wondered how to make money with the Kindle, you are looking at one of the most open writing opportunities available anywhere online. Amazon Kindle Direct Writing, known as KDP, has transformed self-writing since it launched in 2007. Today, it controls roughly 70% of all eBook sales in the United States and pays out tens of millions of dollars to authors every single month.
The March 2026 KDP Select Global Fund alone totalled $69.3 million in author earnings. This guide covers every realistic method for making income through the Kindle platform, what you can expect to earn at each stage and how to set yourself up for long-term success rather than short-term disappointment.
What Is Kindle Direct Writing and How Does It Work?
Before diving into methods and earnings, it helps to understand the mechanics of the platform.
KDP is Amazon’s free self-publishing service. Any writer can upload a manuscript, set a price and have their book live in the Kindle Store within 24 hours. There are no gatekeepers, no literary agents and no upfront writing fees. You publish, Amazon sells, and both parties take a cut.
Amazon offers 2 earning rate structures for eBooks. Books priced between $2.99 and $9.99 earn a 70% earning rate on each sale.
Books priced below $2.99 or above $9.99 earn 35%.
For print-on-demand paperbacks, authors receive around 60% of the list price minus printing costs. A paperback listed at $12.99 might earn around $5.54 per sale after printing fees.
An eBook at $4.99 earns roughly $3.34 per sale after Amazon’s delivery fee.
There is also a third income stream through Kindle Unlimited. If you enrol your book in KDP Select, Unlimited readers can read it for free while you earn a per-page earning rate from Amazon’s monthly global fund.
The rate fluctuates monthly but has in the past settled around $0.004 to $0.005 per page read.
A 300-page book read cover to cover earns roughly $1.20 to $1.50 from a single read. Across thousands of readers, that adds up fast.
This is the question most people skip straight to. The range is wide enough to be both encouraging and sobering.
Self-written Kindle authors earn anywhere from around $150 per month to more than $20,000 per month. Industry research breaks the range down clearly:
Beginners with 1 or 2 books and minimal marketing earn $50 to $500 per month. Intermediate authors with 5 to 10 books and an active marketing effort usually earn $500 to $5,000 per month. Advanced authors with twenty or more well-targeted books, a recognisable author brand and a paid advertising approach can earn $5,000 to $50,000 or more per month.
The top 10% of self-authors earn around 75% of total market income. That is not meant to discourage anyone. Treating KDP as a real venture rather than a passive money machine produces very different results from uploading one book and hoping for the best.
Most new authors who do not yet have a following or a marketing approach make less than $50 per month in their first few months. Persistence and a growing list change that picture greatly over time.
Method 1: Writing and Writing eBooks
The most direct path to Kindle income is writing and writing eBooks in your own name.
The genres that sell most steadily on Kindle include romance, thriller, mystery, fantasy, self-help, personal finance and how-to guides. Romance alone accounts for a large share of Kindle sales. If you can write well in any of these areas, a ready audience exists.
Fiction writers who build a series often do very well. Readers who enjoy book one tend to work through the rest of the list quickly. This drives both sales and Kindle Unlimited page reads at volume. Series fiction creates what authors call read-through, where a single reader makes earnings across multiple titles.
Non-fiction writers have a different advantage. A well-researched guide can sell at a higher price, attract strong reviews and keep selling for years with minimal promotion once it finds its readers.
A new author writing their first eBook should not expect meaningful sales in the first month. Most successful KDP authors describe a gradual build across six to twelve months, during which they publish more titles, gather reviews and begin to understand what their readers respond to. The writers who earn real income on Kindle have almost all been doing it for at least a year with 5 or more titles in their list.
Method 2: Kindle Unlimited and KDP Select
One of the biggest decisions any Kindle author faces is whether to enrol in KDP Select.
KDP Select requires 90-day sole digital distribution with Amazon. During that period, your eBook cannot be sold elsewhere. In exchange, it becomes available to Kindle Unlimited readers. You earn from the KDP Select Global Fund based on pages read.
The trade-off is real. Sole rights means you cannot sell through Barnes and Noble, Kobo, Apple Books or any other retailer during the enrolment period. For authors who have known audiences on other platforms, this can mean real lost income. For new authors without existing reader bases elsewhere, KDP Select often makes more sense because the Unlimited audience on Amazon is enormous.
Many top earners make up to 70% of their monthly KDP income from page reads through Kindle Unlimited rather than direct sales. This makes the programme very attractive for fiction authors whose books tend to be read quickly from start to finish.
KDP Select also unlocks 2 sales tools. Kindle Countdown Deals let you discount your eBook for up to seven days. Free Book Promotions let you offer your book free for up to 5 days per 90-day period. Both tools can create a burst of reach that carries into paid sales after the promotion ends.
Method 3: Low-Content and No-Content Books
Not every book on Kindle involves writing tens of thousands of words. Low-content books are a distinct income stream that many people overlook when thinking about how to make money with the Kindle.
Low-content books include journals, notebooks, planners, logbooks, activity books and colouring books. They contain very little written content but give buyers a structured template or blank pages they use for a purpose. A 120-page habit tracker or a blank recipe journal can be created in a few hours using free design tools and listed on KDP as a paperback.
Once a low-content book is written, it costs nothing to maintain. Amazon prints each copy on demand.
You never handle stock, pack boxes or deal with returns. Margins on print paperbacks are thinner than on eBooks. The lower time investment per title makes volume more achievable.
Successful low-content authors tend to operate with large lists. Having 100 to 200 low-content titles is not unusual for serious sellers. Individual titles might earn $10 to $50 per month. Across a large list that adds up to meaningful passive income.
The market for low-content books has become tougher over the years. Generic templates with no design thought perform poorly. The sellers who do well invest in appealing covers and specific niche targeting. A “2026 Daily Planner for Nurses” will outsell a generic “Daily Planner” almost every time.
Many of the most successful KDP authors publish under pen names rather than their real names. This is permitted by Amazon and is standard practice in several genres.
Authors choose this route for several reasons. Romance authors often use pen names for privacy. Non-fiction authors sometimes use a pen name that fits a specific niche better than their real name. Some authors use different pen names for completely different genres to avoid confusing their audience.
Pen names also allow you to test different genres without risking your known author brand if something does not perform well. If you write non-fiction and want to try crime fiction, a pen name keeps the 2 separate.
From a practical standpoint, a pen name is simply a name you enter during the KDP writing process. All earnings still go to your real account and your real bank details. There is no legal complexity involved in using one.
Method 5: Ghostwriting and Writing Other People’s Content
Not every KDP author writes their own books. Some build writing ventures by hiring ghostwriters to produce content, which they then publish under their own name or a pen name.
The model works by identifying a profitable niche on Kindle, finding a skilled ghostwriter who can produce content in that area and writing the finished book as a self-written title. The author of record earns the earnings while the ghostwriter earns a one-time flat fee.
A 20,000-word non-fiction guide might cost $300 to $1,000, depending on the writer’s experience and the topic. A full-length 80,000-word novel costs much more. The economics make sense when you project the earnings a well-positioned book can make over several years.
This approach costs more to start than writing your own books. It allows people with venture skills but less writing confidence to still build a KDP income. It scales more easily because you are not limited by your own writing speed.
Ghostwriting is a legal industry with a long history. The practice is legal and accepted on Amazon’s platform. The key requirement is that you ensure the content you publish is original and meets KDP’s quality standards.
Getting Your Book to Rank: The Practical Side
Writing a book and having it discovered by buyers are 2 very different things. Understanding how the Kindle Store’s search and recommendation systems work is essential.
Your book’s title, subtitle and details need the keywords your target readers search for. This requires research rather than guesswork. Tools like Author Rocket and Kindlepreneur’s keyword tools help identify specific search phrases that have solid volume but manageable competition.
The Kindlepreneur website is one of the most respected free resources for KDP tuning and covers the keyword approach in considerable depth.
Group selection matters more than most new authors realise. Amazon lets you choose up to 3 groups for your book. Choosing highly specific subgroups rather than broad ones gives your book a much better chance of ranking at or near the top of its group. A book ranked in the top 3 of a specific subgroup displays a “Best Seller” or “Hot New Release” badge, which is visible in search results and drives extra clicks and sales.
Your cover is your most important marketing asset. Readers make split-second decisions based on covers alone. A polished, designed cover that looks right for its genre is not optional if you want to sell steadily. Polished cover design usually costs $100 to $500, depending on the designer.
Reviews drive both trust and Amazon’s algorithm. A book with 50 reviews will almost always outsell an identical book with 5 reviews. Building an early reader group and using KDP’s free promotion days to get copies into readers’ hands are both legal ways to build your review base.
Once you have a book written and your listing is well-tuned, paid advertising through Amazon Ads is one of the fastest ways to accelerate your income.
Amazon’s pay-per-click platform lets you show your book to readers searching for specific keywords or browsing books by similar authors. You only pay when someone clicks. The goal is for the earnings from resulting sales to exceed the cost of the clicks.
This is not a set-and-forget system. Getting a good return from Amazon Ads requires testing different keywords, monitoring which ads convert and cutting the ones that spend without producing sales. Authors who learn this well often turn a modestly performing book into a steady income earner.
The learning curve is real. Most KDP authors report losing money on ads during their first few weeks before developing enough data to tune well. Starting with a daily budget of $5 to $10 while you learn is a sensible approach.
One angle that many Kindle authors overlook is the chance to combine KDP income with affiliate marketing.
If you write non-fiction in areas like personal finance, online venture or productivity, you can reference products within your content and direct readers to your website for more info. Your website can then convert that traffic into affiliate cuts.
A book about building a home-based venture might mention tools and software relevant to the reader. Readers who found value in the book will often visit the author’s website and explore their recommendations. If those recommendations carry affiliate links, every purchase makes a cut.
This creates a compounding effect. Your Kindle book builds trust and trust. Your website converts that trust into affiliate income. The 2 income streams reinforce each other and together make more than either would separately.
Building this kind of layered income is what the approach I use at this site is built around.
I will show you the tools that work, what realistic timelines look like and what to prioritise in the early months.
Common Mistakes That Kill KDP Income Before It Starts
A few patterns come up repeatedly among new KDP authors and are worth addressing directly.
Writing one book and waiting is the most common mistake. One title is not a venture. It is just an experiment. Authors who build meaningful Kindle income do so through a growing list where each new title brings readers who discover the others.
Skipping polished covers and editing damages sales far more than most new authors expect. Readers judge books by their covers first. A cheap or generic design signals low quality before anyone reads a single word. Books with obvious grammatical errors and clumsy formatting make poor reviews that suppress sales over time.
Ignoring keywords and groups at the point of writing means most new books never get found. The Kindle Store has millions of titles. A book not tuned for the right keywords will not appear in relevant searches, no matter how good the content is.
Giving up too early is perhaps the most costly mistake of all. Most KDP authors describe their first six months as slow and frustrating. The ones who persist through that period almost universally report that things began to change noticeably around month 6 to month 12, once they had several titles live and had started to understand their audience.
Tax and Income Thoughts
KDP income is taxable income in the United States. Amazon issues a 1099-K if your annual earnings exceed the relevant threshold. Before writing your first book, set up a proper tax ID through your KDP account. Failing to do so can result in Amazon withholding 30% of your earnings.
KDP earnings are treated as self-employment income. You owe self-employment tax on top of regular income tax if net earnings exceed $400 in a year. Setting aside 25% to 30% of each monthly payment for tax from the start prevents surprises at filing time.
The upside is that legitimate venture expenses are deductible. Cover design, editing, keyword research tools and advertising costs can all reduce your taxable income.
Is Kindle Writing Still Worth It in 2026?
The short answer is yes, but with clear eyes about what it takes.
Kindle writing remains one of the few income models where someone with genuine writing ability or niche knowledge can build a meaningful, recurring income with no upfront investment. You do not need an author, an agent or a marketing budget to start. You need a good book, a polished cover and the patience to grow.
Rivalry is real. Amazon publishes over 2.6 million new titles each year. Standing out requires treating KDP as a venture, not a hobby.
Authors who commit to learning the platform, building a list and investing in quality consistently outperform those who treat it as a side thought.
Revenue from eBook sales globally is predicted to reach over $15 billion by 2026. Readers are out there in huge numbers. The market is growing. Whether you reach them comes down to consistent effort over the long term.
The authors who earn consistently from KDP share one trait above all others: they think in terms of a list, not a single title. One book is an experiment. 5 books in the same genre are a business.
Building a list takes time. Most writers find that their second book benefits from the audience their first book built. Their third benefit more. By the time they have 5 or more related titles live, readers move naturally between them, and the Kindle Unlimited page reads become a reliable monthly income floor.
The writers who struggle long-term are those who treat each book as a standalone project with no connection to the others. Readers on Kindle form habits around authors they enjoy. Give them a reason to stay in your world, and they will.
Final Thoughts
Learning how to make money with the Kindle is not complicated in concept. It does require commitment in practice, though. The platform gives you direct access to one of the largest reading audiences in the world, clear earning rate structures and tools to market your work at scale. What it does not give you is guaranteed results from a single upload or a shortcut past the work of writing and promoting a book that people genuinely want to read.
The authors who build lasting income on Kindle treat it like a craft and a venture at the same time. They study what sells, invest in quality and keep writing even when early results are modest. If you are willing to take that approach, learning how to make money with the Kindle could be one of the more rewarding decisions you make this year. Start with one well-researched book in a niche you know, publish it properly and build from there.
Affiliate Disclosure: This page contains affiliate links. If you click through and make a purchase, I may earn a cut at no extra cost to you.
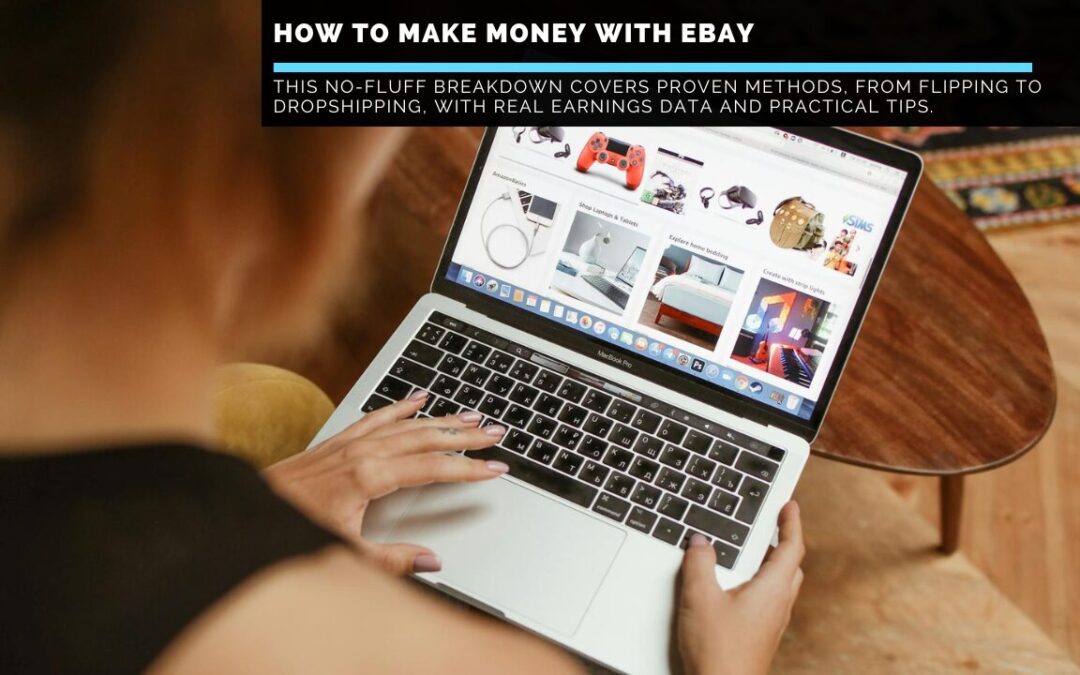
How to Make Money With eBay- The Complete 2026 Seller’s Guide
If you have been wondering how to make money with eBay, you are asking the right question at the right time. eBay has over 134 million active buyers, more than 2.3 billion live listings and around 18 million sellers. Despite being one of the oldest e-commerce platforms online, it remains one of the most active resale markets in the world.
Whether you want to clear out your spare room, start a side hustle or build a full operation around sourcing and selling, eBay offers a clear path to real income. This guide covers what that looks like in practice, what you can expect to earn and how to give yourself the best chance of success.
What Can You Actually Earn on eBay?
Before getting into the methods, it is worth grounding expectations in real data.
As of early 2026, the average hourly pay for an eBay seller in the US is around $21.56. Earnings range broadly from about $13 per hour for part-time or casual sellers to $48 or more per hour for seasoned full-time operators. On an annual basis, the average eBay seller earns around $35,000. Top performers with strong product lines and high volume can reach $70,000 or more.
Casual sellers who treat eBay as a weekend side hustle typically earn a few hundred dollars per month. Full-time sellers who source products actively and manage their listings well often hit $2,000 to $5,000 per month in profit. A small number of full-time sellers earn six figures.
The range is wide because eBay rewards effort, approach and product knowledge above nearly everything else. Two people can start on the same day with the same budget and end up with very different results depending on what they sell and how they present it.
The simplest starting point for anyone new to eBay is selling things they already own. Many people underestimate the value of items sitting in their homes. Old electronics, branded clothing, sports equipment, books, toys and vinyl records can all sell well on eBay, often for more than you would expect.
This approach costs nothing to start. You are not buying stock, taking on risk or waiting for anything to arrive. You list what you have, someone buys it, and you ship it. The money goes straight to your PayPal or bank account.
The key to making this work well is research before listing. Search eBay for the item and filter results by “Sold listings” to see what similar items have sold for recently, not just what people are asking. Pricing based on completed sales rather than current listings gives a far more accurate picture of what buyers will pay.
Presentation matters even for second-hand items. Clean the item, photograph it in good light from multiple angles and write a clear title with the brand name, model and condition. Buyers scroll quickly, and they make decisions based on photos and titles before they read details.
Method 2: Retail Arbitrage and Reselling
Retail arbitrage is one of the most popular methods for building income on eBay. The idea is simple: you buy products at a low price from one source and resell them at a higher price on eBay.
Common sourcing locations include thrift stores, charity shops, garage sales, estate sales and clearance sections of major retailers. The goal is to find items that are undervalued locally but have strong demand on eBay.
Electronics, vintage clothing, collectables, sports memorabilia, board games and home goods all tend to perform well. The second-hand clothing market is growing fast. Around 70% of shoppers plan to buy more pre-owned items in 2026. Vintage and branded pieces can fetch several times their thrift store price when listed with the right keywords and photos.
The habit that separates profitable resellers from those who break even is checking sold prices before buying. If something will not sell for enough to cover your purchase cost, fees and shipping with a margin left over, do not buy it. The eBay “Sold listings” filter is your most important research tool.
eBay charges a final value fee of around 10% to 15%, depending on the type, plus a payment handling fee of around 2.9%. Plan for roughly 13% in total fees when deciding whether a product is worth sourcing. If you earn $600 or more in sales within a year, eBay issues a 1099-K form. Keeping records from the start is sensible.
Method 3: Wholesale and Bulk Buying
Once you are comfortable with the eBay selling process, buying in bulk from wholesalers is a natural step up. Wholesale buying gives you a lower cost per unit than retail arbitrage. That means higher margins when you sell.
Wholesale suppliers sell minimum quantities, so you need to commit more capital upfront. The benefit is consistency. You know what you are getting, you can list in volume, and you have a reliable supply of stock.
Platforms like DHgate and Alibaba connect sellers with suppliers across a wide range of product types. Liquidation sites such as Bulq and B-Stock sell customer returns and excess stock from major retailers at steep discounts. Buying a pallet of customer returns and sorting through it for sellable items is a popular approach among full-time sellers.
The risk with wholesale is overstocking. If you buy 200 units and the demand drops, you are left holding stock. Starting with smaller quantities and testing demand before committing to large orders reduces this risk.
Dropshipping removes the need to hold any stock at all. You list products on eBay. When a buyer purchases, you order from a supplier who ships directly to the customer. You keep the difference between the supplier price and the eBay sale price.
The appeal is obvious: no upfront stock costs, no warehouse, no packing boxes. You are simply running a shop window without a back room.
The reality is more complex. eBay allows dropshipping, but it must come from a legitimate wholesale supplier, not from another retailer. Sourcing from another retail site and having them ship to your eBay buyer is against eBay’s policies and can lead to account suspension.
Margins on legitimate dropshipping can be thin, especially in strong types. The sellers who make it work focus on niche products with fewer rival sellers and build relationships with suppliers who maintain consistent quality and shipping times. A single late delivery or wrong item can make negative feedback that damages your seller rating.
For anyone considering dropshipping, learning the rules and finding genuine wholesale suppliers before listing anything is essential. The Shopify guide on how to make money on eBay covers the sourcing approaches that work best in more detail and is worth reading before you start.
Method 5: Selling Collectables and Niche Items
Some of the most profitable eBay sellers focus on a narrow type where they have deep knowledge. Collectables are a strong example.
Vintage video games, trading cards, vinyl records, rare books and sports memorabilia can all command significant prices from the right buyer. A PlayStation 1 RPG that cost $40 in a thrift store can sell for several hundred dollars if it is a rare title in good condition. A first-press vinyl picked up for a few dollars can fetch $50 to $200, depending on the artist and condition.
The key advantage of niche expertise is spotting value that casual shoppers miss. When you know which editions are rare, which condition grades matter and what the market pays, you can source with confidence.
Building this kind of knowledge takes time, but it pays back steadily. Sellers who know their niche well tend to have better photos, better details and more trust with buyers. That leads to higher prices and fewer returns.
Method 6: Private Label Products
Private label means creating or sourcing products under your own brand rather than reselling someone else’s branded goods. You work with a manufacturer to produce items with your branding and sell them on eBay as your own product.
The advantage is pricing power. When you sell a generic product, you compete directly with other sellers on price. When you sell your own branded product, you set the price, and rival sellers are indirect at best.
Private label suits sellers willing to invest more upfront time and money in exchange for better long-term margins. It works best in types where buyers are not loyal to known brands. Tools, kitchen gadgets, health products and pet accessories tend to be good starting points.
Getting started typically involves sourcing from a manufacturer through Alibaba, ordering samples, testing quality and creating listings with custom photography. The process takes longer to set up than reselling. The results can compound well over time, though.
Not everyone who makes money with eBay is a seller on the platform. The eBay Partner Network lets you earn cuts by sharing eBay links on your blog, YouTube channel or social media. When someone clicks your link and buys on eBay, you earn a cut.
Cut rates range from 1% to 4%, depending on the type and the final sale value. The cookie window is 90 days, so you earn a cut even if the buyer returns weeks later to complete their purchase.
For bloggers and content creators who write about products, gear or niche hobbies, the eBay Partner Network is a natural fit. A well-written guide about vintage cameras can link to relevant eBay listings and earn cuts every time a reader clicks and buys.
Earning power grows with your traffic. Sellers and affiliates who create useful evergreen content around specific product types find that the content keeps earning long after they publish it. That is the compounding nature of content-driven income.
Regardless of which method you use, the quality of your listings is the biggest factor in whether items sell quickly at a good price or sit unsold for weeks.
Write Titles That Match How Buyers Search
eBay’s search engine matches buyer searches to listing titles. Your title needs to include the exact words a buyer would type into the search bar. Brand name, model number, size, colour and condition should all be in the title if they apply. Vague titles like “nice jacket for sale” perform far worse than specific ones like “Levi’s 501 Original Fit Jeans 34×32 Dark Wash Good Condition.”
Sellers who use videos in their listings see around a 22% increase in sales on average. eBay supports videos up to five minutes long within listings. For products where condition or fit matters, adding a short video alongside photos can improve the sales rate.
Price Based on Data
The best pricing tool for any eBay seller is the “Sold listings” filter in eBay’s search. Searching for your item and filtering to completed, sold listings shows exactly what buyers have paid recently. Price within 10% of the recent market average to stay strong.
For items over $50, enabling “Best Offer” is a strong tactic. Set your asking price 5% to 10% above your minimum so you have room to negotiate without hurting your margin. Use “Send offer to watchers” for items that have not sold within 30 days.
Offer Fast Shipping and a Clear Returns Policy
Shipping speed and returns policy directly affect your search ranking and sales rate. Sellers who offer fast handling and free or clearly priced shipping rank higher in eBay’s search results. Top-rated sellers who maintain strong metrics and fast handling receive a 10% discount on final value fees and a reach boost.
Free shipping is not always possible, but building the shipping cost into the item price and showing free shipping in the title can increase click-through rates. Buyers respond well to seeing a clear total price.
Knowing eBay Fees
One of the most common mistakes new sellers make is not accounting for fees before pricing. Knowing your numbers from the start prevents surprises when you receive your payout.
eBay allows up to 250 free listings per month for most sellers. After that, insertion fees apply. Final value fees range from 10% to 15%, depending on the type.
Electronics and media sit at the lower end of that range. Clothing and accessories often sit higher. Payment handling adds around 2.9% per transaction.
When deciding whether a product is worth listing, add up your sourcing cost, shipping and around 13% in combined fees. What remains is your gross profit. Subtract packaging costs, and you have your net margin per item. If that number is not worthwhile after all deductions, do not sell it at that price.
Some sellers use Promoted Listings to give their items more reach. This puts your listing at the top of search results. The extra fee is only charged if the item sells through a promoted click.
Promoted Listings can accelerate sales for new or slow-moving stock. Treat them as an extra cost within your margin calculation.
Your seller feedback score and rating share are visible to every buyer who views your listings. A seller with thousands of positive reviews will outsell a newer seller with identical products almost every time.
Building that name takes time, but the process is straightforward. Ship promptly, pack securely, describe correctly and respond to messages within 24 hours. When something goes wrong, resolve it generously. A refund that keeps a buyer happy is almost always worth more than the cost of the item.
Asking buyers to leave feedback after a successful transaction is permitted and encouraged. Many buyers forget or do not bother unless prompted. A polite message after delivery, thanking the buyer and noting that feedback is appreciated, will increase the proportion who follow through.
Tips for Scaling Your eBay Operation
Once you are making consistent sales and have a reliable sourcing method, scaling requires systems rather than just more effort.
Cross-listing your eBay stock on platforms like Facebook Platform or Poshmark multiplies your exposure without requiring extra stock. Tools like Vendoo and Crosslist automate the process of publishing the same listing across multiple platforms, saving significant time.
Reinvesting early profits into more stock rather than spending them is the fastest way to grow. Sellers who treat early eBay income as capital for buying more stock tend to grow much faster.
Tracking results by product type and sourcing location helps you focus time and money where returns are strongest. A simple spreadsheet recording what you paid, what you sold it for and how long it took gives you data to make smarter sourcing decisions. According to Linnwork’s research on eBay reselling, tracking actual ROI per item rather than revenue alone is one of the clearest markers of a profitable seller.
Common Mistakes to Avoid
A few patterns come up repeatedly among new eBay sellers and are worth knowing about before you start.
Not researching sold prices before buying stock leads to overpaying for items that will not yield a meaningful margin. The sold listings filter is free and takes two minutes. Using it before every purchase is one of the simplest habits that separates profitable sellers from unprofitable ones.
Ignoring fees when setting prices is another common error. Pricing an item at $30 with $5 shipping and not factoring in the 13% in fees leaves many new sellers surprised when their payout arrives much lower than expected. Always do the maths before listing anything.
Poor photos and weak titles are the most visible mistakes. They directly cost sales. Buyers make quick decisions based on the first image and title they see.
A smartphone with good lighting and a neutral background is all you need. Blurry or dark photos send buyers straight to a rival.
Neglecting customer messages is a slower mistake but a damaging one to make. Buyers who do not get a prompt response often leave or leave negative feedback. Most buyers only message when they have a question that is stopping them from buying.
Is eBay Still Worth It in 2026?
The honest answer is yes, if you approach it with realistic expectations and a genuine approach.
eBay is not a passive income source at all. It requires sourcing, listing, shipping and customer service. The sellers who earn well treat it as a real operation with systems, data and consistent effort.
What eBay offers in return is access to one of the largest buyer pools in the world, decades of built-in trust and the flexibility to sell almost anything without building your own store from scratch.
For people who enjoy hunting for deals or have specialist niche knowledge, eBay is one of the best platforms available in 2026. The eBay Seller Centre offers detailed guidance on fees, listing tuning and account management for sellers at every level.
Final Thoughts
Learning how to make money with eBay is largely about choosing the right method for your situation, sourcing products with proven demand and presenting them well. The platform has real earning potential at every level, from casual decluttering to full-time reselling.
The common thread running through every successful eBay seller is that they do the research first. Sold prices get checked before buying. Fees get calculated before listing.
Good photos and clear titles come standard. Buyers get handled with care. None of this is complicated. Steadily doing all of it separates the sellers who build something lasting from those who give up after a few slow results.
There is real money to be made if you know how to make money with eBay and put the right systems in place from the start. It all starts with research, patience and one good listing at a time.
Affiliate Disclosure: This page contains affiliate links. If you click through and make a purchase, I may earn a cut at no extra cost to you.
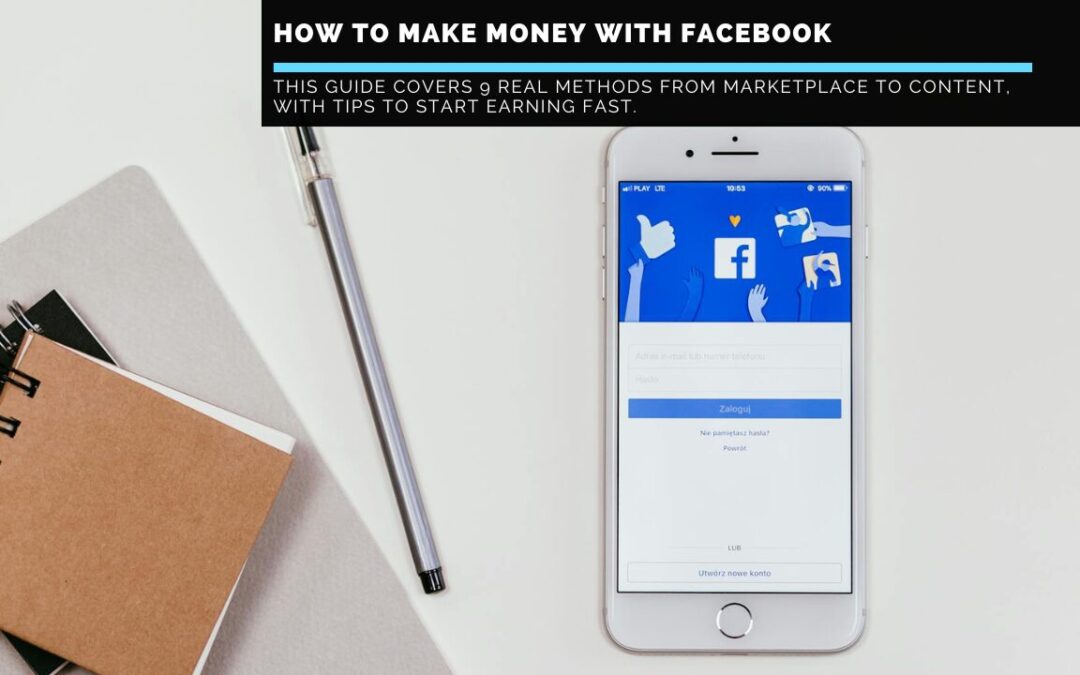
How to Make Money With Facebook: 9 Real Methods That Work in 2026
If you have ever scrolled through your Facebook feed and wondered whether other people are making money from it, the answer is yes. Many people are making money there in more ways than most people realise. Learning how to make money with Facebook no longer requires being a big brand or a full-time influencer.
With over 3 billion monthly active users and a growing set of creator tools, Facebook in 2026 offers genuine earning chances for ordinary people, small company owners and freelancers. This guide covers 9 practical methods, what each involves and how to get started without wasting time on approaches that do not work.
Is Facebook Still Worth Using to Make Money?
Before we get into the methods, it is fair to ask whether Facebook is still a relevant platform for earning in 2026. The short answer is yes, but it does require the right approach.
Facebook reaches more people than any other social network. As of early 2025, it has 3.065 billion monthly active users. The platform has expanded its commerce and creator tools and launched a unified content payment programme.
Hundreds of millions of shoppers use Facebook Marketplace every month.
Roughly 16% of all active Facebook users log in mainly to browse Marketplace. That tells you something about how commerce-driven the platform has become.
It is not the same Facebook as 2015. Organic reach for posts has dropped over the years, which means building an income purely on likes and shares is harder than it used to be. But the tools open to use for serious creators and sellers are better than ever. The readers are still there.
Facebook Marketplace is one of the easiest places to start earning on the platform. It has over 1 billion monthly active users and holds more than 51% of all social commerce activity in the US.
The core appeal is simple. There are no listing fees for local sales. You keep 100% of what you earn.
For shipped items, Facebook charges a 5% fee with a minimum of $0.40 per order. That is greatly cheaper than competing platforms like eBay or Amazon, where recommendation fees range from 8% to 15%.
What can you earn in practice? It depends on your approach. Casual sellers clearing out their homes often earn several hundred dollars in a weekend.
One seller on Medium made $1,640 in 50 days by listing household items, thrift store finds and locally sourced goods. Dedicated resellers who treat Marketplace as a company earn $2,000 to $5,000 per month.
Fast-moving categories include furniture, electronics, clothing, baby gear and tools. The second-hand furniture market alone is projected to reach $24.19 billion in 2026. A large portion of that activity flows through Marketplace.
To get started, you need a Facebook account. Go to the Marketplace tab, click Create new listing and follow the steps. Strong photos, clear descriptions and fast replies separate sellers who make steady sales from those who wonder why nothing shifts.
A few things worth knowing before you scale up. Facebook charges a 10% selling fee on shipped orders, calculated on the full amount, including shipping. For local sales, there is no fee.
If you earn more than $400 in profit across the year, the IRS requires you to report it as income. Keeping basic records from the start is a good habit.
Facebook launched its Content Earning programme in August 2025. Before that, earnings came from separate programmes: in-stream ads, Reels ads and performance bonuses. The new programme brings all of those together.
Through this programme, qualifying public videos, Reels, photos and text posts earn money based on their performance. Payouts depend on activity, views and plays. Facebook uses one dashboard so creators can see how much each piece of content earns.
To access the programme, go to your polished dashboard, click Earning and then Content Earning to fill out the interest form. As of 2026, the programme remains invite-only for individual creators, though Facebook has sent invitations to over one million creators already earning from the platform.
The earning range is wide. Reels creators earn between 5 and 11 cents per view. A creator with a strong following who posts steadily can make thousands of dollars per month.
The key is producing content that people watch all the way through rather than scroll past.
For creators who are not yet invited, the path forward is to build a consistent presence with original content, engage your readers genuinely and check your polished dashboard often for entry rules updates.
3. Facebook Stars and Fan Memberships
Facebook Stars is the platform’s built-in tipping system. Viewers buy Stars and send them during live streams or on Reels as a way of supporting creators they like. Each Star is worth $0.01 to the creator, so 1,000 Stars equals $10.
It adds up fast for creators with engaged and loyal readers.
It works best when you build a real connection with your viewers. Creators who respond to comments during live streams and host regular themed sessions earn far more from Stars than those who just broadcast without interacting. Facebook also runs bonus programmes where active creators earn extra for hitting activity targets.
Fan memberships take this further. Creators with at least 10,000 followers or 250 return viewers can offer paid memberships. Members pay a monthly fee for exclusive content, early access or members-only posts. Facebook takes a cut, but creators keep most of the money.
A creator with 1,000 paid members at $4.99 per month would make close to $4,000 per month from memberships alone. The challenge is building the trust needed to convert followers into paying supporters. That takes time.
The compounding effect is real, though.
4. Partner Marketing Through Facebook
Partner marketing is one of the strongest long-term income models you can build using Facebook as a traffic source. You share links to products or services you recommend and earn a cut when someone buys. The income continues as long as people keep clicking and buying, which means the work you do today can pay you months or years from now.
Facebook is a good fit for partner marketing because it allows you to reach specific readers through groups, pages and targeted posts. A well-run Facebook group on a niche topic gives you ready readers for partner recommendations that are genuinely relevant.
The key difference between partner marketing that works and the kind that gets people unfollowed is trust. Recommending products you have actually used builds steady credibility. Recommending products you have actually used, being honest about partner links and only sharing things that are genuinely useful builds the kind of trust that makes consistent clicks and cuts.
Some partner programmes that pair well with Facebook readers include tools for online companies, software, health products and training courses. Cut rates vary from 5% on physical products to 40% or 60% on software.
Facebook Groups are one of the most underused earning tools on the platform. A well-run group on a specific topic can become a genuine asset. Members trust your recommendations, attend your events and buy your products.
The income from a group does not come directly from Facebook. It comes from what you build around it, such as products, courses and brand deals. A group on home organisation, small company finances or healthy eating gives you readers who are ready for relevant products and courses. You earn from partner sales within the group, selling your own digital products, offering paid coaching or consultancy, or running sponsored posts for relevant brands.
Groups that earn well share a few common traits. They have a clear and specific focus. They are actively managed and free from spam.
The owner posts steadily and responds to members. Value always comes before selling.
Building a group to the point of meaningful income takes several months. It is not a quick win. A group with 5,000 engaged members in a specific niche is worth far more than a page with 50,000 passive followers.
6. Selling Digital Products Through Facebook
If you have skills or knowledge that others want to learn, Facebook gives you a way to sell digital products directly to readers. These might include e-books, templates, online courses, printables or design assets.
Digital products cost almost nothing to make after the initial effort and can be sold unlimited times. A well-made e-book on a topic like meal planning can sell for $9 to $29 and keep making income long after you write it.
Facebook Groups and Facebook Pages both work well for sharing digital products. You can also run paid Facebook ads to send traffic to a sales page once you know the product sells.
One effective approach is to give away a free short guide to build your email list. From there, you offer the paid product to people who have already seen what you provide. This is the classic lead magnet model. It works steadily across virtually every niche.
7. Facebook Ads for Your Own Company
If you already have a product or service to sell, Facebook Ads is one of the most powerful tools open to use for reaching buyers. Facebook’s ad platform gives you detailed targeting by age, location, interests, income level and much more.
This is not passive income. Running profitable Facebook Ads requires learning the platform, testing ads and tracking results carefully. But for companies with a proven product and a fair budget, the return on ad spend can be strong.
Around 62% of brands report that positive ROI from Facebook Ads is achievable. The platform continues to be one of the most cost-effective paid channels for reaching targeted readers.
Small company owners selling physical products, coaches sharing online programmes and e-commerce brands driving traffic to Shopify stores all use Facebook Ads as a core part of their growth approach. Many advertisers begin with $5 to $10 per day to test what works before scaling.
The learning curve is real. Mistakes in the early stages cost money. Starting with Meta’s own training resources before spending is a sensible move.
You can access Meta’s free Blueprint courses to build a solid foundation before putting money into your first campaign.
8. Brand Partnerships and Sponsored Content
If you build a following on Facebook, whether through a page, a group or a personal profile with public content, brands will, over time, approach you to promote their products. Sponsored posts, product reviews and brand partnerships are a real income stream for creators who have built genuine influence in a niche.
You do not need millions of followers. Micro-influencers with 5,000 to 50,000 engaged followers often earn $200 to $1,000 per sponsored post. Creators with larger or more targeted readers can earn several thousand dollars per post. The rates depend heavily on your niche, your activity rate and the size of the brand.
The most important thing here is selectivity. Sharing products that do not fit your readers or that you do not believe in damages the trust you have built. One poorly chosen sponsorship can cost you more in lost trust than it earns in fees. Choosing partnerships carefully and being upfront with your readers about sponsored content is the approach that works long-term.
To attract brand deals, make it easy for companies to contact you. Add a company email to your profile or page, create a short media kit that outlines your readers’ types and activity rates and reach out early on to brands that are a natural fit for what you cover.
This method is a little different from the others. The income does not come directly from Facebook. Instead, you use Facebook as a traffic source to send people to your own website.
A well-run website with partner links, display ads or digital products can make real income. Facebook can feed that site with consistent traffic through posts, group activity, Facebook Live sessions and Reels that link back to your content. This approach is more robust than relying purely on Facebook’s own earning tools. You own the asset that the traffic goes to.
According to the Shopify guide on making money on Facebook, Facebook is the most popular social commerce site in the US. That reach makes it a strong source of targeted traffic for websites in the same niche.
Niche blogs, partner sites and e-commerce stores all benefit from steady Facebook traffic. Building this mix takes longer than simply selling on Marketplace. But it creates a more durable income source that does not depend entirely on platform rules or system changes.
How to Choose the Right Method for You
Not every approach in this guide will suit every person. The right method depends on your skills, your time and your goals.
If you want to start earning fast with no readers and no upfront investment, Facebook Marketplace is the easiest starting point. You can list your first item today and get paid within days.
If you are building a long-term online company and want income that compounds over time, partner marketing or driving traffic to your own website will give you the most durable results. These take longer. The earning power is higher. You are not entirely dependent on Facebook’s policies.
If you enjoy making video content and want to earn from the platform directly, focus on Reels and live streams while working towards Content Earning entry rules.
Most people who earn steadily from Facebook use more than one of these methods at once. A Marketplace seller might also run a Facebook Group where they recommend relevant partner products. A content creator might combine Stars, memberships and brand deals. The more streams you have, the less any single one becoming disrupted matters.
Practical Tips for Earning More on Facebook
A few things steadily separate people who earn well on Facebook from those who see little return despite their effort.
Show up with consistency. Facebook’s system rewards accounts that post often. You do not need to post every day.
Once a week is not enough to build momentum, though. Three to five times per week is a fair target for most creators and company owners.
Focus on a specific niche. The more clearly defined your topic is, the more likely people are to follow you. A page about “making money online” is broad. A page about “side hustles for teachers” is specific, easy to follow and much easier to earn from.
Build your email list from day one. Facebook can change its rules, cut your reach or suspend your account without warning. An email list belongs to you regardless of what the platform does. Use Facebook to drive people to a sign-up page where they get something useful for free.
Be patient in the early months. Almost everyone who earns real money from Facebook went through slow growth, low activity and zero sales first. The people who push through that phase are the ones who, over time, build something worth having.
The Honest Picture
Facebook is a genuine place to build income in 2026. It is not a shortcut, though. The methods that work take time, effort and a real willingness to learn from what is not working. There are no secret hacks and no system tricks that replace consistent, useful content and genuine activity with your readers.
The creators and sellers who earn the most from Facebook treat it as a serious part of their company, not a casual activity. They track what works, they invest time in improving their skills, and they build systems that keep earning when they are not posting.
It covers the framework I use and the tools that make it work, without the hype or the unrealistic promises you see from most online content.
How Long Before You Start Earning?
This is the question most people ask before they commit to any of these methods. The honest answer is that it depends on which path you choose.
Facebook Marketplace is the fastest. Many people make their first sale within 48 hours of listing something. The income is immediate but limited by what you have to sell and how much time you want to put in.
Content-based methods take much longer. Building an audience that trusts you enough to buy from you or watch your content week after week takes months, not days. Most creators who earn consistently from Stars, memberships or Content Earning spent six to twelve months building their presence before things clicked.
Affiliate selling and website traffic sit in the middle. You can see your first cut within a few weeks if you target the right content. But the compounding effect, where old content keeps bringing in new readers and new cuts, usually takes six to nine months to become meaningful.
The pattern that holds across all of these is simple. The people who stick with one method long enough to learn what works are the ones who end up earning. Those who switch approaches after a few weeks of slow results never find out what could have happened if they had stayed the course.
Final Thoughts
So, how to make money with Facebook? The platform gives you more ways than ever to earn, from selling second-hand goods on Marketplace to building a content company that pays through ads and brand deals. The common thread is that the money follows value.
Provide something people want to see, buy or learn from and do it steadily. The income tends to follow.
Figuring out how to make money with Facebook is not complicated in principle. The challenge is choosing one or two methods that fit your situation and committing to them long enough to see results, rather than jumping from one approach to another before anything has time to work. Pick your method, take the first step today and build from there. The platform rewards those who stay the course.
Partner Disclosure: This page contains partner links. If you click through and make a purchase, I may earn a cut at no extra cost to you.
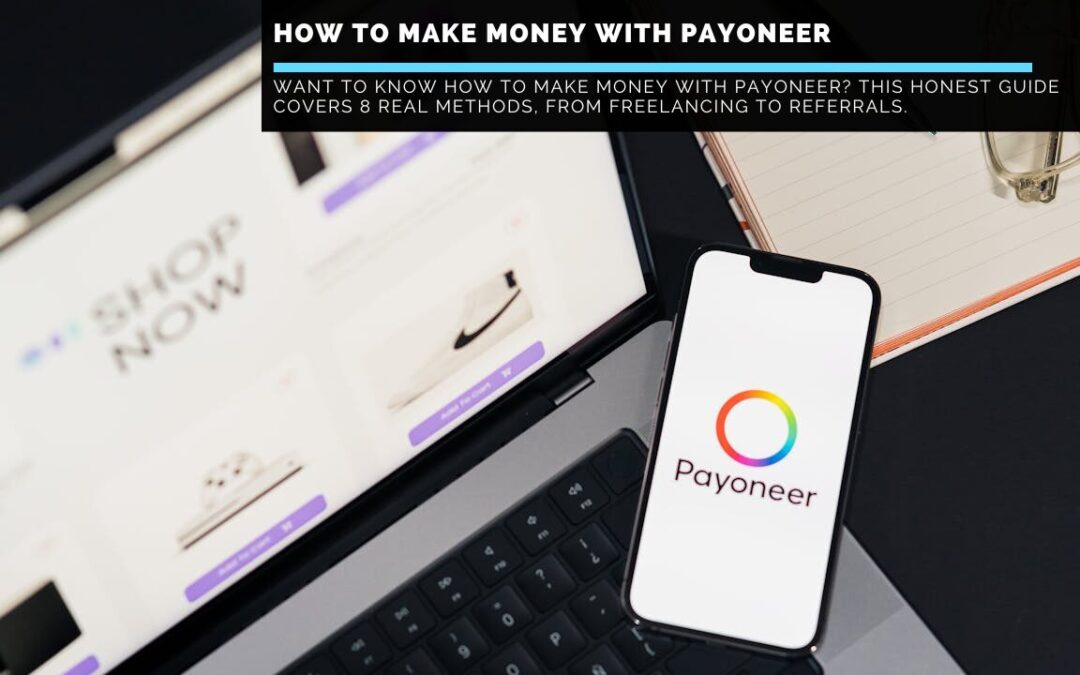
How to Make Money With Payoneer: 8 Proven Ways to Earn in 2026
If you have been searching for solid, practical advice on how to make money with Payoneer, you are in the right place. Payoneer is one of the most widely used cross-border payment sites in the world. Millions of freelance workers, online sellers and digital company owners in over 200 countries use it.
But here is something a lot of people get wrong: Payoneer itself is not a way to earn money. It is a tool that enables you to receive money.
The actual earning happens through the work you do, the sites you use and the income sources you build. This guide breaks down 8 practical methods for making real income that flows through Payoneer. Each section covers what works and how to get started without wasting time.
What Is Payoneer?
Before we get into the ways to earn, it helps to understand what Payoneer actually does, so you can make the most of it.
Payoneer is a money services site that lets you receive payments from buyers, companies and sites in multiple currencies. You get access to local getting accounts in major currencies such as USD, EUR and GBP.
Those accounts work like a local bank account in each region. A buyer in the US can pay you like a local transfer. This removes a lot of friction from global payments.
Once money is in your Payoneer account, you can send it to your local bank, pay other Payoneer users or spend via the Payoneer Mastercard. The site connects to over 2,000 sites and sites, including Fiverr, Upwork, Amazon, eBay and Airbnb.
Payoneer charges low fees. Transfers between Payoneer users are free. Getting payments from buyers who do not use Payoneer can incur a fee of up to 3%, depending on the payment method.
Paying out to a local bank account has a small fee, usually around $1.50 for USD transfers. Money type change carries a spread of around 0.5% above mid-market rates in most cases.
It is a solid, well-known site with real-world value.
Freelancing is the most direct and widely used method for making income through Payoneer. The site connects to all of the major freelance sites, making it easy to receive your earnings without working through complex global wire transfers.
Fiverr
Fiverr works on a gig model, where sellers create fixed-price service listings starting at $5 per gig. In practice, seasoned Fiverr sellers create premium packages worth $100 to $500 or more per order. Common services include logo design, copy work, social media running and SEO audits.
Payoneer links straight with Fiverr and offers a Fiverr Revenue Card. This lets you pay out earnings to a Payoneer-linked prepaid card. Linking your Payoneer account to Fiverr is a smart move from day one.
Upwork
Upwork is one of the largest freelance sites in the world, connecting skilled professionals with companies of all sizes. In-demand services include writing, web growth, graphic design, video editing, virtual assistance and marketing. Top earners on Upwork can make $5,000 to $20,000 per month. Beginners usually start at lower rates while building their profile.
Payoneer is a native payout option on Upwork. Link your account straight, and funds reach your Payoneer balance within 24 hours of a payment clearing. This makes it one of the smoothest ways to receive and manage your Upwork earnings, especially if you have buyers in multiple currencies.
Other Sites That Pay via Payoneer
Beyond Upwork and Fiverr, dozens of other sites support Payoneer as a payout method. Toptal, which is known for its rigorous vetting process, pays top-tier freelance workers via Payoneer. PeoplePerHour, 99designs, Envato and Freelance worker.com also connect to Payoneer.
Adobe Stock and Shutterstock both use Payoneer to pay photographers and artists for their image sales. If you have a skill that can be delivered remotely, there is almost certainly a site that supports Payoneer payouts.
2. Selling Products on E-Commerce Sites
Online selling is another strong income source that routes through Payoneer, very suitable for sellers who operate across multiple sites.
Amazon
Amazon uses Payoneer to disburse payments to sellers in many markets. If you run an Amazon FBA company or sell through Amazon Handmade, you can connect your Payoneer account to receive payments in the currency of each Amazon site.
This is useful for sellers on multiple Amazon storefronts. Payoneer lets you hold each currency in a separate balance and change when the rate is favourable. Building an Amazon FBA company takes time and capital.
Well-known sellers earn anywhere from a few hundred dollars per month to six or seven figures each year. It is a serious company model, not a quick win. The earning power is real.
eBay and Etsy
eBay is one of the oldest e-commerce sites and still makes a solid income for sellers who know how to source and sell products. Etsy is ideal for creators selling handmade goods, digital downloads, printables and vintage items. Both sites offer Payoneer as a payout option in many regions.
Etsy has grown steadily as a market for digital products. Selling printables, templates and planners requires little overhead once created. These products can make passive income over time. Many Etsy sellers focus on this as a low-cost and scalable product model.
Other Sites
Walmart Site and Rakuten also use Payoneer for seller payments. If you expand across multiple sites, Payoneer lets you combine earnings into one account regardless of which site the sale came from.
3. Affiliate Marketing
Affiliate marketing is one of the most scalable income models open to anyone with an online presence. You earn a fee every time someone signs up for a product or service through your unique tracking link. Your income compounds as your content library grows because older articles and posts continue driving traffic long after you publish them.
Payoneer does not restrict your affiliate income options. Many top affiliate programmes pay via bank transfer or PayPal. If you use your Payoneer local getting account details, you can route most of those payments through Payoneer.
Some affiliate programmes pay straight to Payoneer, including content sites and ad networks that have linked Payoneer into their payout systems.
Affiliate marketing is the income model I focus on through this site. Done well, it makes regular fees from high-quality products that people truly benefit from using. The earning power is real, but it takes patience.
Most affiliate marketers see their first meaningful income between months 4 and 9. The key is to build content steadily and focus on specific keyword clusters rather than broad topics.
If you create content such as videos, courses or guides, Payoneer gives you access to many sites that pay you for it.
Udemy
Udemy is one of the largest online course sites in the world. Instructors upload courses on topics from coding to cooking. Udemy pays royalties based on enrolments.
Payoneer is a supported payout method on the site. Common courses make tens of thousands of dollars over their lifetime. Results vary widely depending on topic, quality and promotion.
Creating a course takes real upfront effort. Once it is live, though, it can earn without effort for years. It is worth thinking about whether you have genuine expertise in a specific area.
Patreon
Patreon lets creators earn a regular income from a membership base. Fans pay a monthly fee in exchange for exclusive content, early access or group access. Payoneer is a supported payout method on Patreon.
The earning range on Patreon is enormous. Small creators with a few hundred loyal fans earn around $200 to $500 per month. Well-known creators with thousands of patrons can make $10,000 or more per month.
Building a Patreon audience takes time and requires an existing following. The model is powerful once you reach a critical mass of supporters.
Shutterstock and Adobe Stock
Stock photo sites offer a way to earn passive income from your creative work if you are a photographer, artist or digital artist. Shutterstock and Adobe Stock both pay sellers a royalty each time one of their images is licensed. Payoneer is a payout option on both sites.
Building a stock library takes time. A library of several hundred quality images can make steady passive income month after month. Some sellers earn $500 to $2,000 per month from stock images alone.
5. Remote Consulting and Coaching
If you have deep expertise in a specific field, consulting can be among the most lucrative ways to earn online. Hourly rates for seasoned consultants range from $75 to $500 or more, depending on the niche and buyer size.
Payoneer lets you bill global buyers straight. You can make a bill from within your account, send it anywhere in the world and receive payment straight to your balance. The buyer can pay by credit card or bank transfer. Payoneer handles the currency change on its own.
Common consulting niches include company approach, marketing, finance, IT and legal checks. Coaching niches cover career growth, fitness and personal finance. If you already have a polished track record in any of these areas, you have the foundation to start earning with minimal setup costs.
6. Content Writing and Copy work
Content writing is one of the easiest entry points into online income for people who are good with words. Companies of every size need regular content: blog posts, website copy, email newsletters, product descriptions and more.
Skilled writers earn 5 to 25 cents per word for general content and 10 to 50 cents per word or more for technical writing.
Sites like Contently, ClearVoice and Scripted connect writers with companies and pay through bank transfer or Payoneer, depending on the market. Direct buyer work, sourced through LinkedIn or your own website, usually pays more since there is no site taking a cut.
If you are just starting out, building a few sample pieces in a specific niche is the fastest way to land your first buyers. Niches that pay well include finance, technology, health and SaaS. A writer who focuses on one or two niches builds credibility faster than a generalist.
Virtual assistance is a broad category that covers a wide range of tasks companies outsource to remote workers. Common VA services include email running, calendar scheduling, customer service, data entry, research, social media running and bookkeeping.
Entry-level virtual assistants usually earn $12 to $20 per hour. Seasoned VAs with niche skills can charge $35 to $75 per hour. Many VA companies grow into small agencies, taking on multiple buyers over time.
Payoneer suits VA work well because buyers are often in the US or Europe while the VA is based elsewhere. The local getting account means your buyer can pay you as though paying a local contractor, with no global wire fees.
Sites like Belay and Time Etc connect companies with virtual assistants and use Payoneer in some markets. You can also source buyers straight through LinkedIn and bill them through Payoneer.
8. The Payoneer Refer Programme
The Payoneer refer programme is a way to earn bonus income on top of your main work. When you refer a new user and they receive $1,000 in payments within their first year, both of you earn a $25 bonus.
This is not a primary income approach. You will not replace your salary by referring people to Payoneer. However, if you mention Payoneer naturally in your content or conversations with other freelance workers, the referral bonuses add up over time without extra effort.
For those who want to go further, Payoneer also runs a formal affiliate programme that pays a fee per active referral. To qualify, you need at least 10 successful referrals through the standard scheme. It is designed for bloggers, YouTubers and social media influencers who reach freelance workers and online company owners.
How to Set Up Your Payoneer Account
Getting started with Payoneer is free, and the setup process takes less than 30 minutes.
Visit payoneer.com and click the sign-up button. You will choose your account type. For freelance workers and affiliate marketers, the relevant category is usually freelance worker or digital company owner. You will need to give your name, address, date of birth and a government-issued ID.
Once approved, you access your dashboard. From there, you can view account details, request payments, manage currency balances and link to sites. Account approval takes up to 72 hours, though many are approved within a few hours.
From your dashboard, connect to any supported site by selecting it and following the steps. Payoneer prompts you to log in to your site account and allow the link. After that, your site earnings route on its own to Payoneer.
Tips for Maximising Your Earnings Through Payoneer
Making Payoneer work hard for you goes beyond simply linking it to a site. Here are some habits that help you get more from your Payoneer account.
Hold currencies strategically. If you earn in USD but live where the local currency is weaker, hold your USD balance rather than changing right away. Payoneer lets you hold multiple currencies and change when the rate is more favourable.
Bill buyers straight. Consider taking on some buyers straight and billing them through Payoneer rather than routing work through a site. You keep more of the income since there is no site fee. Payoneer charges 3% on credit card payments and around 1% on bank transfers via the bill system.
Use the Payoneer card wisely. The Payoneer Mastercard lets you spend your balance without paying out to your bank first. This saves time and reduces fees if you often make company purchases in your earning currency.
Track your income from multiple sources. Payoneer’s power to combine income from many sites into one account is one of its strongest features. Use this by diversifying your income sources rather than relying on a single buyer or site.
Combine Payoneer with an online company model. Freelance workers and sellers who earn the most through Payoneer treat it as part of a broader company rather than a standalone solution. Building your own website, growing an email list and developing multiple income sources compound your earning power over time.
A few patterns come up often among new Payoneer users and are worth avoiding from the start.
Using Payoneer for personal transfers is against the rules. The site is designed for company use only. Sending money to friends or family violates the terms of service and can lead to account restriction.
Ignoring the fee structure is a common mistake. The fees are low but not zero. Factor them into your pricing from the start so you are not surprised when a payout costs more than expected.
Paying out too often when your balance is small increases the relative cost of fees. Letting your balance build before paying out is a more efficient approach.
Not verifying your account fully can delay payments and limit your payout options. Completing a full review early removes these restrictions.
Is Payoneer Worth Using in 2026?
For anyone earning online from global buyers or sites, the answer is a clear yes. Payoneer solves a genuine problem. It lets you get paid across borders without losing a large portion of your earnings to fees or exchange markups.
It suits freelance workers with US and European buyers, e-commerce sellers across multiple sites and content creators who earn from several sources at once. Consolidating all of those streams into one account is a real advantage.
It is not perfect. The customer support could be faster, and some users have reported delays in account review during busy periods. The currency change fee is also higher than some expert services for large amounts. But for day-to-day use as a payment hub for online income, it is hard to beat at this price point.
If you are serious about building an online income, setting up your Payoneer account early makes sense. It opens doors to sites and buyers that would otherwise require complex payment arrangements.
Building Income Beyond Individual Sites
One theme runs through every method in this guide. The most successful online earners do not rely on a single site or income source. Freelance workers who earn well on Upwork also have their own website that attracts direct buyers.
An Etsy seller with a strong shop also has an email list. A Fiverr seller with consistent orders also offers coaching and consultancy on the side.
Payoneer supports all of those income sources in one place. It is a payment tool, not a company approach. Building a real online income requires consistent effort, a clear niche and patience in the early months.
So, how to make money with Payoneer? The honest answer is that Payoneer itself does not make income for you. It is the payment infrastructure that supports the income you earn through freelancing, selling, creating and consulting.
Getting that distinction right matters. It shapes how you approach building your earning approach.
It connects to thousands of sites, handles multiple currencies and makes it easy to bill global buyers without the friction of standard banking. For anyone building an online income in 2026, having a Payoneer account is close to a necessity.
Pick one or two methods from this guide, set up your Payoneer account and start building. Slow and steady progress in a clear direction is far more valuable than trying to do everything at once. Those who figure out how to make money with Payoneer treat it as a serious tool for a serious company, not a shortcut to fast cash.
Affiliate Disclosure: This page contains affiliate links. If you click through and make a purchase, I may earn a fee at no extra cost to you.
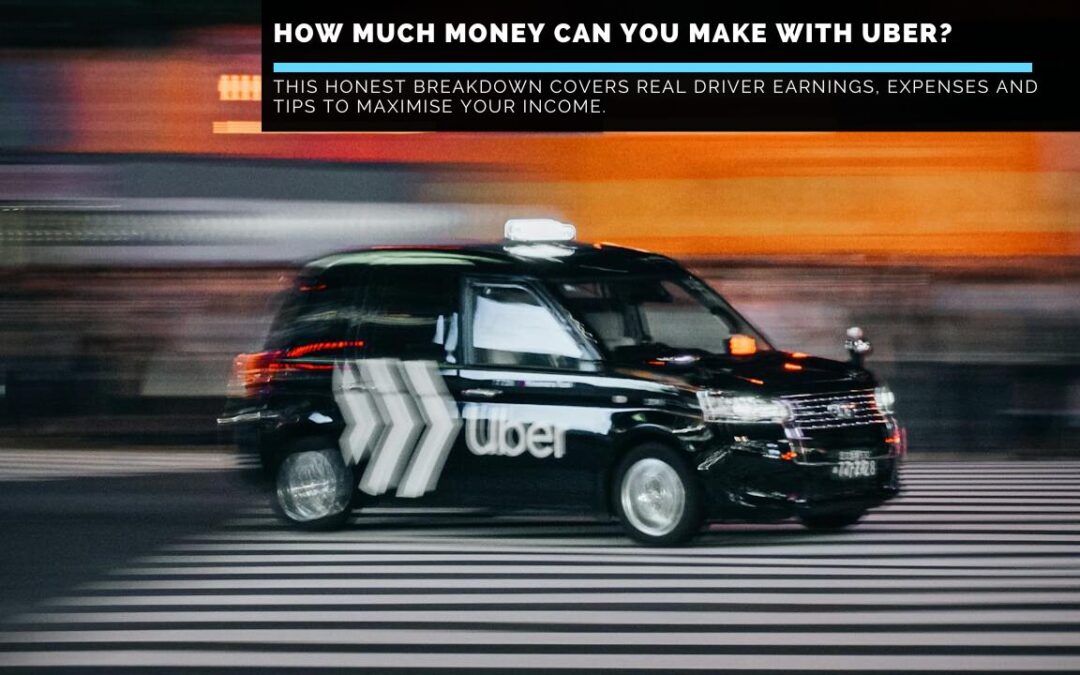
How Much Money Can You Make With Uber? The Honest 2026 Breakdown
If you have ever sat in the back of an Uber and thought, “I wonder how much this driver actually makes,” you are not alone. The question of how much money can you make with Uber comes up constantly, on Reddit threads, in Facebook groups and in conversations between people looking for a flexible way to earn extra income. The answer is not quite as simple as the recruitment ads would have you believe, but it is a lot more nuanced than the doom and gloom critics suggest. In this guide, I am going to break down the real numbers, the hidden costs, the best strategies for earning more and whether driving for Uber is genuinely worth your time in 2026.
What Do Uber Drivers Actually Earn Per Hour?
Let us start with the numbers that matter most to most people, hourly pay.
Gridwise tracked nearly 67,000 Uber drivers in 2026 and published a detailed earnings breakdown. The median hourly rate sits at $21.18 per hour in total trip pay.
When you add surge pricing, bonuses and tips, that figure rises to $21.92 per hour.
That figure is the midpoint, meaning half of all drivers earn more and half earn less.
So what does that look like across the earnings spectrum?
The top 25% of drivers gross $51,000 or more per year before expenses. The top 10% of earners land longer rides and airport runs. They clear greatly higher per-trip amounts.
At the lower end, part-time drivers in slower markets or those who drive during off-peak hours may see closer to $15 per hour. This widespread simply reflects the fact that Uber driving rewards the strategic decisions you make. The more deliberately you approach it, the better your results tend to be.
The Rideshare Guy, one of the most respected separate resources for driver data, puts the typical range at $15 to $25 per hour. Top earners in busy markets pull $30 to $50 per hour during surge periods.
The key takeaway is that your market and your driving strategy matter enormously. A clear plan makes a bigger difference than raw hours behind the wheel. Most drivers who struggle do so not because the platform is broken but because they have no real strategy in place.
The key takeaway here is that $21 to $23 per hour gross is a reasonable baseline for a driver who puts some thought into when and where they work.
Translating hourly figures into weekly and annual projections helps you assess whether Uber fits your goals.
Here is a rough breakdown based on different levels of commitment:
Part-time (10 to 20 hours per week)
Part-time drivers who put in 10 to 20 hours per week can typically earn between $200 and $600 per week before expenses. Driving during peak periods pushes you towards the higher end. This makes Uber a solid side hustle for people who want extra income without a full-time commitment.
Full-time (35 to 40 hours per week)
At the median rate of $21.18 per hour, a full-time driver working 40 hours a week grosses roughly $847 per week. That works out to around $44,000 per year before expenses. Top 25% earners gross over $51,000 per year.
After expenses
This is where the picture changes. After fuel, maintenance, insurance, value loss and taxes, most full-time drivers take home between $35,000 and $45,000 per year. That is a meaningful reduction from the gross figures, which is why knowing your costs is just as important as knowing your earnings.
What Factors Affect How Much You Earn?
The range between the lowest and highest earners is enormous. A driver in rural Tennessee and a driver in Manhattan covering the same hours live in entirely different financial realities. Here are the key factors that determine where you fall on that spectrum.
Your Location
Location is the single biggest factor affecting your income. Drivers in dense urban markets steadily report higher hourly earnings. Frequent ride requests, shorter wait times and regular surge pricing all contribute to that advantage.
In high-demand cities, drivers often gross $25 to $40 per hour during optimal conditions. Smaller markets may see rates of $15 to $18 per hour. Wait times between rides are also longer, which lowers your effective hourly rate.
When You Drive
The time of day and week makes a significant difference. Early morning commutes, evening rush hours and Friday and Saturday nights are steadily the busiest periods across most markets. Big local events such as concerts, sports fixtures and festivals can create surge pricing that pushes your earnings well above average.
Weekend nights in particular tend to be the most lucrative sessions for drivers who can work those hours. Many seasoned drivers target these windows specifically rather than spreading hours across the full week.
Surge Pricing
Surge pricing is one of the most important tools in a driver’s earnings toolkit. When demand outpaces supply, Uber raises its rates. As a driver, you receive a share of that increase on top of your base fare.
Surge pricing can add anywhere from a few dollars to $40 or more on a single ride, depending on the market and conditions. Seasoned drivers learn to expect surges. They monitor the heatmap and position near venues where demand spikes are expected.
Surge pricing is not a guaranteed income stream. It is variable and unexpected. Treat it as a bonus rather than a core part of your plan.
Tips
Tips are a meaningful part of Uber driver income that many people overlook. One seasoned driver cited by Sidehustles.com, with over 14,000 rides across five years, noted that tips worked out to around 10% of total earnings.
Around 1 in 3 or 4 riders leaves a tip. Airport passengers and business travellers tend to be the most generous.
At the median, Uber drivers earn around $1.20 per trip in tips. Over the course of a busy week, that adds up. Some drivers boost tips by keeping their vehicle clean, offering phone chargers and staying friendly throughout every trip.
Your Vehicle Type
Not all Uber vehicles are equal. Drivers who qualify for Uber Comfort, UberXL or Uber Black can charge higher fares. Uber Black drivers report gross annual revenues from $60,000 to well over $100,000, depending on the market. However, operating costs for premium vehicles are also much higher.
If you drive a standard economy car, you are most likely under the UberX category. It offers the widest rider base but the lowest per-trip fares. Upgrading to a premium vehicle opens higher-paying categories and often leads to better tips.
This is the section that Uber recruitment content tends to gloss over. It is arguably the most important part.
Uber drivers are separate workers. You bear the cost of everything yourself.
Fuel
Fuel is the most significant ongoing expense for most drivers. With national fuel prices around $3.45 per gallon in early 2026, a full-time driver can expect to spend $100 to $200 per week on fuel.
Over a year, that is $5,200 to $10,400 out of your pocket before accounting for anything else.
Vehicle Maintenance and Value Loss
Driving for Uber puts serious miles on your vehicle. Oil changes, tyre rotations and brake replacements typically run $50 to $100 per month. Larger repairs can wipe out several weeks of earnings at once.
Most new drivers fail to account for value loss. Every mile you drive reduces the value of your car. The more you drive for Uber, the faster your vehicle depreciates. When you need to replace it, you will feel that cost.
Insurance
Personal auto insurance usually does not cover commercial driving. Driving without the right cover exposes you to real financial risk.
Uber provides some cover while you are on a trip. Gaps exist, though, when your app is on but you have not yet accepted a ride. Many drivers add a rideshare add-on to their personal policy to fill those gaps.
Self-Employment Taxes
As a separate worker, you pay self-employment tax covering both employer and employee portions of Social Security and Medicare. That rate is 15.3% of your net self-employment income. If you do not set aside money for taxes each week, April can be a shock.
The good news is that you can deduct many expenses. Mileage, phone bills, car washes and tolls all count. Keeping clear records throughout the year is essential.
Uber Driver Earnings by City: How Location Changes Everything
Here is a general look at how earnings differ across major markets.
New York City
New York is one of the highest-earning markets in the country. Demand is constant, and airport trips between JFK, LaGuardia and Newark provide a steady stream of high-value rides. However, operating a vehicle in New York costs much more, which eats into that advantage.
Los Angeles
LA drivers benefit from a spread-out city where longer trips are common. The volume of events and venues in the LA metro area means surge opportunities are frequent. Some Uber Black drivers in LA report $1,500 or more per week during strong periods.
Chicago
Chicago offers solid earning potential on weekend nights and around major events at venues like Wrigley Field. The city’s density means Uber is a popular choice for riders across the metro area.
Smaller Markets
In smaller cities, earnings per hour tend to be lower, and wait times are longer. Drivers in these markets often find part-time driving makes more sense. Demand is not consistent enough for full-time hours to pay well.
How to Earn More Driving for Uber
If you are going to drive for Uber, it makes sense to drive smart rather than just drive more.
Drive During Peak Hours
Morning commutes between 6 am and 9 am and evening rush hours between 4 pm and 7 pm are reliably busy across most markets. Friday and Saturday nights are the gold standard for earnings, especially in urban areas where nightlife drives demand after 10 pm.
Placing yourself before expected demand peaks separates strategic drivers from those who log in at random.
Use the Heatmap
The Uber driver app includes a heatmap showing where demand is high and where surge pricing is active. Learning to read this tool and placing yourself before a surge hits can make a real difference to your hourly earnings.
Target Events and Airports
Concerts, sporting events and festivals reliably generate surge pricing and high trip volumes. Many seasoned drivers keep a calendar of major events so they can plan ahead. Airports also provide higher-value trips, especially in early mornings and late evenings when long-haul travellers are moving.
Uber uses a rating system to rank drivers. High-rated drivers see more requests and are preferred by riders.
A rating above 4.8 is generally recommended. Small touches such as a clean car, a friendly greeting and a phone charger cable can make a noticeable difference to tips and ratings.
Track Every Expense
Failing to track expenses is one of the most common mistakes new drivers make. Every business mile is potentially deductible. The IRS standard mileage rate for 2026 is 70 cents per mile. For a driver covering 1,000 business miles per week, that deduction adds up to tens of thousands of dollars annually and directly reduces your tax bill.
Using a mileage tracking app from day one is essential.
Consider Multi-Apping
Many full-time drivers run Uber alongside Lyft or a delivery platform like DoorDash during slow periods. This strategy fills dead time between Uber rides with income from other sources. Gridwise data steadily shows that drivers across multiple platforms earn more per week than those on one app alone.
Never have two active requests at once. Toggle your second app off as soon as you accept an Uber trip.
Is Uber Driving Worth It in 2026?
The honest answer depends entirely on what you are comparing Uber driving to.
If you want a flexible way to earn $200 to $400 per week around an existing job, Uber is a genuinely open option to all. The barrier to entry is low. You need a qualifying vehicle, a clean driving record and a background check. You can start earning within days, and you work on your own schedule.
If you are considering Uber as a full-time career, the picture becomes more complicated. The gross potential at full-time hours is strong, with many jobs. However, expenses, vehicle wear and the absence of benefits such as paid leave, health insurance and pension payments mean the real value of the income is lower than the headline figures suggest.
For most people, the sweet spot is using Uber as a strategic side hustle. Drive during peak hours on evenings and weekends, be deliberate about which trips to accept and keep costs under control.
One driver cited by Sidehustles.com put it well. He now drives only on Fridays and Saturdays, earning $40 to $50 per hour during those peak windows without the wear of full-time hours. That is a smart way to approach it.
Uber is not just a rideshare platform. Uber Eats allows you to earn through food delivery. You do not need a spotless interior, and the pressure of passenger interaction is absent.
However, IRS guidance on gig economy tax obligations confirms that gig drivers face self-employment obligations no matter what platform. As a general rule, delivery driving tends to generate lower gross earnings than rideshare.
Uber Eats drivers typically earn $12 to $18 per hour before expenses. That is notably below the rideshare median. Many drivers use Uber Eats to fill gaps during slow rideshare periods rather than as a main income source.
What the Top Drivers Know That Most Drivers Do Not
If you read forums where drivers share their experiences, such as the Rideshare Guy blog or the r/UberDrivers subreddit, the highest earners share a few consistent habits.
Top earners treat driving like a business. They track income and expenses carefully, set money aside for taxes each week and plan schedules around data. Top earners know their market well. They know which venues, events and time windows produce the best results.
Top earners also know when to stop. Driving while fatigued reduces service quality and raises accident risk. Many set strict session limits and step away from the app well before reaching exhaustion. That discipline is part of what keeps them profitable long-term.
They do not rely on Uber alone. Building multiple income streams is the most reliable path to financial security as a self-employed person. Uber can be one strand of that. The drivers who thrive are usually thinking about what else they can build alongside driving.
Could Online Business Be a Better Long-Term Play?
This is a point worth considering honestly.
Uber driving offers genuine flexibility and is open to all income levels. However, it has a fundamental limitation. It is entirely time-for-money income.
When you stop driving, the money stops. There is no compounding and no passive element. You also have no control over platform commission rates or policy changes. These can affect your earnings greatly.
If you are driving for Uber to escape money pressure, it can help. It is worth thinking about what you are building in parallel.
Affiliate marketing lets you create content that generates recurring commissions long after the initial work is done. It takes longer to build than logging onto the Uber app. The income does not stop when you stop working, though.
It covers realistic timelines, early-month expectations and the tools that make it achievable without a large upfront investment.
Frequently Asked Questions
How much does the average Uber driver make per week?
Part-time drivers who work 10 to 20 strategic hours per week typically earn $200 to $600 before expenses. Full-time drivers averaging 40 hours per week gross around $847 per week. Take-home pay after expenses is considerably lower.
Does Uber take a cut of your earnings?
Yes. Uber’s service fee typically sits between 20% and 30% of the fare. This covers platform access, commercial insurance and other running costs. Knowing this split matters when calculating your realistic earnings.
What are the biggest expenses for Uber drivers?
Fuel, maintenance, value loss and self-employment taxes are the primary costs. Combined, they can reduce your gross hourly rate to closer to $15 to $18 per hour net.
Can you make $1,000 a week with Uber?
Yes, but it requires a deliberate strategy. Drivers who steadily earn $1,000 or more per week target peak periods, maintain excellent ratings and take advantage of promotions and bonuses in high-demand markets. It is achievable but far from typical.
Is Uber driving a good side hustle?
For people who want flexible extra income, Uber is one of the more practical options available. It works well for those who drive on Friday and Saturday evenings. These sessions steadily produce the highest earnings relative to time invested.
Do Uber drivers get benefits?
No. As separate workers, Uber drivers receive no employee benefits such as paid leave, health insurance or pension payments. This is one of the most significant trade-offs of gig work. Factor it into any honest assessment of the income.
Final Thoughts
So, how much money can you make with Uber? The real answer is that it depends. Armed with the right information, you can make a far more informed decision than most people who sign up without thinking it through.
The median driver earns around $21 per hour gross. Full-time hours translate to $35,000 to $45,000 take-home after expenses.
Driving during peak periods can push that higher. The costs are real, and they matter. For many people, the flexibility has genuine value beyond the hourly rate.
If you are thinking about Uber as a stepping stone towards a more flexible working life or financial recovery, it is worth exploring what you can build in parallel.
How Much Money Can You Make With MySurvey? The Honest Answer
If you have been searching for how much money can you make with MySurvey, there is one important fact to know right away. MySurvey no longer exists as a standalone platform.
In 2019, the survey panel merged fully into LifePoints, run by the same parent company with the same core experience. The MySurvey website is closed to new members. All accounts moved across to LifePoints.
If you sign up today thinking you are joining MySurvey, you are actually joining its successor. This article covers what MySurvey was, how much it paid and whether surveys are worth your time as an income strategy.
What Was MySurvey?
MySurvey has a long history. It traced its roots to 1946, when a company called National Family Opinion began collecting buyer research data in the United States. Over the following decades, that business changed hands and names several times, eventually becoming MySurvey under the Lightspeed banner. At its peak, MySurvey had rewarded its members with over $32 million USD worldwide.
The model was simple. Members signed up for free, completed surveys on health, travel, technology and lifestyle and earned points for each one. Points could be redeemed for PayPal payments, gift cards, retail vouchers and donations.
MySurvey was popular. It attracted hundreds of thousands of members across the United States, built a large following and featured on many recommended survey lists. It had a mobile app, a referral programme and a sweepstakes that gave members extra earning options.
In early 2019, Lightspeed began merging MySurvey with another panel, GlobalTestMarket. By June 2019, all MySurvey members had moved to the new LifePoints platform. From January 2020, the MySurvey website was closed.
This is the key question for most people searching for MySurvey reviews. What could a typical member actually earn?
The honest answer is: not very much.
According to SurveyPolice, which tracked member reviews of MySurvey over several years, typical survey payouts sat between $0.50 and $1.25 per survey.
The point system worked on a rate of 10 points per 5 minutes of survey time.
You needed 1,000 points to begin cashing in rewards. One thousand points equalled $10.
Individual surveys typically rewarded between 100 and 200 points. Each survey took around 15 to 30 minutes to complete.
On a good day, a member might complete three or four surveys and earn 400 to 600 points. At that rate, reaching the minimum cash-out threshold took roughly three to five days of regular survey taking. That works out to an effective hourly rate of somewhere between $1 and $3 per hour for most members.
Academic and longer product surveys tended to pay more per minute than short polls. Selective members improved their effective rate somewhat. Knowing which task types paid best made a real difference over time.
The referral programme added a small extra income layer. Each successful referral earns you 150 points, worth about $1.50. This helped members reach the cash-out threshold a little faster.
A monthly sweepstakes gave members a chance to win 10,000 points, worth $100. Most never won, but the sweepstakes kept engagement high.
Reviewing the Good Financial Cents analysis of MySurvey, the cash-out mechanics become clearer. To receive a $10 PayPal payment, members needed 1,200 points. To receive $15, they needed 1,800 points.
The processing time for PayPal cash-outs was between 4 and 8 weeks, which was on the slower side compared to competing platforms. Gift card payouts were processed more quickly.
The Downsides MySurvey Members Reported
Despite its long history, MySurvey attracted a fair share of criticism from its members. The most common complaints centred on a handful of recurring issues.
Being screened out of surveys was a significant frustration. Members would start a survey, answer screening questions and then be told they did not qualify, after 5 to 10 minutes. This was industry-wide rather than unique to MySurvey, but the platform was criticised for not compensating members adequately for the time spent on disqualifying questions.
Account closures were another major issue. In its later years, MySurvey developed a reputation for closing accounts without warning. Members who had built up $20 to $50 in points sometimes found their accounts shut down without recourse. This issue drove significant negative reviews across platforms like Trustpilot and the Better Business Bureau.
The slow payout timeline also drew consistent criticism. Waiting up to eight weeks for a $10 PayPal payment felt unfair to many members, especially when competing platforms could process payments in days.
MySurvey Is Now LifePoints
For anyone wanting to pick up where MySurvey left off, LifePoints is the direct continuation. It runs under the same parent company, Lightspeed Research. It works in much the same way. Members earn points for completing surveys and redeem them for PayPal payments, gift cards or charitable donations.
LifePoints has over 5 million members worldwide across 70 countries. The company has paid over $22 million USD to its members since the merger. New members get 10 bonus points on account verification.
Sign up directly at LifePoints to see current options.
The point-to-cash conversion rate on LifePoints works differently from the old MySurvey system. On LifePoints, 5,500 points are worth about $5. Surveys typically reward between 50 and 300 points depending on their length and complexity. The screening-out rate remains high, which is a common frustration across the paid survey industry.
Testing of LifePoints found results similar to the old MySurvey numbers. Reviewers found earnings of around $1 to $2 per hour when accounting for discriteria and screening time. Selective users who targeted higher-paying surveys could push that closer to $3 per hour.
How Much Can You Realistically Earn From Online Surveys?
Whether you are considering MySurvey’s successor, LifePoints or any other paid survey platform, the income ceiling on this type of work is low. Understanding that the ceiling is important before you invest time in any survey site.
Most active users of multiple survey platforms earn $30 to $60 per month. Members who qualify for many surveys and use several platforms at once might earn $100 to $150 per month. Earning more than that from surveys alone is very rare.
The fundamental constraint is the ratio of time to reward. A well-optimised hour of survey work might earn $3 to $6. That is far below the federal minimum wage.
The flexibility is genuine. You can work at any time, from anywhere, with no commitment. But the trade-off in hourly rate is significant.
If your goal is small amounts of pocket money to supplement your income, surveys can fill that role without requiring any skills or prior experience. If you want to replace real income or build something that grows, surveys are the wrong tool.
Is MySurvey a Scam?
This question comes up in search results regularly. MySurvey was not a scam. It was a legitimate market research platform backed by Lightspeed Research, one of the world’s largest market research companies. It paid real money to real members and built a genuine community over many years.
The negative reviews it received stemmed from real frustrations: slow payouts, account closures without warning and a modest earning rate. These are valid criticisms.
But there is a difference between a service that disappoints and a service that deceives. MySurvey delivered what it promised to most members most of the time. The problems were most acute for members who encountered the account closure issue, which was genuinely unfair.
LifePoints, its successor, continues to attract similar complaints about account closures. This pattern suggests the issue is systemic rather than accidental. Members who understand this risk and redeem their points early and often can largely avoid the problem.
What Can You Actually Earn in a Month?
To give you a concrete sense of what monthly earnings from MySurvey looked like for a typical active member, consider this breakdown.
An active member logging in five days per week and completing two or three surveys per session would accumulate approximately 1,000 to 1,500 points per week. At that rate, they would hit the $10 PayPal cash-out threshold every one to two weeks. Over a full month, that works out to $20 to $40 before the time spent on rejected surveys is accounted for.
Members who treated it casually, logging in a few times per week and doing whatever surveys were available, earned closer to $10 to $20 per month. This matches the experience of most survey panel members across the industry.
The History Behind MySurvey and Why It Matters
Understanding MySurvey’s history helps explain both its strengths and its limitations. The platform was not a fly-by-night survey website. It had roots going back nearly 80 years and was backed by one of the world’s leading market research firms.
National Family Opinion, the company that eventually became MySurvey, was among the first firms to conduct large-scale buyer opinion research in the United States. For decades, it collected data through mail surveys, phone calls and later through online panels.
By the time MySurvey launched online, it already had decades of links with major brands that needed buyer data. That is why MySurvey surveys felt more substantive than on many rivals. The questions were designed by trained research teams, the topics were specific, and the data collected was genuinely valuable to the brands paying for it.
This history is also why many long-term MySurvey members felt a genuine sense of loss when the platform closed and merged into LifePoints. They had built up years of completed surveys, a trusted relationship with the platform and a reliable, if modest, income from it. The transition was not smooth for all.
What Happened to Members’ Points When MySurvey Closed?
When Lightspeed merged MySurvey into LifePoints in 2019, existing members were told their point balances would transfer to the new platform. For most members, this worked as intended. Their existing points were migrated, and they could continue earning and cashing in on LifePoints without losing what they had built up.
However, some members experienced issues. Points went missing during the migration. Login details stopped working for some.
Customer service was slow to respond. For some members, the transition meant losing hard-earned points with no clear way to recover them.
The lesson from the MySurvey experience is clear: never let your point balance grow too large before redeeming. The risk of account closure is always present. Redeeming at the minimum threshold keeps the risk low.
How MySurvey Compared to Other Survey Sites
For its time, MySurvey sat in the middle of the paid survey market. It was not the highest paying platform available, but it was genuine, well-organised and offered a range of payout options that made it flexible.
Compared to Swagbucks, Survey Junkie and Pinecone Research, MySurvey offered a narrower set of earning options. Swagbucks allowed members to earn through video watching, cashback shopping, web search and games in addition to surveys. MySurvey was survey-only, which meant that on days when no matching surveys were available, there was nothing to earn.
Pinecone Research offered higher per-survey rates but invited new members by selection rather than open sign-up. MySurvey was open to anyone, which made it more accessible but also meant a larger and more active member base chasing the same survey spots.
Tips for Getting More From MySurvey and LifePoints
If you are going to use LifePoints or any similar survey platform, these habits will help you get more value from the time you invest.
Complete your profile fully. Survey matching is based on demographic data. A fully completed profile gets you more relevant surveys, which means fewer wasted screening attempts and more surveys you actually qualify for.
Check your dashboard daily. New surveys appear regularly. Higher-paying ones fill up quickly. Logging in daily gives you a better shot at the top-paying surveys before they close.
Target longer surveys first. Short polls often pay very little per minute. Longer surveys from research firms and academic institutions tend to pay a much better hourly rate. Prioritise those when they appear.
Join multiple platforms. The most effective way to improve monthly survey earnings is to spread your effort across three or four platforms rather than spending more time on just one. Each platform sends surveys to different demographics. Members who join Survey Junkie, LifePoints, Swagbucks and Branded Surveys all at once get a much larger pool of available surveys each day.
Redeem points regularly. Do not let a large balance build up. Account closures have happened to members with significant unpaid balances.
There is no guarantee of recovery. Cash out as soon as you reach the minimum threshold.
MySurvey vs Better Alternatives
MySurvey was a decent survey platform for its time. In the context of what the survey industry offered, it was comparable to its peers: modest pay, genuine but limited options and a straightforward experience for members with realistic expectations.
If you are looking for survey platforms with a better reputation and a slightly higher earning rate today, these are worth considering.
Survey Junkie pays $3 per hour on average and has a more transparent point-to-cash conversion. The disqualification rate is lower than LifePoints, and the payout process is faster.
Branded Surveys offers a stronger daily survey volume and a tiered loyalty system that rewards consistent members with higher point bonuses. The effective hourly rate for regular members is often cited as one of the better ones in the survey industry.
Swagbucks goes beyond surveys to include earning options from watching videos, searching the web, cashback shopping and completing tasks. The variety makes it easier to stay active and build up rewards without relying solely on survey availability.
Prolific is worth a mention for members who want academic research surveys. These tend to pay better per minute than commercial surveys. The disqualification rate is sharply lower. Access is more limited, but the quality of the earning experience is notably better.
This is the honest question behind the specific query about how much money can you make with MySurvey. People are not usually asking because they are passionate about surveys. They are asking because they want to earn money online, and surveys seem like an accessible starting point.
Survey sites are accessible. They require no skills, no investment and no prior experience. They pay real money. For someone who wants to earn $20 to $30 per month from genuinely spare time while watching television or commuting, surveys can deliver that.
But surveys scale very poorly. Every dollar you earn requires a fresh investment of your time. There is no compounding, no growth and no asset being built. The income does not grow unless you spend more time.
If you are genuinely trying to build an online income rather than earn small amounts of pocket money, the time you spend on surveys could be far better invested in building a content site, learning affiliate marketing or developing a digital product that earns while you sleep.
The difference is stark. One hour of survey work produces $2 to $3 that disappears the moment you stop. 1 hour of writing an article for a content site produces an asset that can earn commission clicks for years. The upfront income is slower from content and affiliate work, but the ceiling is far higher.
Frequently Asked Questions About MySurvey
Is MySurvey still active? No. MySurvey closed in 2020. All users were moved to LifePoints, which is run by the same company.
Can I still earn from MySurvey? Not on MySurvey itself.
LifePoints is the replacement. It works the same way. You earn points for surveys and redeem them for cash or gift cards.
How long did it take to earn $10 on MySurvey? For a typical member, around one to two weeks of regular use. That required completing several surveys per session, a few days per week.
Was MySurvey worth it? For small amounts of pocket money, yes. For building real income, no. The hourly rate was too low to make it a primary income source.
How does LifePoints compare to MySurvey? They are very similar. LifePoints has a more modern website.
The earning rate and survey volume are roughly the same. Some members report more surveys on LifePoints. Others find fewer.
What is the minimum payout on LifePoints? You can redeem from a low balance. Payouts arrive via PayPal or gift card. The timeline varies from a few days to a few weeks.
A Better Path to Online Income
If the question of how much money can you make with MySurvey led you here because you are looking for a real way to build online income, this is where I would point you. Surveys are fine as a temporary supplement while you are learning and building. They should not be your long-term strategy.
A blog in a niche you know, monetised with affiliate links, can earn $500 to $2,000 per month within 12 to 18 months. That income does not require you at your desk answering questions. It earns while you sleep or travel.
It is free to read and covers the practical first steps with no exaggerated income promises. It covers the tools, platforms and first steps for building an affiliate-based online income with honest timelines and no exaggerated claims.
Final Thoughts
So, how much money can you make with MySurvey? When the platform was active, most members earned the equivalent of $1 to $3 per hour. A few made more. Most made less than that.
A consistent and selective member might earn $20 to $40 per month. For most people, that was the realistic ceiling on MySurvey. The platform had a long history and a genuine community, but it was always a pocket-money solution rather than a path to meaningful income.
MySurvey no longer exists. Its successor, LifePoints, offers a similar experience with a more modern interface. The earning potential on LifePoints is roughly comparable to what MySurvey offered.
The frustrations around rejections and account closures remain. For a small extra income from genuinely spare time, it is a legitimate option. For building a real online income, it is the wrong starting point.
Affiliate Disclosure: This page contains affiliate links. If you click through and make a purchase, I may earn a commission at no extra cost to you.
Amazon Mechanical Turk: How Much Money Can You Really Make?
So you have been wondering how much money can you make with Amazon Mechanical Turk. It is one of the most searched questions about online side income. The honest answer is: more than you expect at first, but less than you need long-term.
Amazon Mechanical Turk, often called MTurk, is a real, legitimate platform run by Amazon. It pays real money. But the numbers tell a more complicated story than most guides admit. This article gives you the full picture, based on real data and real experiences from workers who have spent years on the platform.
What Is Amazon Mechanical Turk?
Amazon Mechanical Turk launched in 2005 as a crowdsourcing marketplace. Businesses post small tasks that computers cannot yet do as well as humans. Those tasks are called HITs, which stands for Human Intelligence Tasks. As a worker, you browse available HITs, choose the ones you want, complete them and get paid when the requester approves your work.
HITs cover a wide range of work. Common examples include tagging images, transcribing audio clips, completing surveys, moderating content, verifying business listings and categorising data. None of these tasks require specialist knowledge. Most take between 30 seconds and a few minutes each.
Requesters are the businesses or researchers who post HITs. They set the pay rate, the deadline and any qualification requirements. Workers, also called Turkers, choose which HITs to accept.
Once a HIT is completed, the requester has up to 30 days to review and approve it. Only after approval does the payment land in your account.
The name comes from an 18th-century chess automaton that appeared to be a thinking machine but was operated by a hidden human chess master. The platform works on a similar concept: tasks that look automated on the surface are powered by human intelligence behind the scenes.
This is the part most guides gloss over. How much money can you make with Amazon Mechanical Turk, really?
A 2018 academic study analysed 3.8 million tasks completed by 2,676 workers on the platform. The findings were stark. The median hourly wage was around $2 per hour.
Only 4% of all workers earned more than the federal minimum wage of $7.25 per hour. According to Wikipedia’s overview of Amazon Mechanical Turk, data from subsequent research places average hourly earnings in the $5 to $9 range for a substantial number of workers, while the most experienced and active workers may reach $20 per hour or more.
The range is wide because MTurk income depends on how selectively you choose HITs, how fast you work, whether you use the right tools and how long you have been building your reputation.
A useful way to think about realistic earnings is by experience level.
Beginners (First 1 to 3 Months)
New workers face two challenges at once. First, they lack the approved HIT history needed to qualify for better-paying tasks. Second, they have not yet learned which requesters and task types are worth their time.
In the first few weeks, most new Turkers earn $2 to $4 per hour. Low-paying image tagging and $0.01 receipt transcription tasks are everywhere. Beginners often accept them without checking the maths.
A HIT paying $0.10 that takes five minutes is a $1.20 hourly rate. That is not worth it.
The first milestone is reaching 100 approved HITs, which unlocks access to a wider pool of tasks. The next milestone is 500 HITs, followed by 1,000. Each threshold opens up better-quality work from requesters who require a proven track record.
Intermediate Workers (3 to 12 Months)
Once you have a few hundred approved HITs and have learned the community tools, earnings improve noticeably. Experienced Turkers on Side Hustle Nation report averaging $6 to $12 per hour on typical sessions, with some surveys hitting $12 to $22 per hour when they arrive at the right time.
The key shift at this stage is selectivity. Rather than accepting whatever is available, intermediate workers learn to filter by effective hourly rate, check requester ratings on Turkopticon and focus on task types where they are genuinely quick.
A realistic monthly target at this stage is $100 to $300 per month, working an hour or two each day. That is not a life-changing amount, but it is consistent beer money that requires no commute and no boss.
Experienced Workers (12 Months and Beyond)
Experienced workers who have put in the time to build strong qualifications, learn the community forums and use the right browser tools can earn $10 to $20 per hour on good days. One well-cited example is Michael Naab, a business consultant who has completed over 95,000 HITs since 2013. In a typical month, he completes around 4,000 HITs and earns roughly $1,000 part-time. That works out to around $200 per week from a side hustle he fits around his main job.
That $1,000 per month figure represents the practical ceiling for most dedicated part-time workers. It is achievable but requires consistent effort, smart tool use and the willingness to treat MTurk like a system rather than a casual pastime.
A very small group of Super Turkers, who work six to eight hours per day and use automation scripts to grab high-paying batch work, can earn more. Some report $50 to $100 on good days. But this is not a sustainable model for most people. The work required to reach it is not proportional to the return.
Not all HITs are equal. Knowing which task types pay best for the time invested changes everything about your MTurk experience.
Academic and Research Surveys
Surveys posted by university researchers are among the best HITs on the platform. They pay more than commercial surveys, they are clearly described, and the requesters tend to be reliable.
A well-designed academic survey might pay $3 to $5 for 15 to 20 minutes of work. That puts the effective rate at $9 to $20 per hour. These do not appear every day, but they are worth prioritising when they do.
Batch Work
Batch tasks are large collections of nearly identical HITs posted by a single requester. If the pay rate is good, you can complete them quickly because the learning curve is zero after the first one.
Finding a good batch at $0.15 to $0.25 per HIT that you can complete in 20 to 30 seconds each produces a strong hourly rate. Batch work is where experienced Turkers earn their best, consistent money.
Transcription
Transcribing short audio clips pays better than image tagging and data labelling. The key is to find transcription HITs that pay fairly for the length of audio involved.
Many low-quality transcription HITs pay $0.01 for work that takes two minutes.
Good ones pay $0.50 to $2.00 for clips under a minute. The difference is enormous.
Data Verification and Business Listings
Verifying business information, checking whether websites are live or confirming that product listings match their descriptions are all solid HIT types. They require no writing, they are quick to complete, and the rejection rate is low because the expected output is clear.
The Tools That Improve Your Earnings
Raw effort alone will not get you to a respectable hourly rate on MTurk. The Turkers who earn well use tools that non-users simply do not have access to.
Turkopticon is a browser extension that shows requester ratings compiled by the MTurk community. Before accepting any HIT, experienced workers check whether the requester has a history of approving work fairly and paying promptly. Some requesters systematically reject submissions to avoid paying. Turkopticon helps you avoid them.
MTurk Suite is a browser extension that adds features to the MTurk dashboard, including a projected earnings tracker, a HIT finder that alerts you when high-value tasks appear and a way to track your hourly rate in real time.
The MTurk Crowd and Reddit’s r/mturk community are forums where experienced workers share which HITs are worth doing, warn others about bad requesters and post tips on new batch work. Joining these communities early significantly shortens the learning curve.
Mmmturkeybacon is a script that tallies your projected earnings for the day so you can track progress without manually counting tasks.
These tools together can lift your effective hourly rate from $3 to $4 per hour up to $8 to $12 per hour or more, simply by helping you work smarter rather than harder.
To understand the reality of MTurk income, it helps to think about what a typical session involves. You log in, check the forums for any high-value HITs that have been posted, sort the dashboard by pay and filter out low-value tasks. Then you complete HITs for one to two hours, tracking your rate and adjusting your approach as you go.
On a good day, you find a solid batch that pays $0.20 per HIT and takes 25 seconds each. That is $28.80 per hour.
On a slow day, good HITs are scarce, and you end up completing surveys for $6 to $8 per hour. On a poor day, you log in, see nothing worth your time and log off.
Unpredictability is one of MTurk’s biggest drawbacks as an income source. The best work appears at specific times, often during US business hours on weekdays. Workers online only in the evenings or at weekends consistently miss the best opportunities.
The Honest Pros and Cons
A balanced look at MTurk means acknowledging both sides clearly.
What works well: The sign-up process is simple. There are no qualifications needed to start. The platform is legitimate and backed by Amazon.
You can work for 10 minutes or two hours, entirely on your own schedule. Earnings are transferred directly to your bank account with no minimum threshold. For people who want to earn small amounts of money consistently without any commitments, MTurk delivers on that.
What does not work so well: The pay is low, especially when you are starting out. There is no guaranteed income because HIT availability fluctuates.
Some requesters reject work unfairly. You have limited recourse when they do.
Reaching a meaningful hourly rate takes months of learning and consistent effort. The income is fully active, not passive. Every dollar requires your direct time and attention.
According to the overview at Career Karma, only a small fraction of MTurk workers ever earn above minimum wage. Most use it as supplemental income rather than a primary source of money.
Is MTurk Worth Your Time?
The honest answer is: it depends on what you are trying to achieve.
If you want a reliable way to earn $20 to $50 per week without any specific skills, commitment or schedule, MTurk can deliver that once you have learned the basics. It suits students, stay-at-home parents, retirees and anyone with blocks of free time at the computer who wants to convert those hours into modest cash.
If you are hoping MTurk will replace a real income or grow significantly over time, the data says otherwise. The ceiling on MTurk earnings is low. There is no compounding.
The more hours you put in, the more you earn, but there is no point at which the income begins to grow without more of your time. That is the fundamental limitation of micro-task work as an income model.
Every hour on MTurk is an hour that could be spent building something that compounds. A blog, a content site or an affiliate portfolio all require similar time upfront but offer far higher income potential over 12 to 24 months.
A Smarter Alternative Worth Considering
If the question of how much money can you make with Amazon Mechanical Turk has led you here because you are genuinely looking for a way to earn online, MTurk is a reasonable starting point for an immediate small income. But it should not be your long-term strategy.
Building a content site around a niche you know and monetising it with affiliate marketing takes longer than completing HITs. But once the income starts, it does not stop when you step away from your computer. An article you write today can earn commission clicks for the next five years. That is a fundamentally different model from trading minutes for cents.
It covers the first steps of building a content business around affiliate income, with honest timelines and no get-rich-quick promises.
How to Get Started on MTurk
Getting set up is straightforward. You need an existing Amazon account, or you can create one for free at mturk.com. Click “Get Started with Amazon Mechanical Turk” on the worker page and follow the sign-up steps.
You will need to provide your name, address and a Social Security number for tax purposes. MTurk requires an Amazon Payments account to process earnings. This takes one to three days to verify.
Once approved, you can start browsing HITs right away. There is a 10-day waiting period after your first HIT before you can transfer earnings. After that, you can set up transfers every 3, 7, 14 or 30 days.
Only workers in the US and India can withdraw earnings as cash. Workers in other countries receive their pay as Amazon gift cards instead.
MTurk vs Other Side Hustles: How Does It Compare?
It helps to put MTurk earnings in the context of other online income options available to someone starting from scratch.
Online surveys through platforms like Swagbucks or Prolific pay similarly to MTurk for comparable tasks. Prolific is generally considered to pay better per hour for its survey work.
Freelance writing on platforms like Upwork pays $15 to $50 per hour for someone with a basic writing portfolio. The earning ceiling is far higher than MTurk, and the rate improves with experience in a way that MTurk rates do not.
Transcription services like Rev and TranscribeMe pay $0.45 to $1.25 per audio minute. For someone who types quickly, this can outperform MTurk transcription HITs significantly.
Affiliate marketing through a content website is slower to start, but the income does not stop when you step away. An article ranking on Google today earns commissions every day without additional work.
The comparison matters because your time is finite. MTurk is not a bad option for earning small amounts quickly. But it competes poorly with alternatives that build income over time rather than resetting it every day.
How Workers Maximise Their MTurk Income
The workers who earn the most on MTurk share a few common habits that most beginners overlook.
They are patient in the early phase. Building up to 1,000 approved HITs takes time, especially at the start. But hitting that threshold opens access to a significantly better pool of tasks. Treating the early months as qualification-building rather than helpfully income-generating resets expectations.
They work during peak hours. Logging in between 9am and 3pm Eastern Time on weekdays consistently produces more good HITs than evening or weekend sessions. The platform’s most active requesters post during business hours.
They track their effective rate. Workers who monitor their hourly rate during sessions quickly learn which task types are worth their time. Some MTurk Suite features make this tracking automatic, so you can stop mid-session if a batch stops being worth it.
They build a niche. Some workers become fast at specific task types, such as audio transcription or sentiment tagging. Speed in a familiar task type lifts the effective hourly rate without any improvement in the base pay rate.
If you do want to use MTurk, these habits make a real difference.
Never accept a HIT without checking the effective hourly rate first. Divide the pay by the estimated time in hours. Anything below $6 per hour is generally not worth accepting unless there are very few better options.
Check requester ratings on Turkopticon before starting any new task type. A requester with a poor approval rating or a history of rejecting work for unclear reasons will waste your time.
Work during US business hours on weekdays when possible. The best HITs appear on a regular schedule and are snapped up within minutes. Early access requires being online at the right time.
Build your qualification count steadily. Reaching 1,000 approved HITs with a high approval rate opens significantly better tasks. Treat the early months as an investment in unlocking better work later.
Join the MTurk community on Reddit and bookmark the forums. The collective knowledge of experienced Turkers is one of the most valuable free resources available.
The Verdict on Amazon Mechanical Turk
MTurk occupies a specific and honest niche in the world of online income. MTurk is not a scam. It is not a path to financial freedom either. What it does offer is a real way to earn small, consistent amounts of money from a computer without any upfront investment or specialist skills.
For beginners curious about how to earn online for the first time, MTurk is a useful introduction. You learn how micro-task platforms work, you earn a small amount while learning, and you graduate to better options once you understand the landscape.
For anyone looking to replace a meaningful income or build something that grows, MTurk is the wrong starting point. The ceiling is too low. The work is too repetitive. Your hourly rate improves with effort, but never truly transforms.
Use it for what it is. Supplement your income for a few months while you build something with real long-term potential. Then make that the focus.
So, how much money can you make with Amazon Mechanical Turk? For most workers, the realistic range is $2 to $12 per hour depending on experience, tools and the quality of available work. A committed part-time worker who applies smart strategies for over 6 months or more can reach $100 to $300 per month. Exceptional cases like Michael Naab demonstrate that $1,000 per month is achievable for someone treating MTurk as a consistent part-time system, but this represents the top end of what most people can realistically sustain.
MTurk is legitimate, flexible and accessible. It earns real money. But it rewards your time rather than growing beyond it, which limits how far it can take you. If your goal is an income that builds over time rather than one that resets every time you close your laptop, the smarter path is to start building something now alongside whatever MTurk income you earn in the short term.
Affiliate Disclosure: This page contains affiliate links. If you click through and make a purchase, I may earn a commission at no extra cost to you.
How to Make Money by Making a Website: 9 Proven Ways That Work
If you have ever wondered how to make money by making a website, you are asking a great question. It is also one of the most searched topics in online business.
The good news is that you do not need a computer science degree, a large budget, or a big following to get started.
Thousands of ordinary people build websites every year that go on to earn real income. Some use it as a side hustle. Others grow it into a full business. This guide walks you through every proven method, what each one earns and what it takes to get started.
Why a Website Is One of the Best Income Assets You Can Build
A website is different from a job. When you stop working a job, the income stops. When you build a website properly, it keeps generating income while you sleep, travel or focus on other things.
The content you publish today can attract visitors and earn commissions or ad revenue for years. That is the power of building a digital asset rather than trading time for money.
The setup cost is genuinely low. A domain name costs around $12 per year. Hosting runs from $5 to $15 per month at the entry level.
A basic WordPress site can be live in an afternoon. From there, the investment is your time and your consistency.
This does not mean websites print money by themselves. You need to build traffic, earn trust and choose a method that suits your niche.
But the ceiling on what a well-built site can earn is high. Established content sites sell for 30 to 40 times their monthly revenue. A site earning $3,000 per month can sell for $90,000 to $120,000. That is a real financial asset, not just a side income.
Affiliate marketing is the most popular way to monetise a website. It is also the one I recommend most strongly for beginners. You write content that helps readers solve a problem, including tracking links to relevant products and earn a commission every time someone clicks through and buys.
You do not handle stock, customer service or refunds. Your job is to create helpful content and build an audience that trusts your recommendations. The commission comes from the seller, so there is no extra cost to the reader.
Commissions vary widely by niche. Physical product programmes like Amazon Associates pay 2% to 8%, depending on the category. Software and SaaS tools pay far more, often 20% to 60% recurring.
A single software referral that pays 40% on a $47 per month plan earns you $225.60 over 12 months from one click. Scale that across dozens of referrals, and the income compounds quickly.
The best niches are those where people search for recommendations before buying: software tools, online education, finance products, health supplements and home goods. If your content helps someone choose between two products or decide whether something is worth buying, you are in a strong position to earn.
Method 2: Display Advertising
Display advertising means placing ads on your site and earning money each time a visitor sees or clicks on one. Google AdSense is the most common starting point. It is beginner-friendly, easy to install and starts earning as soon as you have a reasonable amount of traffic.
The honest caveat is that display ads need volume to generate meaningful income. A site with 5,000 monthly visitors might earn $10 to $30 per month from AdSense. But a site with 100,000 monthly visitors with a premium ad network like Mediavine or Ezoic can earn $1,000 to $5,000 per month from ads alone.
Display advertising works best as a secondary income stream alongside affiliate marketing rather than the primary monetisation method from the start. As your traffic grows, your ad revenue grows with it passively. Many bloggers find that adding ads to a well-trafficked site doubles their income without any extra work.
Method 3: Selling Digital Products
Digital products are among the most profitable things you can sell from a website. You create them once and sell them repeatedly with no inventory cost, no shipping and no production overhead. A well-positioned digital product can generate income for years from a single piece of work.
The global digital goods market is valued at around $124 billion as of 2025 and is growing fast. Examples of strong digital products include e-books, templates, guides, workbooks, spreadsheets, Lightroom presets, website themes and prompt packs for AI tools. The key is to solve a specific problem for a specific audience at a price that feels like a no-brainer.
A helpful guide to digital product monetisation from Elegant Themes shows how combining digital products with other income streams is one of the fastest ways to grow website revenue.
For a personal finance site, a budgeting spreadsheet template sells well. For a fitness site, a 12-week workout plan PDF sells. Design-focused sites do well selling Canva template packs. Tools like Gumroad, Payhip and Shopify make it simple to list and deliver digital products with no technical setup.
Method 4: Online Courses
Online courses are an extension of the digital product model, but at a higher price point. Rather than selling a PDF for $27, you package your knowledge into a structured learning experience that can sell for $97, $297 or more. The e-learning market is projected to reach $491 billion by 2025. Demand for practical, well-taught courses continues to grow.
The advantage of hosting a course on your own website rather than Udemy or Skillshare is that you keep full control of pricing, your audience and your brand. You can build an email list from your students, launch follow-up products and earn recurring income through a membership tier.
Teachable and Thinkific connect directly with your site and handle course hosting, payment processing and student access. You focus on the content. They handle the technical side. A course that solves a genuine problem in your niche and is priced fairly will sell steadily once you have traffic and trust built up.
Method 5: Sponsored Content and Brand Partnerships
Once your site attracts a steady audience, brands in your niche will pay to get in front of that audience through sponsored posts, product reviews or banner placements. Sponsored content generates 59% more brand recognition than traditional display ads. That is why brands allocate real budget to it.
Rates vary significantly. A small niche blog with 10,000 monthly visitors might charge $200 to $500 for a sponsored post. A larger site with 100,000 monthly visitors in a premium niche can charge $2,000 to $5,000 or more per placement.
The key is to be selective. Taking money from brands whose products conflict with your audience’s interests destroys trust quickly. One poor-fit sponsorship can do more damage than ten good ones can undo.
The right approach is to only partner with brands you would genuinely recommend to a reader who trusts your advice. That standard keeps your site’s authority intact and makes your sponsorships feel like recommendations rather than advertisements.
Method 6: Membership Sites and Paid Newsletters
A membership model charges readers a recurring fee for access to premium content, a community, tools or exclusive resources. Even a modest number of paying members adds up fast. One hundred members paying $10 per month equals $1,000 in recurring monthly income. Five hundred members at the same rate equals $5,000 per month.
Membership works best when your free content is already strong. People pay for the upgrade because they trust you with what you give away. A fitness blogger might offer free weekly tips and charge members for a private group, personalised training plans and access to a recipe database. A marketing educator might offer free articles and charge members for templates, case studies and monthly Q&A calls.
WordPress has solid membership plugins like MemberPress and Restrict Content Pro. Both make setting up a gated section of your site easy. Patreon and Substack are good alternatives if you want minimal technical setup while still building a paid audience.
Method 7: Freelance Services
Your website can also serve as the front door to your own services business. A well-built site that demonstrates your expertise in writing, design, SEO, web development, photography or any other skill can attract inbound clients who are ready to pay.
This is not passive income, but it is often the fastest way to earn from a new site. You do not need high traffic to land clients. Just the right message, a strong portfolio and a contact form will do. Three or four regular clients paying $500 to $2,000 per month each can produce a full-time income from a site with very low traffic.
The smart long-term play is to use service income to fund your site’s growth and then gradually shift towards more scalable income streams like affiliate marketing or digital products as your traffic builds. Services give you the cash flow to stay in the game while the passive income catches up.
Method 8: Flipping Websites
Website flipping is the practice of building a site, growing its traffic and income and then selling it for a multiple of its monthly earnings. The standard multiple for content sites sits at 30 to 40 times monthly net revenue. A site earning $500 per month consistently can sell for $15,000 to $20,000. A site earning $3,000 per month can sell for $90,000 to $120,000.
Sites like Flippa and Empire Flippers make it easy to buy and sell websites. Buyers are usually investors who want to acquire an income-generating asset rather than build one from scratch. Sellers are often site builders who prefer to take a lump-sum payout and start the process again with a new project.
Flipping is a skill that takes time to develop. Your first site may not sell for a premium, but each one you build teaches you more about what makes a site valuable. Clean traffic data, steady affiliate income and a clear growth path make a site most attractive to buyers.
Lead generation websites capture contact information from visitors who are interested in a specific product or service and sell those leads to businesses that need customers. A site covering car insurance quotes, mortgage rates, or home renovation can earn $10 to $200 per lead, depending on the market.
You build a site that ranks for high-intent searches, collects enquiry forms and passes the leads to local businesses or national advertisers. The business pays you for every qualified lead, regardless of whether they close the deal. Your job is to get the right people to the right place.
This model can be highly profitable but does require more upfront research into which industries pay well for leads and what the legal requirements are in each vertical. Finance and insurance leads tend to pay the most but have stricter compliance requirements. Home services like plumbing, roofing and HVAC offer good rates with simpler compliance.
How Much Can You Realistically Earn?
The income range for website owners is enormous. A beginner site in its first six months might earn $0 to $100 per month. A site with consistent effort at 12 months typically earns $200 to $1,000 per month. At the 2-year mark, with strong content and a clear strategy, $2,000 to $5,000 per month is very achievable.
The Elementor guide to website monetisation makes the point clearly: passive income from a website requires real upfront work in content creation and traffic building. But once the foundation is in place, the income is far more stable and scalable than most people expect.
The key variable is not talent or budget. It is consistency. It is consistency and time horizon. The people who earn high incomes from websites are the ones who kept publishing and improving for 12 months or more before expecting results.
What Makes a Website Actually Earn
A website earns money when three things work together: traffic, trust and a method that matches what the audience needs. Removing any one of those three breaks the chain.
Traffic without trust produces clicks but no conversions. Trust without traffic produces no income at all. A strong monetisation method without the right audience earns nothing. Getting all three working together is the work of building a website properly.
Traffic comes from search engine optimisation, which means writing content that answers specific questions your audience is searching for. It also comes from Pinterest, email referrals and social sharing. SEO is the most reliable long-term traffic source. An article that ranks on Google’s first page for a relevant search brings visitors every day without ongoing effort.
Trust comes from being genuinely helpful over a long period. It builds slowly and compounds with every article, every honest recommendation and every email you send. It can be lost quickly with one misleading post or a poor-fit sponsorship. Protect it.
Alignment means choosing income methods that fit your audience’s buying habits. A reader looking for a free budgeting guide is unlikely to buy a $2,000 course as a first step. A reader who has followed your software reviews for six months is far more likely to click an affiliate link you recommend. Always match the offer to where your reader is in their journey.
Choosing Your Starting Point
If you are new to this and trying to work out where to begin, the answer is simpler than it might seem. Pick one niche, build a clean WordPress site, publish helpful content around the questions your audience is asking and add affiliate links as you go.
Do not try to launch five income streams at once. Start with affiliate marketing because it requires no product creation, no customer management and you can start earning from your first few articles.
Add display ads once your traffic grows. Consider a digital product or course once you have 500 or more subscribers on your email list. Layer the income streams gradually as your site grows.
The tools and platforms exist to help you build every part of this. What matters more than which tools you choose is that you start. Stay consistent and keep your readers’ interests ahead of your own short-term income goals.
It covers the exact starting steps I recommend, the tools worth using and the affiliate programmes that offer the best returns for content site owners.
How to Build Your Website the Right Way
Getting the foundation right makes everything that follows easier. A site built on the wrong platform, in the wrong niche or with no keyword strategy will struggle no matter how much content you publish.
Choose a Niche With Buyer Intent
The best niches for making money with a website are those where readers are trying to solve a specific problem or make a buying decision. How-to guides, product comparisons, reviews and tutorials all attract people who are close to taking action.
Avoid niches that are too broad. “Travel” is too broad. “Budget travel in Southeast Asia for solo women” is a niche. The more specific your focus, the less competition you face and the more your content stands out to the exact reader you want.
Set Up on WordPress
WordPress is the right platform for a site you want to monetise. It is flexible, well-supported and works with every affiliate programme, ad network and digital product platform available. A basic WordPress site on a reliable host like Bluehost or SiteGround can be up in under an hour.
Your site does not need to be beautiful to earn money. It needs to be fast, clean and easy to read. A simple theme with white space and clear headings is more effective than an elaborate design that slows your pages down.
Build for Search From Day One
Every article you write should target a specific keyword that your audience types into Google. Use a free tool like Google Keyword Planner or a paid tool like Jaaxy to find topics with real search volume and low competition.
Write articles that answer one question well rather than trying to cover everything in a single post. A 1,500-word article that fully answers one question will outperform a 5,000-word article that tries to cover ten questions poorly.
Consistency matters more than frequency. One well-researched article per week, published every week for a year, builds a content library of 52 articles. That is enough to generate real traffic, real affiliate clicks and real income if the topics are well-chosen.
The Mindset That Makes It Work
Many people start a website and abandon it after two or three months, when traffic is still low, and income is near zero. This is the most common point of failure. It is also the most avoidable.
A website is a long-term asset. The first three months are almost always the hardest. Traffic is slow. Revenue is small.
Progress feels invisible. But the work you do in those early months is what drives the results you see in months nine, twelve and beyond.
Keep your focus on producing one genuinely useful piece of content per week, building your email list from day one and choosing the right affiliate programmes for your niche. Everything else follows from those three habits.
Learning how to make money by making a website is less about secrets or shortcuts and more about understanding which methods work, matching them to your niche and putting in the consistent effort that most people give up on too early. All nine of the methods covered here work. The ones that work best for you will depend on your skills, your niche and how much time you are willing to invest upfront before the income starts to grow.
A website built with genuine care for its audience and consistent, useful content can become one of the best financial decisions you ever make. Starting costs are low. The income ceiling is high. The asset you build is yours.
That combination is hard to beat. Start today, stay consistent and revisit the question of how to make money by making a website in 12 months when your numbers tell the real story.
Affiliate Disclosure: This page contains affiliate links. If you click through and make a purchase, I may earn a commission at no extra cost to you.
Can You Get Paid to Write a Blog? Yes, But Here Is What Nobody Tells You
Can you get paid to write a blog? The short answer is yes. It happens more often than most sceptics would have you believe.
The longer answer is that blogging income rarely appears quickly. It does not look the same for everyone. The path to real money from writing a blog is quite different from what the shiny course adverts suggest. This article gives you an honest breakdown of every way bloggers get paid, what those income streams actually earn and what it takes to build something real.
What It Means to Get Paid to Write a Blog
When people ask can you get paid to write a blog, they are usually imagining one of two scenarios. Either they picture writing freely about topics they love and earning money from that, or they picture getting hired to write blog posts for someone else’s website.
Both are legitimate paths. Both are real. They just work very differently and attract different types of people.
Writing your own blog and monetising it is the more common starting point. You build a site, publish content regularly, attract an audience and introduce income streams once you have enough readers to make them worthwhile. This takes longer, but the income can become passive over time. It arrives even when you are not actively working.
Freelance blog writing for clients is a faster route to cash. You write posts for businesses, brands and publications that need content and do not want to create it in-house. You get paid per post or per hour, sometimes very well, without needing to build your own audience first.
Both paths have merit. Many bloggers do both at the same time. The key is understanding which one fits your goals and your timeline.
The income range in blogging is enormous. Some bloggers earn nothing. Others earn 6 figures per month. The useful question is what is realistic for someone starting now with consistent effort, not what is possible at the extreme ends.
According to a detailed annual survey published by Productive Blogging, which surveyed bloggers across experience levels in 2025, there is a strong correlation between the number of posts published and the income earned. Bloggers who publish more consistently over a longer period earn significantly more than those who publish sporadically.
A beginner blog in its first 6 to 12 months typically earns $0 to $500 per month. A blog with one to two years of consistent content earns $500 to $3,000 per month with a clear strategy. Established blogs with strong traffic and multiple income streams often earn $5,000 to $20,000 per month. A small group of authority bloggers earn well above that figure, but they represent the top tier rather than the norm.
For freelance blog writers, Indeed reports that the average base salary for a blogger in the United States sits at around $35,666 per year.
Freelance rates vary widely. A beginner might charge $50 to $100 per post. An experienced writer with a specialist niche can charge $200 to $500 or more per post. The very best command $1,000 and upward for complex, long-form content in high-demand niches.
The Main Ways to Get Paid to Write a Blog
There is no single method that works for everyone. The bloggers who earn the most use several income streams that reinforce each other. Here is a breakdown of the most reliable ones.
Affiliate Marketing
Affiliate marketing is the backbone of income for many bloggers. You write content that helps readers make decisions, including tracking links to products and earn a commission when someone clicks through and buys. You do not manage inventory, handle customer service or deal with refunds. Your job is to write content that genuinely helps.
Commissions vary by programme. Amazon Associates pays 2% to 8% on physical products. Software affiliate programmes pay far more, often 20% to 60% recurring. A single well-placed affiliate link in a ranked post can earn commissions for years without extra work.
The key is writing content that matches buyer intent. Someone searching for the best email marketing software for small teams is actively looking to buy. If your article ranks for that search and gives a thorough, honest answer, your click-through rate will be strong. That is how the income builds.
Display Advertising
Once a blog attracts steady traffic, display advertising becomes a passive income layer you can add with no new content required. You join an ad network, place a code snippet on your site and earn money each time a visitor sees or clicks an ad.
Google AdSense is the starting point for most bloggers. The pay per thousand views is modest, often $2 to $10, depending on the niche. At 25,000 to 50,000 monthly page views, premium networks like Mediavine or Ezoic become available. These networks pay significantly higher rates, often $15 to $50 per thousand views for lifestyle, food and finance content.
Display advertising alone will not make a blog rich until traffic is substantial. But combined with affiliate marketing, it adds a second income layer that grows with your audience.
Sponsored Posts and Brand Partnerships
Brands pay bloggers to write posts that feature their products or services. The rate depends on your audience size, engagement rate and niche. A blogger with 10,000 monthly readers might charge $200 to $500 per sponsored post. A blogger with 100,000 engaged readers in a premium niche can charge $2,000 to $5,000 or more.
The important distinction is between authentic partnerships and pure advertising. Readers can tell the difference. Sponsored content that fits naturally with the blog’s topics converts well for the brand and builds trust with readers. Forced or irrelevant sponsored content damages the relationship you have built with your audience.
As your blog grows, brands in your niche will begin to approach you. Before that happens, platforms like Clever, Blog Meets Brand, and Mediavine Connect help bloggers find relevant sponsorship opportunities.
Your blog serves as a live portfolio of your writing skills and your knowledge of a niche. Businesses searching for content writers often find bloggers through their sites and reach out directly. You can also actively pitch your services to companies whose content needs align with what you write about.
Freelance writing for clients runs separately from your own blog income but uses the same skills. The advantage is immediate cash flow. The disadvantage is that client work takes time away from your own blog.
According to data covered by Master Blogging, freelance writers in the United States earn an average of $68,767 per year when writing for brands. This figure reflects experienced writers in strong niches, but it demonstrates the ceiling available to writers who build a reputation.
Adding a hire me page with your best work and the types of content you offer gives potential clients a clear path to reach you. Many bloggers earn their first consistent income this way while their own traffic is still growing.
Digital Products
Digital products are one of the most scalable ways to earn from a blog. You create an e-book, template pack, mini-course or printable worksheet once and sell it repeatedly without ongoing effort. There is no inventory, no shipping and no production cost.
The blog builds the audience and the trust. The digital product converts that trust into income. A well-positioned product that solves a specific problem can sell steadily for years from a single optimised post.
Pricing varies by product type. E-books commonly sell for $10 to $50. Template packs sell for $20 to $100.
Mini-courses sell for $50 to $200. Full online courses sell for $100 to $2,000 or more, depending on depth and delivery method. The margins on digital products are extremely high compared to physical goods or services.
Online Courses and Memberships
An online course is an extended version of the digital product idea. Rather than packaging knowledge into a downloadable file, you structure it as a learning journey with lessons and exercises.
Bloggers who build genuine expertise over time often find that readers want to learn from them in a structured way. A blog that consistently helps people start successful side businesses, improve their finances, master a creative skill or grow plants from seed can build a course around that knowledge and charge a meaningful price for it.
Membership programmes work on the same principle but charge a recurring fee. Members pay a monthly or annual fee for premium content, a community forum or a resource library. Even 100 members paying $15 per month produce $1,500 in recurring monthly income that does not reset when you step away.
This is the question most new bloggers want answered. It is also where honest guidance is hardest to find. The truth is that the timeline varies depending on your niche, your consistency, your SEO knowledge and how well your monetisation strategy suits your audience.
A blogger who publishes two to three quality posts per week with a clear SEO strategy can expect $0 in months one to three, small commissions in months three to six and a meaningful income of $500 to $2,000 per month by the end of year one. Survey data from 2025 shows that around 30% of bloggers start earning within six months.
The bloggers who earn sooner tend to share a few traits. They chose a niche with strong buyer intent, meaning readers are looking to spend money rather than just looking for free information. Building an email list from day one enabled them to promote products to their audience directly. Search traffic was prioritised over social media, knowing that a well-ranked article keeps working indefinitely while a social post disappears in hours.
What Kind of Blog Gets Paid?
Not every blog topic earns equally. The niches that attract the most monetisation opportunity are those where readers are looking to solve expensive problems or make purchasing decisions.
Personal finance, online business, software reviews, health and wellness, food and parenting are all strong-performing niches. These topics attract advertisers willing to pay well, affiliate programmes with solid commissions and readers who buy products related to their interests.
Niche blogs that go deep on one specific topic often outperform broad blogs covering many subjects. A blog specifically about budget travel in Southeast Asia will find its audience faster and build more authority than a blog about travel in general. Specificity builds trust, and trust converts.
The blog topic should be something you can write about consistently. You do not need formal qualifications. You need to understand your audience’s problems better than they can describe them. That empathy produces content that ranks and converts.
The Tools You Need to Start
You do not need expensive tools to start a blog that pays. A domain name costs around $12 per year. Hosting costs $5 to $15 per month at the entry level. A basic WordPress installation is free.
What matters more than tools is content quality and how well each post is optimised for search. Every post should target a keyword that real people type into Google. It should answer that query better than the existing results. It should include internal links to related posts on your site and external links to authoritative sources.
An email sign-up form is not optional if you are serious about earning from your blog. Your email list is an asset you own entirely. Search rankings can shift overnight with an algorithm update. Your list stays yours regardless of what happens on any platform.
A Realistic Starting Plan
If you are serious about getting paid to write a blog, here is a grounded starting framework. Choose a niche with genuine buyer intent and enough topics to sustain a content library of 50 or more posts. Set up a clean WordPress site with a simple, fast theme. Commit to publishing at least two quality articles per week for six months before evaluating results.
Join one or two affiliate programmes relevant to your niche right from the start. Even with low initial traffic, including affiliate links from the start trains you to think about monetisation early. Add an email opt-in and start building your list from your first visitor.
Track your keyword rankings, your traffic, and your affiliate clicks monthly. The data shows what is working and where to focus. Blogging rewards people who learn from their results and adjust. It does not reward those who publish blindly and hope for the best.
Many people overlook a straightforward way to get paid to write a blog: writing for someone else. Businesses, publications and established bloggers regularly hire freelance writers to produce content for their sites. They need fresh material, they do not always have time to produce it, and they are willing to pay well for someone who can deliver it reliably.
Platforms like Upwork, ProBlogger Job Board and LinkedIn are full of content writing opportunities. You create a profile, submit writing samples and pitch for jobs in your niche.
A beginner can expect $50 to $150 per post at this stage. With experience and a strong portfolio, that figure rises to $300 to $700 per post. Specialist writers in technical, legal, finance or software niches often charge more.
The advantage of this route is speed. You start earning within days or weeks rather than months.
The disadvantage is that you are trading time for money without building your own asset. Every article you write for a client earns you a one-time payment. Every article you write for your own blog keeps earning in perpetuity.
The smart move is to do both. Use client writing work to fund your living expenses and invest the time you have left into your own blog. After 12 to 24 months, your blog starts to produce its own income, and the reliance on client work decreases.
Building Your Blog’s Email List From Day One
One of the most common mistakes new bloggers make is waiting until they have significant traffic before building an email list. The email list is not a reward for building traffic. It is the tool that helps you convert that traffic into income.
Every visitor to your blog is a potential subscriber. A person who joins your email list is signalling a genuine interest in what you write about. They have chosen to let you into their inbox, which is a significant act of trust. That trust converts at far higher rates than cold search traffic.
A simple lead magnet makes the opt-in compelling. Offer something specific and useful in exchange for an email address. A free template, a checklist, a short guide or a resource list relevant to your niche all work well. The more closely it relates to the problem your readers are trying to solve, the better the conversion rate.
Once you have a list, you can introduce products, announce affiliate deals and share new content directly with people who actually want to hear from you. A list of 500 engaged subscribers who trust your recommendations is worth far more for monetisation than 10,000 monthly visitors who land on your site from search and never return.
The Niche Decision: Getting It Right From the Start
Choosing the wrong niche is one of the most common reasons blogs fail to earn. This does not mean you need to be passionate about a commercially popular topic. It means you need to understand how your niche earns and whether the audience has money to spend.
A blog about luxury travel for budget travellers creates a contradiction. The audience is looking for free or cheap options. Monetising them is difficult.
A blog about affordable ways to travel to Southeast Asia as a digital nomad attracts an audience actively looking to spend money on experiences, tools and resources. The products and affiliate programmes in that niche align with what readers are already buying.
Before committing to a niche, spend an hour researching the affiliate programmes available, the types of sponsored content brands in that space pay for and the search volume around buying-intent keywords. This research takes very little time, but it can save months of effort in a niche that cannot be monetised effectively.
Common Questions About Getting Paid to Blog
How long before a blog earns $1,000 per month? For most bloggers, reaching $1,000 per month consistently takes 12 to 18 months of regular publishing with a sound monetisation strategy.
Some niches get there faster. Others take longer. The key is consistent output and a willingness to learn from your data along the way.
Do you need a huge audience to earn? No. A small, highly targeted audience converts at far higher rates than a large, general one. A blog with 2,000 monthly visitors in a specific niche can outperform one with 20,000 visitors in a broad, hard-to-monetise topic.
Is blogging worth starting in 2025? Yes. Search traffic continues to grow. Affiliate programmes are more generous than ever.
The tools available to bloggers have never been better. The competition exists, but it rewards quality over volume, which plays to the advantage of anyone willing to write genuinely helpful content for a specific audience.
Getting paid to write a blog is a genuine and achievable goal. It is not a get-rich-quick scheme. It is not a lottery. Blogging is a skill-based business that rewards consistent effort, strategic thinking and the patience to let content compound.
The bloggers who fail usually give up during the first 6 months before their traffic has time to grow. Those who succeed are not necessarily more talented. They simply kept publishing and improving long enough for the compounding to kick in.
Blogging suits people who enjoy writing, who are curious about their niche and who are comfortable with delayed results. If that describes you, the answer to can you get paid to write a blog is not just yes. It is yes. The potential is far larger than most beginners expect once they have put in the foundational work.
Affiliate Disclosure: This page contains affiliate links. If you click through and make a purchase, I may earn a commission at no extra cost to you.
How Much Money Can You Make With Affiliate Marketing? The Real Answer
If you have spent any time looking into ways to earn money online, you have probably asked: How much money can you make with affiliate marketing? It is one of the most searched questions online, but also one of the most misrepresented.
The internet is full of screenshots showing five-figure months from people who claim to have cracked the code. The truth is more nuanced, more honest and more encouraging than either the hype or the scepticism suggests. This article gives you a clear, data-backed picture of what affiliates actually earn at every stage of the journey.
What Affiliate Marketing Actually Is
Before diving into income figures, it helps to be clear on what affiliate marketing involves. At its core, it means earning a commission by recommending products or services made by someone else.
You share a tracking link, someone clicks it and makes a purchase and you earn a percentage of the sale. No product to create, no customer service to handle and no stock to manage. Your job is to find the right audience, build trust with them and point them towards products that solve their problems.
The commission model varies by programme. Some pay a flat fee per sale. Others pay a percentage of the order value.
The most attractive model for long-term income is recurring commissions. You earn every month for every customer who stays subscribed to a software tool or membership site.
A customer who stays for 12 months on a $47 per month plan with a 40% commission earns you $225.60 from one referral. Scale that to 50 regular customers and the maths becomes very interesting indeed. That is the kind of income that keeps arriving even when you take a week off.
So, how much money can you make with affiliate marketing in real numbers? According to a survey of over 2,270 affiliate marketers by Authority Hacker, the average affiliate marketer earns $8,038 per month across all experience levels. That figure works out to just over $96,000 per year.
However, that average includes a wide spread of earners. A small group of advanced marketers earns enough to pull the average up sharply. The more useful way to look at the data is by experience level, which paints a much more realistic picture of what you can expect at each stage.
Income by Experience Level
Beginners (0 to 12 Months)
Most people starting out earn between $0 and $1,000 per month in their first year. That is not a failure figure. It is a realistic reflection of the time it takes to build traffic, earn trust and get content ranking in search engines.
According to data from Post Affiliate Pro, around 41% of affiliate marketers earn less than $1,000 per month. A significant portion earn nothing at all in their early months because they are still building the foundation.
The beginner phase is about learning, not earning. You are working out your niche, building your content library, getting your first articles to rank and beginning to grow an email list.
Progress during this phase is often invisible. Your traffic is low, your affiliate clicks are few, and your commissions are small or zero. This is completely normal. The people who push through this phase are the ones who go on to build high incomes.
Months three to six tend to bring the first real signs of life. A few articles start to gain traction. Your first affiliate clicks appear in your dashboard.
You might earn your first $10, $20 or $50. Those small amounts matter because they prove the model works. From there, it is a case of doing more of what is working.
Intermediate Affiliates (1 to 3 Years)
By the time you reach the one-year mark with consistent effort, the picture changes considerably. Intermediate affiliates typically earn between $1,000 and $10,000 per month. At this level, you have developed a content strategy that works, you understand your audience, and you have likely built a small but engaged email list.
This is the stage where affiliate marketing starts to feel like a real income rather than a side experiment. A steady $2,000 to $3,000 per month from a blog or content site is enough to cover bills and create breathing room in a tight budget. For many people building alongside a day job, reaching this level within 18 months is a realistic goal with consistent work.
The key driver at this stage is compounding traffic. Each article you publish adds to your total traffic base. Every backlink you earn pushes your rankings higher.
Every email subscriber you add gives you another chance to earn a commission. None of this happens overnight, but all of it builds steadily if you stay consistent.
Advanced Affiliates (3 to 5 Years)
Advanced affiliates who have been building steadily for three to five years typically earn between $10,000 and $100,000 per month. At this level, affiliate marketing has become a full business rather than a side income.
Research shows that affiliates who reach the five-year mark earn 4.46 times more than those just starting. The gap grows further with experience.
Ten-year veterans earn, on average, 6.31 times more than their beginner counterparts. The compounding effect of content, audience trust and search authority is rea,l and it is significant.
Super affiliates sit at the top of the income table. These are the marketers who have built massive audiences across multiple channels, established genuine authority in their niche and created several income streams from their affiliate work. Income at this level can exceed $100,000 per month, with the very top earners generating far more.
To be clear, super affiliate status is not something most people will reach. However, knowing that the ceiling on this income model is extremely high is a useful context. It tells you that the upside is real, even if the majority of people operate well below the peak.
The Factors That Determine How Much You Earn
Knowing that the range runs from zero to six figures is helpful, but it is more useful to understand what actually moves the needle. These are the factors that separate those who earn well from those who do not.
Your Niche
Not all niches are created equal. A niche where the products are inexpensive and commissions are low requires far more traffic to generate meaningful income than a niche where commissions are high and products solve expensive problems.
Finance, software as a service, online business tools and health are among the highest-earning affiliate niches. According to the same Authority Hacker survey data, affiliates in the education and e-learning niche earn an average of $15,551 per month. Those in the travel niche earn $13,847 on average. Finance affiliates average $9,296 per month.
Compare those figures to a niche with 4% commissions on a $20 product. You would need 250 sales per month to earn $200. The same effort in a SaaS niche with a 40% recurring commission on a $97 per month tool earns you far more per customer. Niche choice is arguably the single biggest income lever you have at the start.
Commission Structure
One-time commissions create income spikes. Recurring commissions create stability. If you build a portfolio of recurring affiliate programmes, your income does not reset to zero each month.
Instead, it builds on what you already have. Each new customer you refer adds to a growing base of monthly income.
This is why software and membership-based affiliate programmes are so attractive to serious affiliates. A customer who signs up for a $27 per month tool and stays for two years earns you $648 from a single referral if your commission is 60%. That is the kind of income model that compounds over time in a way that flat-rate commissions simply cannot match.
Traffic Source and Volume
You cannot earn affiliate commissions without traffic. But it is not just about volume. It is about quality. A visitor who is actively searching for a solution to a specific problem is far more likely to click and buy than a passive social media scroller who stumbled across your content.
Search engine traffic from Google is widely regarded as the highest-quality source for affiliate marketing. Someone searching for the best project management software for small teams is already in buying mode. If your content ranks for that search and gives them a genuine, helpful answer, conversion rates are solid. Building content that ranks takes time, but it generates reliable traffic month after month without ongoing ad spend.
Email marketing is another strong channel. An email list of engaged subscribers who trust your recommendations converts at much higher rates than cold traffic. Building a list from day one is one of the smartest moves you can make as an affiliate marketer. Even a small list of a few hundred engaged subscribers can generate consistent commissions if you build the relationship properly before promoting anything.
Content Quality and Trust
Affiliate marketing is a trust business. Your audience has to believe that your recommendations are genuine before they will act on them. Content that reads like a sales pitch repels readers. Content that reads as advice from a knowledgeable friend converts well.
The affiliates who earn the most are not the ones with the most links or the most aggressive calls to action. They are the ones who have spent time building real authority in their niche, who share honest assessments, including the downsides of products and who put their readers’ interests ahead of their own commissions. That approach takes longer to pay off, but it builds something much more durable.
The most underestimated factor in affiliate marketing income is time. Not talent, not budget and not the programme you choose. Time and consistency. The data is clear: income rises sharply with experience, and the biggest jumps happen between years one and three and again between years three and five.
This is why the people who treat affiliate marketing like a genuine long-term business almost always outperform those who approach it as a quick way to earn some cash. The content library you build in year one is still generating traffic and commissions in year three. The email list you start growing today is worth far more in 18 months than it is now.
Realistic Timelines for Each Income Level
It helps to have a rough sense of when you might hit various income milestones, assuming consistent effort and a reasonable niche. These are not guarantees, but they are grounded in real data from thousands of affiliate marketers.
Your first $100: Most new affiliates building content sites hit their first $100 in commissions within six to nine months. Paid traffic channels can get there faster.
$500 per month: With a good niche and consistent content output, reaching $500 per month typically takes nine to fifteen months.
$1,000 per month: This is a common benchmark for side-income success, and most affiliates with a clear strategy reach it within twelve to eighteen months of starting.
$5,000 per month: This level usually requires two to three years of consistent effort and starts to represent a genuine income replacement for many people.
$10,000 per month and beyond: This is the territory of affiliates who have been building for three or more years and have multiple content channels working together.
High-Earning Niches Worth Knowing About
If you are choosing a niche or thinking about expanding into new areas, these are the sectors that consistently produce strong affiliate income.
Software and SaaS tools tend to pay recurring commissions of 20% to 60% per month. The customer lifetime value is high, and the products solve ongoing business problems, which means churn is often low.
Personal finance covers insurance, investing, credit repair and banking products. Commissions range from $30 to over $200 per lead in some programmes.
Online education and courses are a strong space where commissions are often 30% to 50%, and the ticket prices can be several hundred dollars. Health and wellness include supplements, fitness tools and mental health resources. This niche has broad appeal and strong buyer intent.
What Separates Those Who Succeed
One of the clearest patterns in the affiliate marketing income data is the gap between those who treat it like a business and those who treat it like a side project. The ones who succeed share a small number of common traits.
They pick one niche and stay with it long enough to build authority. Content goes out consistently rather than in bursts.
Building an email list starts from day one rather than relying solely on search traffic. They choose affiliate programmes with recurring commissions where possible. Tracking what works and doubling down on it is how they grow.
None of these things are complicated. But all of them require patience and persistence, which are rarer qualities than most people expect.
A Note on Realistic Expectations
It would be dishonest to write a piece on how much money can you make with affiliate marketing without acknowledging the full picture. Most people who start do not earn significant money in the short term.
Many give up before they get to the point where the compounding starts to work. That is not a failure of the model. It is a reflection of the expectations gap between what people expect and what the process actually requires.
The people who do well are the ones who go in with honest expectations, a long enough time horizon and the willingness to publish content and build an audience before expecting significant returns. If that describes you, affiliate marketing is a legitimate path to a high income. If you are looking for a fast return with minimal effort, this is not the right model.
A website is not the only way to do affiliate marketing. But it is the most reliable. Content you publish on your own site works for you around the clock. A blog post you wrote three years ago can still earn commissions today if it ranks well in search and the product is still worth buying.
Social media posts fade quickly. YouTube videos can perform well over time but require ongoing production. A blog built around a clear niche, with helpful content that ranks in Google, is one of the most stable affiliate income assets you can build.
The setup cost is low. A domain name costs around $12 per year. Hosting runs from $5 to $15 per month at the entry level.
A basic WordPress site can be live in an afternoon. There is very little standing between you and your first piece of content.
What takes time is building up enough content to attract regular traffic. Aim for at least 30 well-researched articles before expecting meaningful search traffic. That might take you three to six months at one article per week. Once you have that foundation, the site starts to work on its own.
Should You Use Paid Traffic?
Paid advertising can speed up results. If you run ads for a well-chosen offer, you can earn commissions within days, not months. But paid traffic also carries real risk. If your ads do not convert well, you lose money fast.
Most beginners are better off starting with content and organic search. The cost is time rather than money. The results take longer to appear. But when they do, they are far more stable and do not disappear the moment you stop paying.
Once you have an income from organic content, paid traffic becomes a much safer experiment. You have a proven offer, a tested message and income to cover ad costs. That is the right time to test paid channels, not at the start when every dollar matters.
One More Thing Worth Knowing
The biggest reason most people fail at affiliate marketing is not a lack of talent or the wrong niche. It is quitting too early. Month three with no sales can feel like proof that it does not work. But month three is often just before things start to move.
Every affiliate marketer who earns a full-time income has a story about the period before anything clicked. They all kept going. That is not a coincidence. It is the pattern.
Getting Started on the Right Foot
The first decision that matters is your niche. Choose something you can write about regularly, that has products worth recommending, and that has enough buyer intent in search to generate commissions. Do not try to promote everything. Pick two or three quality affiliate programmes and learn them well.
Build your content around questions your audience is actually asking. Use keyword research to find topics with real search volume and low enough competition for a newer site to rank. Publish consistently, even if that means one article per week rather than five.
Build your email list from day one. Add a simple opt-in offer to your site and start collecting email addresses before you have significant traffic. An email list is an asset you own, unlike search rankings or social media followers, which can shift or disappear.
It is a practical, no-hype guide built for people who are serious about building something real.
Final Thoughts
So, how much money can you make with affiliate marketing? The honest answer is: anywhere from nothing to several thousand dollars per month, depending on how much time you invest, how smart your strategy is and how patient you are willing to be. The average across all experience levels sits at over $8,000 per month according to large-scale survey data. But that average is shaped by people who have been building for years.
For most beginners, the realistic first-year goal is to learn the model and earn your first few hundred dollars per month. From there, the income compounds as your content grows, your audience trusts you and your affiliate links reach more people.
The potential is real. The timeline is longer than the gurus suggest. Anyone willing to do the work consistently and honestly over time will find the path is clear, one article and one email subscriber at a time.
Affiliate Disclosure: This page contains affiliate links. If you click through and make a purchase, I may earn a commission at no extra cost to you.