
How To Create an Online Course With WordPress (Without the Tech Headache)
Indeed, if you have knowledge worth sharing and you want to turn it into income, creating an online course is one of the most powerful ways to do it. However, platforms like Teachable and Kajabi make it look easy, but they take a cut of every sale and charge you monthly whether your course earns anything or not. Fortunately, knowing how to create an online course with WordPress gives you a better option. You own your platform, you keep every dollar you earn, and you build on an infrastructure that can grow with you for years.
Why WordPress Is a Smart Choice for Online Course Creators
In fact, the debate between hosted platforms and WordPress is mostly settled for anyone who has built more than one course.
For example, hosted platforms like Teachable and Kajabi charge between $29 and $199 per month. On top of that, some charge transaction fees of up to 7.5% on every sale. Indeed, over time, those fees add up significantly. Once your course generates $2,000 per month, you could be paying $150 or more in fees alone just for the privilege of using someone else’s platform.
WordPress takes a different approach. The software itself is free. You pay for hosting, typically between $3 and $10 per month on a shared plan.
You buy a learning management system (LMS) plugin for your specific needs. After that, there are no monthly platform fees and no transaction fees on your sales. So, every dollar your students pay goes through your payment processor at the standard 2.9% plus 30 cents and straight into your account.
The other major advantage is ownership. Your course content lives on your own server. Student data belongs to you.
The site looks exactly how you want it to look. If you decide to change payment processors, update your branding or add entirely new products, you can do all of that without asking anyone’s permission.
Furthermore, WordPress powers over 43% of all websites on the internet. The ecosystem of themes, plugins and integrations is unmatched. In fact, whatever you need your course platform to do, there is almost certainly a way to make it happen with WordPress.
Visit my Get Started Here page for a practical walkthrough of how I am building an online income, the tools I recommend and how to get started without spending a fortune.
What You Need Before You Start
Before you install any plugins or start building lessons, there are a few things to get in order.
A Self-Hosted WordPress Site
First, you need a self-hosted WordPress site. Specifically, this means WordPress.org, not WordPress.com. The free hosted version at WordPress.com restricts what plugins you can install. Indeed, without that freedom, you cannot add an LMS plugin.
Specifically, self-hosted WordPress requires a hosting account and a domain name. Shared hosting plans suitable for a course site start at around $3 to $5 per month. A domain name costs around $12 to $15 per year. In fact, these are genuinely small costs when weighed against what you would pay for a hosted course platform over the same period.
Your Course Content Planned Out
So, it is worth having your course structure clear before you start building anything. Know your module and lesson structure. Decide whether you will use video, written content or a mix of both. Also, think about whether you want quizzes, assignments or certificates.
Indeed, having this planned before you open your plugin makes the building process much faster. You are not making structural decisions and technical decisions at the same time.

A Payment Method for Students
You need a way to take payment before you launch. Stripe and PayPal are both standard options. Most LMS plugins integrate with one or both.
In practice, Stripe is generally the better experience for students, since they never leave your site to pay. PayPal requires students to have or create an account, which adds friction.
Choosing the Right LMS Plugin for WordPress
In short, the LMS plugin is the engine of your course site. It handles your course structure, student enrolments, progress tracking, quizzes and payments. Choosing the right one makes a meaningful difference to both your experience as a course creator and your students’ experience as learners.
Specifically, there are three plugins worth your attention.
LearnDash
Indeed, LearnDash is the most established LMS plugin for WordPress. It has been around since 2013 and is used by universities, Fortune 500 companies and independent creators. The drag-and-drop course builder makes it straightforward to set up lessons, topics and quizzes without touching any code.
Importantly, LearnDash charges no transaction fees on your course sales. It supports one-time payments, subscriptions and membership models. You can drip content to students on a schedule, award certificates and set up prerequisite lessons that must be completed before students can progress.
Specifically, pricing starts at $199 per year for a single site. That covers unlimited courses, unlimited students and all core features. For those who prefer a managed setup, LearnDash Cloud starts at $24 per month and includes WordPress hosting bundled in.
Overall, for most solo course creators, LearnDash is the most reliable and feature-complete option. It is the plugin I would recommend if you are serious about building a long-term course business on WordPress.
Tutor LMS
Notably, Tutor LMS is a newer option that has gained significant traction since its launch in 2019. Its course builder has been praised as the most visually intuitive of the major LMS plugins. You can see your entire course structure on screen as you build it.
Indeed, the free version is genuinely useful. It includes unlimited course creation, a quiz builder with multiple question types, a student dashboard and basic monetisation through its native checkout system. The Pro version adds certificates, drip content, assignments and advanced analytics.
So, Tutor LMS is a strong choice if you are launching your first course and want to test the market before committing to a paid plugin. In fact, many creators have earned their first sales using the free version alone.
LifterLMS
LifterLMS is the most modular of the three. The core plugin is free. You then add the specific features you need as paid add-ons, each priced at around $99 per year.
In practice, this works well if you have a simple setup. However, if your requirements grow, the add-on costs can eventually exceed what LearnDash charges for its full feature set.
Furthermore, LifterLMS integrates particularly well with Divi and Beaver Builder if you are already using one of those page builders. For those building on the Divi theme, this is a notable advantage.
For a detailed comparison of these options alongside others in the market, Kinsta’s guide to the best WordPress LMS plugins provides a thorough overview with hands-on assessments of each platform.
Visit my Get Started Here page for a practical walkthrough of how I am building an online income, the tools I recommend and how to get started without spending a fortune.
Step-by-Step: How To Create an Online Course With WordPress
Once you have your hosting, domain and plugin sorted, the actual process of building your course follows a clear sequence.
Step 1: Install and Activate Your LMS Plugin
Specifically, in your WordPress dashboard, go to Plugins and then Add New. Search for your chosen LMS plugin. If you are using Tutor LMS, it is free to install directly. LearnDash and LifterLMS require you to download the plugin file after purchasing and upload it manually.
Specifically, once activated, each plugin runs a setup wizard to guide you through the initial configuration. So, work through this carefully. Set your currency, connect your payment processor and configure your basic settings before you create a single lesson.
Step 2: Create Your Course Structure
In LearnDash, go to LearnDash LMS and then Courses. Click Add New to create your first course. Give it a title and a clear description that explains what students will learn and who the course is designed for.
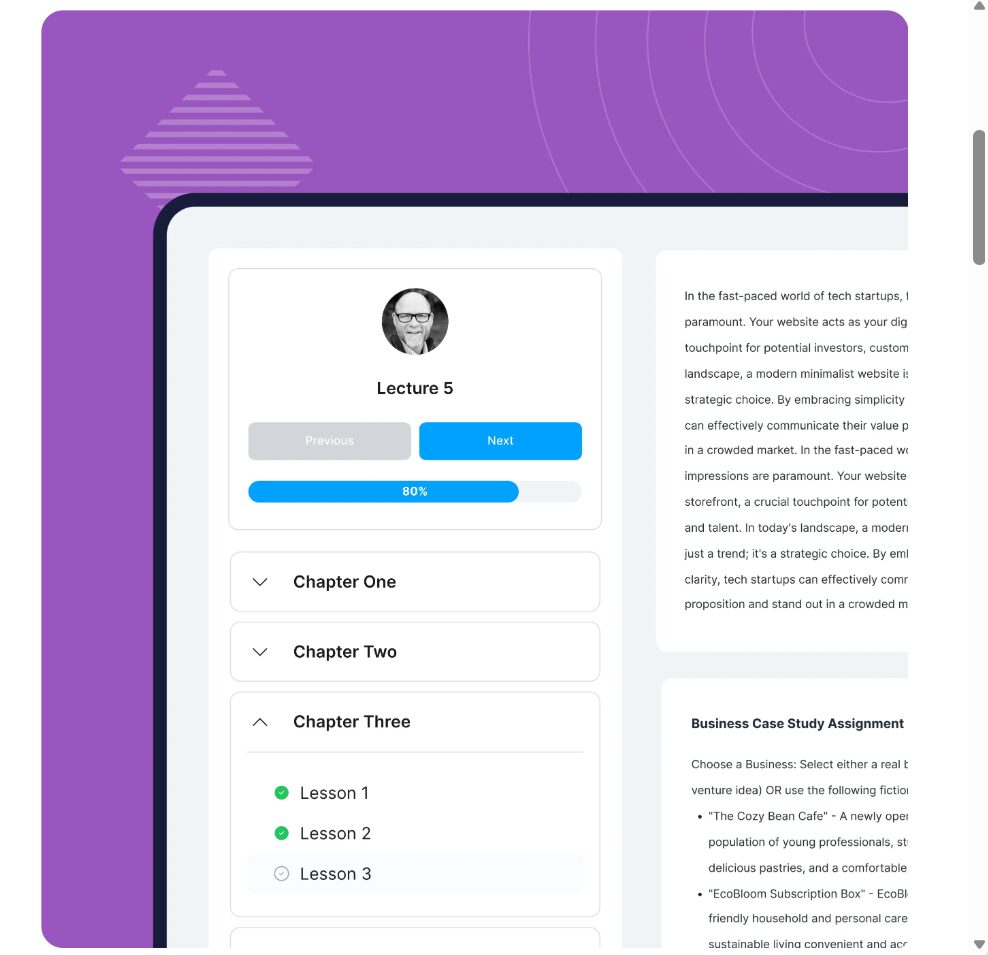
Specifically, inside the course builder, you organise your content into sections, lessons and topics. Think of sections as modules or chapters. Lessons sit inside sections. Topics sit inside lessons and break content into smaller, focused units.
Specifically, build your full structure first. Add all your sections and lesson titles before you start filling them with content. Indeed, this gives you a clear map of your course and makes it easier to see where the content is flowing well and where gaps exist.
Step 3: Add Your Course Content
So, with your structure in place, open each lesson and add your content. WordPress gives you a block editor to work with. You can add text, images, embedded videos, downloadable files and more within each lesson.
Specifically, for video content, host your videos on Vimeo or YouTube rather than uploading them directly to WordPress. Indeed, large video files slow your site significantly. For example, an embedded Vimeo or unlisted YouTube video loads quickly and keeps your storage costs low.
So, keep each lesson focused on a single idea or skill. In fact, short, focused lessons have better completion rates than long ones that try to cover too much. A lesson of 5 to 10 minutes of video or 500 to 800 words of text hits the right length for most students.
Step 4: Set Up Quizzes and Assessments
In fact, quizzes do two important things. They help students check their own understanding, and they keep them engaged with your material. Both LMS and Tutor LMS include quiz builders that support multiple question types, including multiple choice, true or false, fill in the blank and short answer.
Specifically, in LearnDash, quizzes can be added at the topic level, the lesson level or as a final assessment at the end of a section. You can set a passing score, limit the number of attempts and display feedback after each question. So, use these settings to create a learning experience that challenges students rather than just processing them through content.
Step 5: Configure Your Pricing and Payment
This is where most people spend too little time. Importantly, your pricing settings determine how students access and pay for your course.
Specifically, in LearnDash, go to the Settings tab of your course and set the Access Mode to Closed. This means students need to purchase access before they can view any content. Then set your price and connect your payment method.
So, think carefully about your pricing model. For example, a one-time payment works well for courses with a defined start and end. A recurring subscription works better for courses that you update regularly or that are part of a larger membership offering. Both options are available in most major LMS plugins.
Also, consider whether you want to offer a free introductory module. Letting potential students access the first section at no cost is a strong way to demonstrate value before asking for payment.
Step 6: Design Your Course Sales Page
Indeed, your course sales page is where you convert visitors into paying students. This is not just a box to tick. It is one of the most important pieces of content on your entire site.
Specifically, your sales page needs to clearly explain what the course covers, who it is for, what students will be able to do after completing it and why your teaching approach is the right one for them. Include a clear price and a strong call to action.
Most LMS plugins create a basic course overview page automatically. You can edit this with your page builder. Add your own branding, testimonials if you have them, a course curriculum preview and a prominent enrolment button.

Step 7: Test Everything Before You Launch
So, before you tell anyone your course exists, go through the entire student experience yourself. Create a test account, enrol in your own course and progress through every lesson. Check that videos play, that quizzes work correctly and that the payment process runs smoothly from start to finish.
Also, look for any gaps in your content. Note any lessons that feel too long or any sections where the flow feels uneven. Fix these before your first real student encounters them.
Also, test on a mobile device. Many of your students will access your course on a phone or tablet. If your course does not look good on mobile, you will have a problem with completion rates.
Setting Up Your Course Website Design
The LMS plugin handles your course functionality. Your WordPress theme handles how everything looks.
In fact, you do not need a premium theme to launch a good course site. The free Astra and Kadence themes both work extremely well with all major LMS plugins. They are lightweight, load quickly and offer enough customisation to look professional without requiring a designer.
So, if you are using Divi already, stay with Divi. It integrates well with LifterLMS and works adequately with LearnDash. If you are starting fresh, Astra or Kadence will give you a cleaner foundation.
In short, keep your design simple. Your students are there to learn from your course, not to admire your website. A clean layout with clear navigation, fast loading times and readable fonts serves your learners better than a complex design that slows everything down.
Visit my Get Started Here page for a practical walkthrough of how I am building an online income, the tools I recommend and how to get started without spending a fortune.
How to Market Your Course
Building the course is only half the job. Getting paying students into it is the other half.
So, start with your existing audience, however small it may be. If you have an email list, tell them first. For those with a blog, write content that naturally leads to your course topic. Anyone building from scratch with no audience should lean on content marketing through SEO. It is the most reliable long-term strategy for attracting the right students.
Write blog posts that answer the questions your ideal students are already searching for. Include your course as a natural recommendation within that content. Over time, those posts build organic traffic and that traffic converts into course enrolments.
Furthermore, Pinterest is also worth considering for course marketing. It is a visual search engine with users who are actively looking for learning resources. Pins that link to your course sales page or to related blog content can drive meaningful traffic over a long period.

Indeed, email marketing is the most reliable channel once you have an audience. In fact, even a small list of 200 to 300 engaged subscribers can generate strong course launch sales if the relationship has been built properly. So, offer a free resource related to your course topic to build that list from day one.
For a comprehensive guide to building an audience and monetising your WordPress site alongside your courses, WPBeginner’s guide to making money with WordPress covers a wide range of strategies that complement the course model well.
How Much Can You Earn From a WordPress Course?
The range is wide and depends on your niche, your marketing and the quality of your course. However, the numbers can be very encouraging.
A course priced at $97 with 30 students in its first month generates $2,910 in revenue. A course priced at $197 with 20 students generates $3,940.
In fact, these are realistic targets for a focused course in a niche with genuine demand. They are not guaranteed, and results require good marketing, a strong course and a growing audience.
Indeed, the advantage of WordPress over hosted platforms becomes clear over time. If you were paying $99 per month on Teachable and a 5% transaction fee on those same sales, you would lose a significant portion of your income to the platform. In contrast, with WordPress, your LMS plugin costs $199 per yea,r and your payment processor takes its standard rate. That is it.
Common Mistakes to Avoid
Most first-time course creators make a handful of predictable errors. Indeed, knowing them in advance saves real time and money.
Waiting Until the Course Is Perfect
Unfortunately, the most common mistake is spending months polishing content before launching to a single student. Perfectionism delays income and delays real feedback.
Launch a minimum viable version of your course. Enrol your first students at a lower price in exchange for honest feedback. Use their responses to improve the content. This approach generates income faster and produces a better course.

Ignoring the Sales Page
The sales page is often the last thing creators focus on, yet it’s the first thing potential students see. In fact, a weak sales page kills conversion rates regardless of how good the course itself is. Spend real time on it. Make it clear, specific and persuasive.
Choosing the Wrong Plugin for Your Needs
Indeed, installing the most expensive or most feature-rich plugin is not always the right move. If you are building your first course, a free plugin like Tutor LMS may be all you need. So, start lean. Add functionality as your course business grows, and the revenue justifies the investment.
Not Collecting Emails
Indeed, your course platform could disappear tomorrow. Your email list cannot be taken from you. Build an email list alongside your course from the very first student. In fact, it is the single most valuable asset in your online business.
Ready to Start Building Your Online Business?
Learning how to create an online course with WordPress is a valuable skill. However, it is just one path to building income online. If you are earlier in your journey and want a clear roadmap for building an online business from scratch, including how courses fit into a broader affiliate marketing strategy, I have put together a starting point for you.
Visit my Get Started Here page for a practical walkthrough of how I am building an online income, the tools I recommend and how to get started without spending a fortune.
Final Thoughts
WordPress gives course creators something that hosted platforms simply do not: ownership. In short, you own your platform, your content, your student relationships and every dollar your course generates. Indeed, the upfront learning curve is real, but it is shorter than most people expect, and the long-term financial advantage is significant.
The steps are clear. Get your hosting and domain set up. Choose an LMS plugin that fits your needs.
Build your course structure and content. Configure your pricing. Design a sales page that converts. Test everything and then market consistently.

For a broader look at how the e-learning market is growing and why building your own course platform makes more sense than ever, WPBeginner’s breakdown of online course statistics and trends provides useful context on the size of the opportunity.
Knowing how to create an online course with WordPress puts you in control of that opportunity. In fact, every course you build is an asset that can generate income for years. Start lean, improve based on real feedback and build from there.